Abduzeedo - graphic design | design inspiration | tutorials - |

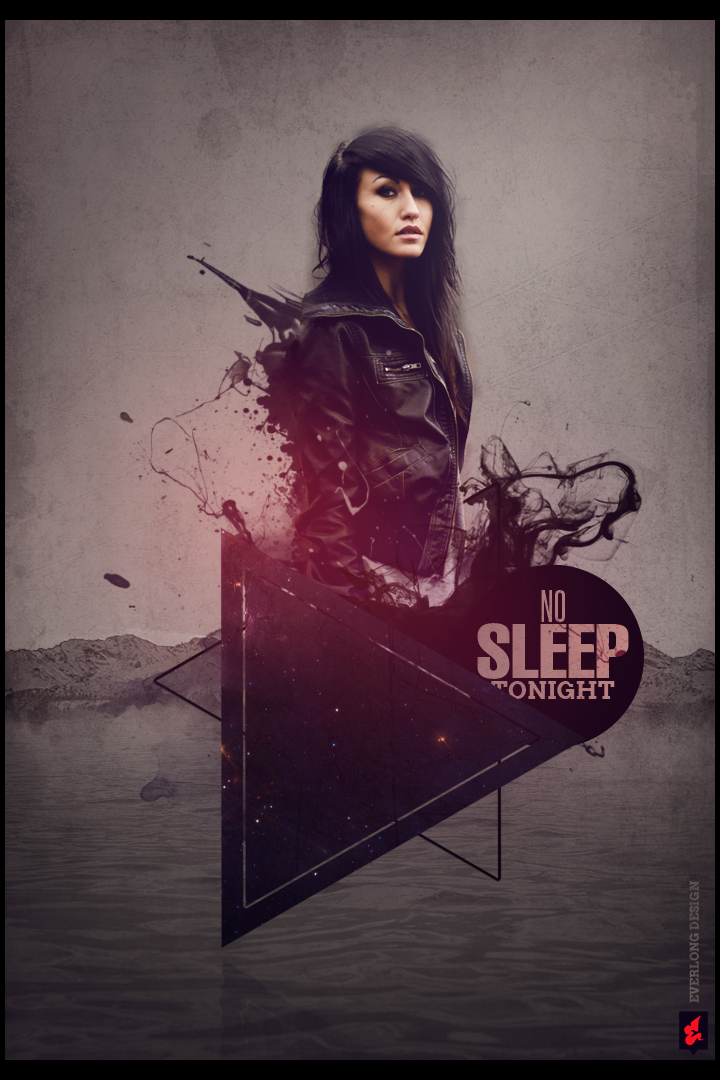
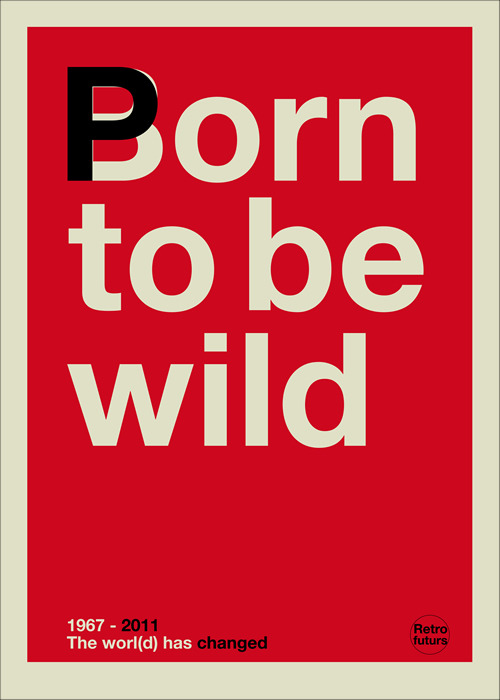
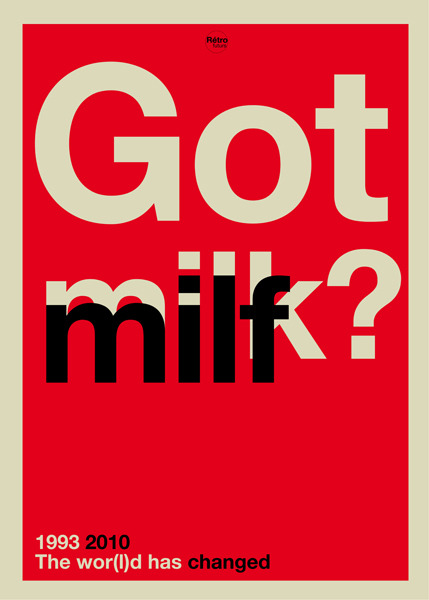
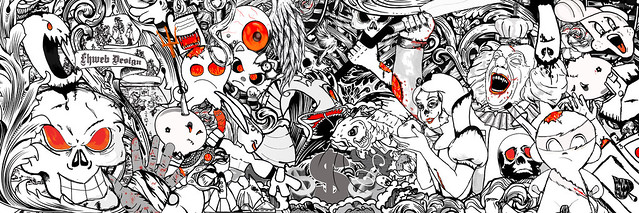
- Daily Inspiration #781
- Filter Forge Contest
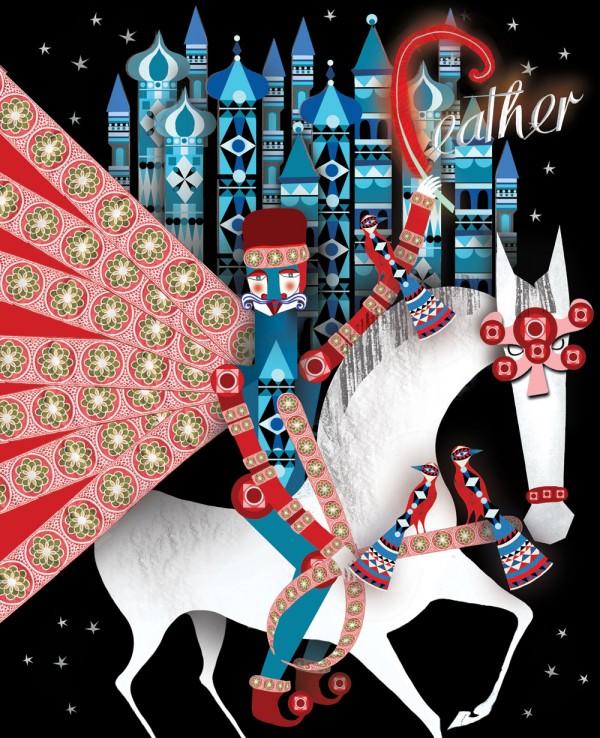
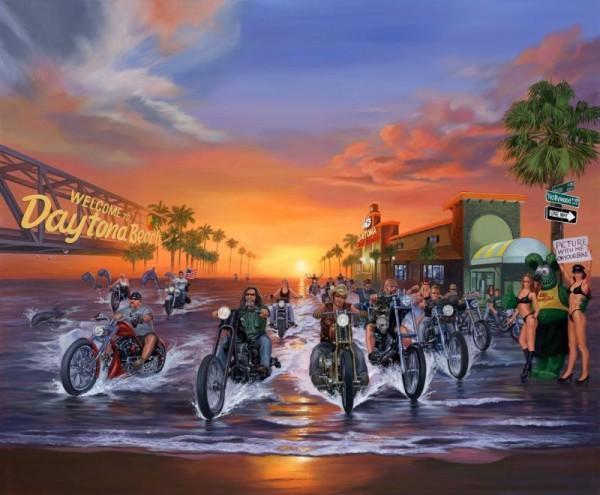
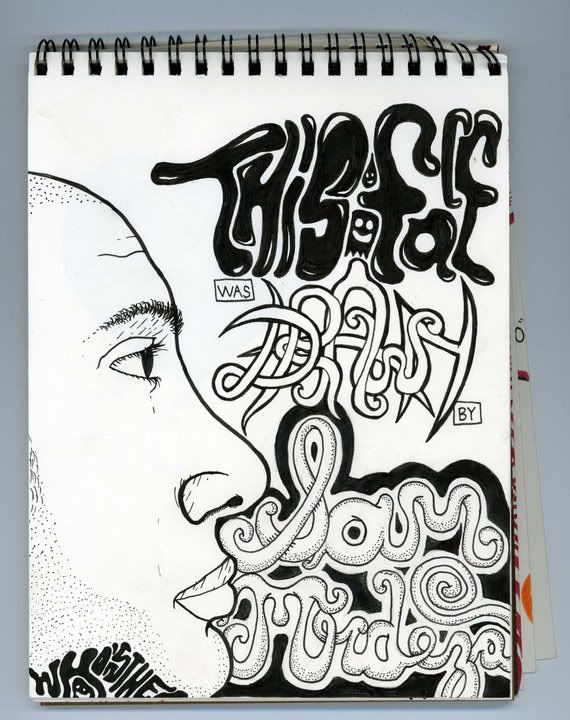
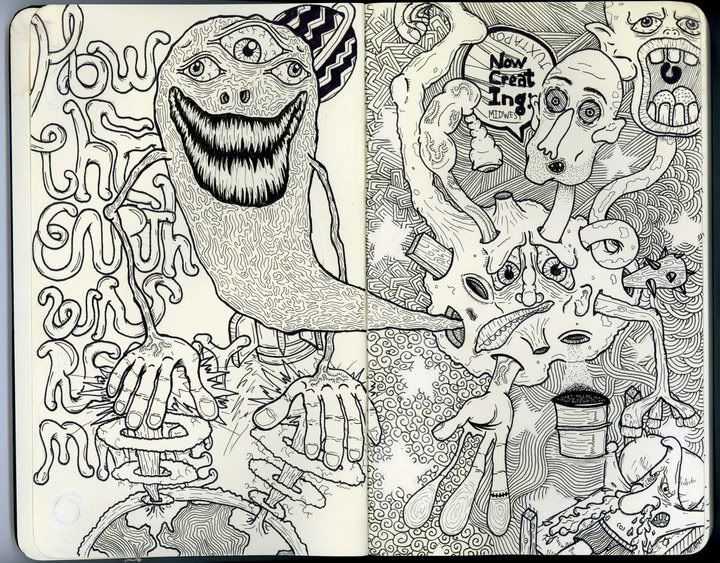
- Mixed Vintage Memories
- The Perfect Office #81
- Fluffy Clouds in Photoshop
| Posted: 28 Mar 2011 02:21 PM PDT
This post is part of our daily series of posts showing the most inspiring images selected by some of the Abduzeedo's writers and users. If you want to participate and share your graphic design inspiration, just send us, via email, the image with the link from where you found it, also use "Daily Inspiration" in the subject, and don't forget to send your Abduzeedo username; or via Twitter sending to http://twitter.com/abduzeedo.<!--break--> If possible use the HTML code: <p class="imgC"><a href="Link to the page you found the image"><img src="Link to the Image" /></a></p> Do you want to see all images from all Daily Inspirations? Check out http://daily.abduzeedo.comAdam
al b sure
Arthur
Best Bookmarks
Cuded
Derek Brow
Drang
Eugene Kim
Fabiano
Fabio
fksd
Gisele
Jelle Sander
John
HdK
Koning
marco pucciniMeng To
Newyorkiz
Paul Divina
Scott VincentStevenTukoria
Via Twitter@daniel_nelson
@fhwebdesign
@SmirapDesigns
Send your suggestions via Twitter to http://twitter.com/abduzeedo using #abdz in the end of the tweet. |
| Posted: 28 Mar 2011 09:24 AM PDT
Hey everyone! I am happy to announce our next contest, sponsored by our friends over at Filter Forge. Filter Forge is a high-end graphic software allowing you to create visual effects, enhance photos, generate textures, and process images. It features 7500+ free ready-to-use realistic and abstract textures and effects, and a powerful visual editor to create custom ones. Filter Forge can operate as a standalone application or as a plug-in for Photoshop and compatible hosts, under Windows or Mac OS X.Photographers, graphic designers and 3D modelers will benefit from a large library of ready-to-use textures and effects available for free. Any library filter can be opened in Filter Editor for examination and improvement. All filters are adjustable and editable, resolution-independent, and support real-world HDRI lighting. The library contains over 7500 filters; all filters can be viewed online at http://www.filterforge.com/filters/ Contest GuidelinesThis contest is pretty straight forward. Using the Filter Forge software create your own custom filter(s) and/or use one of the 7500 filters that come with their software to create an original piece of your own. You may submit up to 5 filter examples, please include a before and after image for each filter you use. The top three submissions will be awarded a free license for their downloaded Filter Forge software, a value of $399! How to ParticipateA free fully-functional 30-day trial version of Filter Forge is available on their website. CLICK HERE to download that free trial so you can use it to create your submission according to the guidelines above. Send your submissions to nathan@abduzeedo.com by April 1st with "Filter Forge Contest" in the subject line to participate. Some Filter Forge Examples
RecommendationsThe Filter Forge Watercolor filter is so realistic that it's scary. It is soooooooo GREAT! Trust me, you definitely need to check this out. Filter Forge's amazing node based editor has been invaluable in giving us the power to create textures that make the most of today's real-time pixel shaders. This is really a fantastic piece of software, I highly recommend everyone checking it out if you're into pattern/texture map creation. Filter Forge is – by quite a margin – the most powerful plug-in we've looked at here. That's because it's a tool for creating plug-ins, both generative texture-creation tools and effect filters. Filter Forge is an incredibly powerful new Photoshop Plugin. It's simply amazing. It gives you the power to create your own filters (you must run them from inside Filter Forge though) without any programming knowledge at all. |
| Posted: 28 Mar 2011 06:47 AM PDT
It's impossible not to get inspired by vintage design, photography, architecture and more. So I decided to mix things up on this post and get you that fresh inspiration you need, whether you looking to be inspired by shapes, colors, textures or overall design, you will find a memory that will touch you.<!--break--> About the authorHi there! I'm Paulo Canabarro, 25 year old web designer from Brazil currently living in Providence RI, USA. I'm truly passionate about design of all kinds. Finding and sharing inspiration has become part of my life. If you have any suggestions or requests just get @ me - pvpcanabarro@gmail.com For some cool stuff make sure to Follow me on twitter! Sponsored Links:
|
| Posted: 27 Mar 2011 09:52 PM PDT
We've seen some great gadgets and equipment for designers. So many cool stuff, that we could actually assemble infinite perfect office spaces! Every week we'll assemble a perfect office, and we'd like you to help us. What equipment would the perfect office have?<!--break--> Not only gadgets and equipment, but also furniture, sound system, gaming stuff (for lunch time!). A designer is totally allowed to dream with the perfect office, and that's what we're gonna do here! Also, tell us your suggestions, or even better, you may tell us via twitter (mine and fabio's), using #abdz_ofc so we can check it. Alright? I hope you guys enjoy this brief selection. Cheers! ;) Lumian Design LED Desk Light This sleek desk lamp comes in a black finish and features a flip up design for convenience and versatility. The LED lamp offers 240 lumens of flicker free and UV free output at 6500K color temperature, and last up to 36,000 hrs. This lamp also features a built-in night light. (at 7 Gadgets) Instant Rainbow Welsh designer Yumalum just released a second print in his Polaroid poster series. The "Instant Rainbow" graphic beautifully interprets the classic instant camera spitting out a crisp ROYGBIV snapshot. Measuring 50 x 70 centimeters, each poster is printed on matte paper using a high-quality photo printer and ink. The vintage photo gear and popping rainbow stripes combo is sure to grab attention—the perfect addition to any photography nerd's office wall. (at Cool Hunting) Mipow Juice Book For ipad Easel stand on the back allows iPad to sit vertically and horizontally; Extra power infinity included to provide extra power to iPad. (at 7 Gadgets) Material EditRoll The design is the result of the research about the creation of new tangible interfaces. The concept births from the experience accrued in 3d modellation field; it consists on a hardware (the roll part), that can sample the features of the superface on which it roll appling theme on the virtual models, and on a software that shows and permits to modify all the parametres of the material and the textures in a compatible way with the most common render engines. The aim of the research is make easy and quick a lot of complex operations but first of all make tangible and conscious the use of instruments completely immaterial. Check the image for an example video. (at Industrial Design Served) MSI GX680 Laptop MSi has unveiled today its latest laptop gaming creation in the form of the MSi GX680 gaming laptop, which is equipped with a Intel's second generation Core i7 quad core processor. Together with a NVIDIA GeForce GT 555M discrete graphics supporting Direct X 11 and 4 x DDR3 memory slots that can be fitted with a a maximum of 16GB of memory combined with accelerated dual hard disk architecture. Another feature on the MSi GX680 is the Turbo Drive Engine (TDE) technology, that with just one touch of the Turbo hotkey will instantly revs up the system performance allowing it to handle even the most graphics intensive gaming (or work, right?) sessions. (at Geeky Gadgets) |
| Posted: 27 Mar 2011 08:40 PM PDT
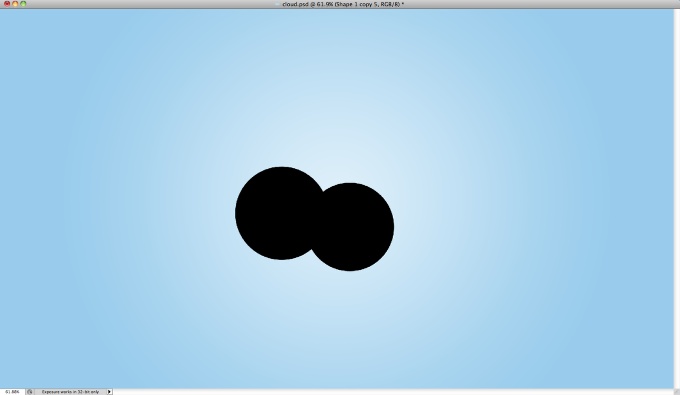
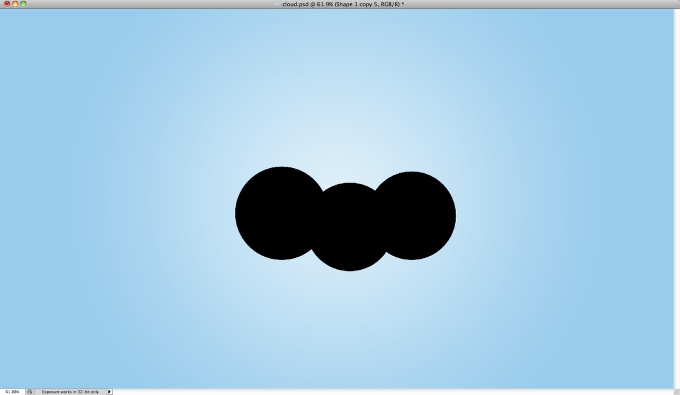
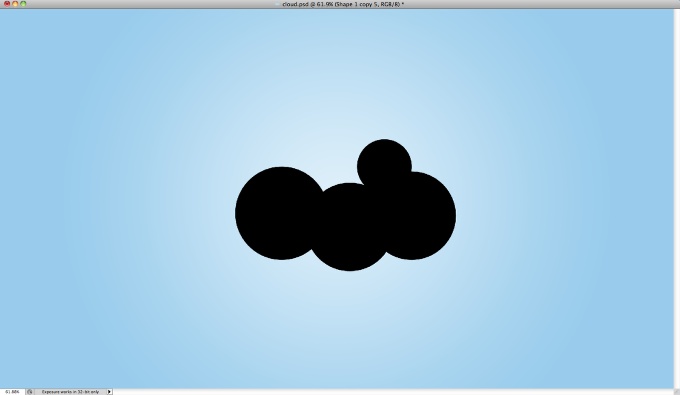
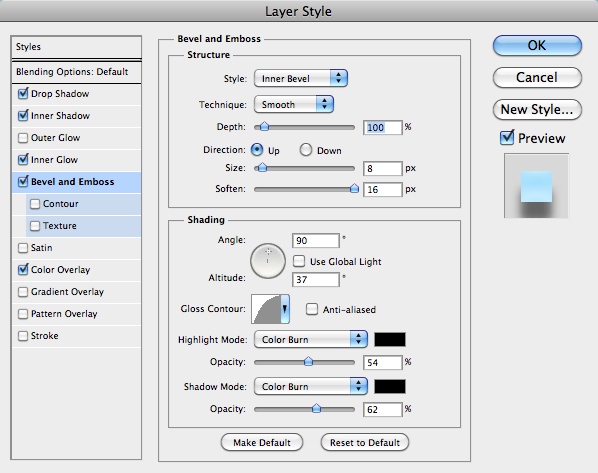
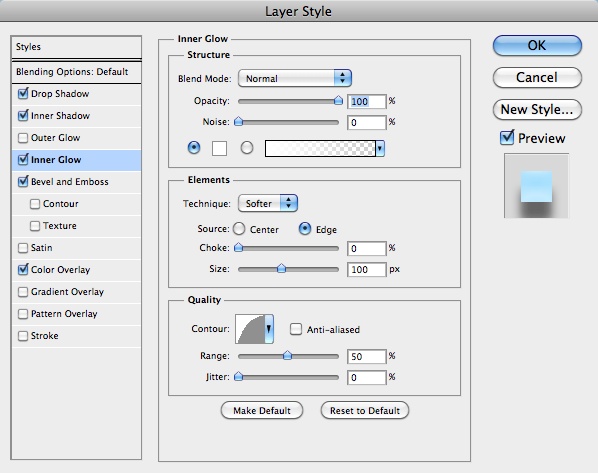
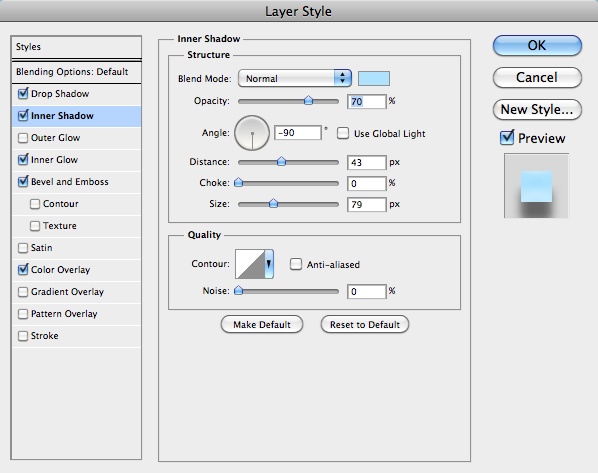
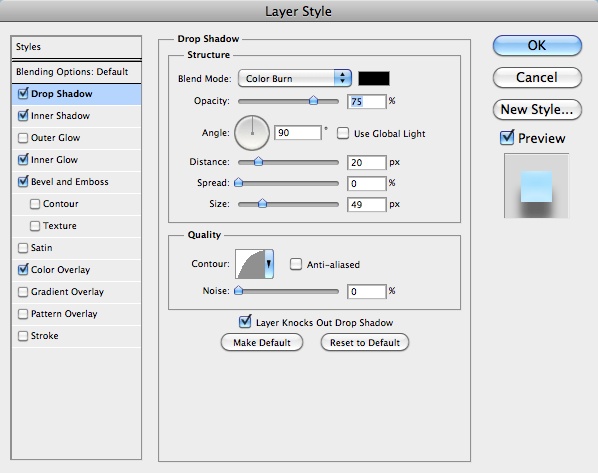
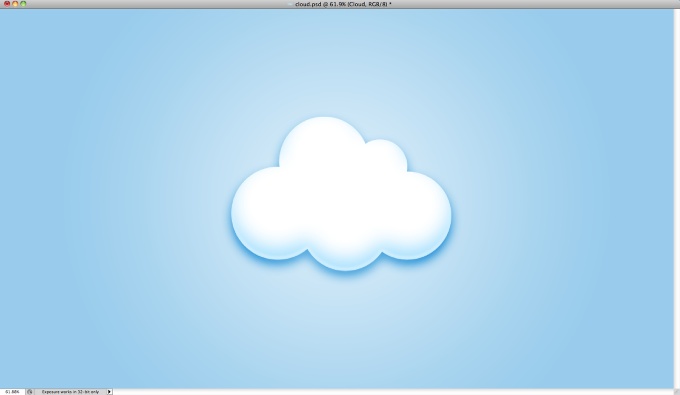
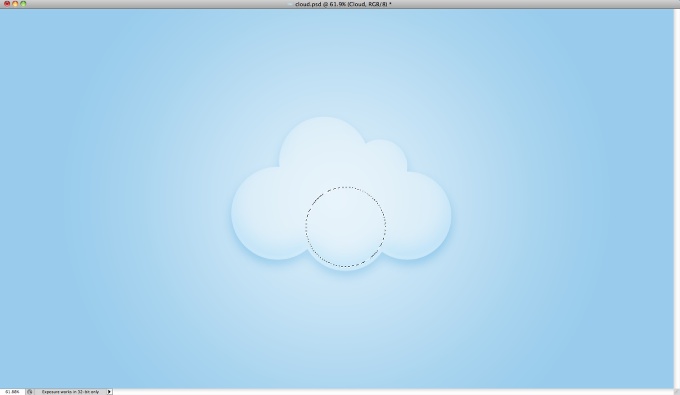
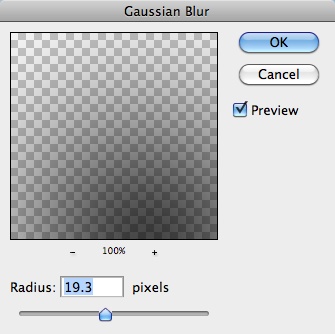
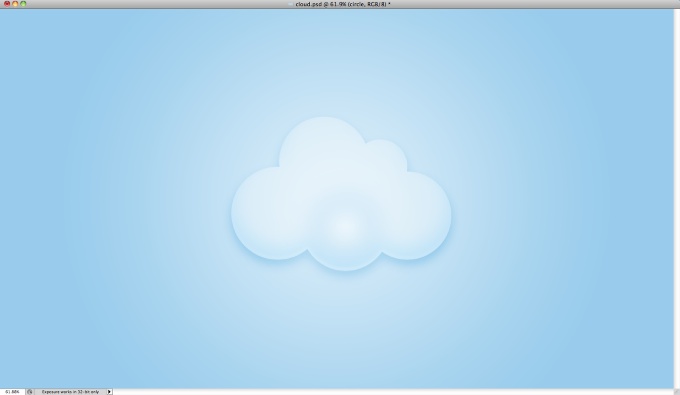
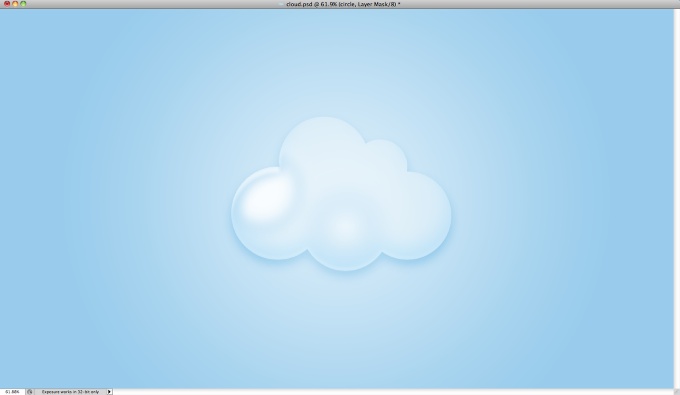
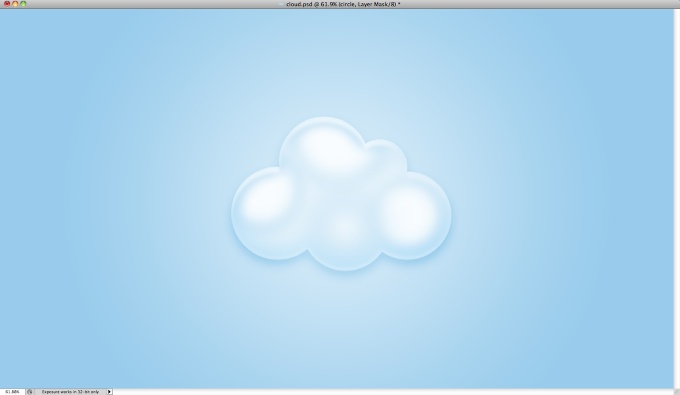
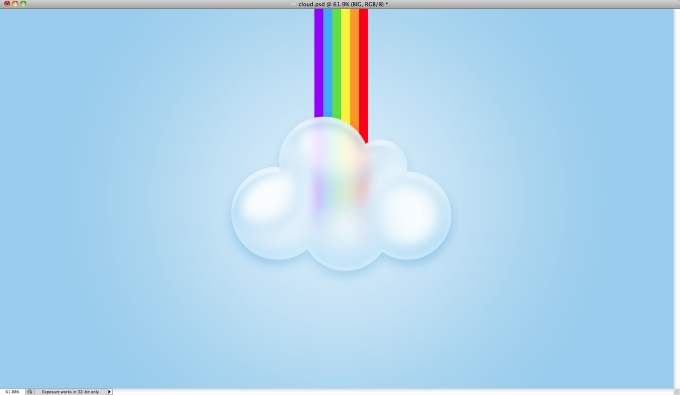
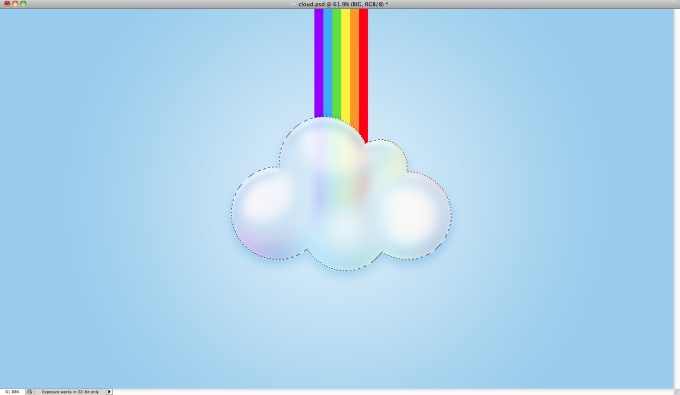
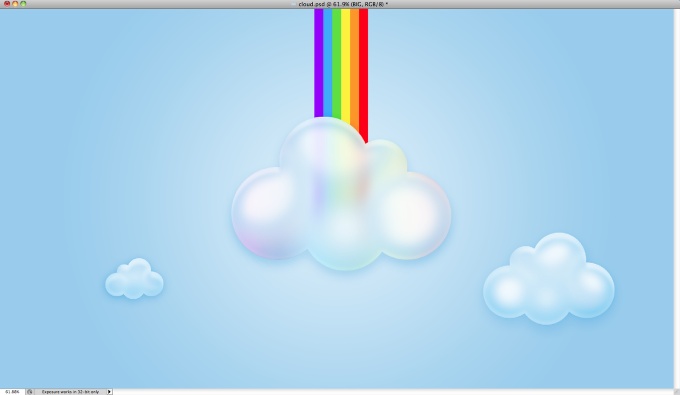
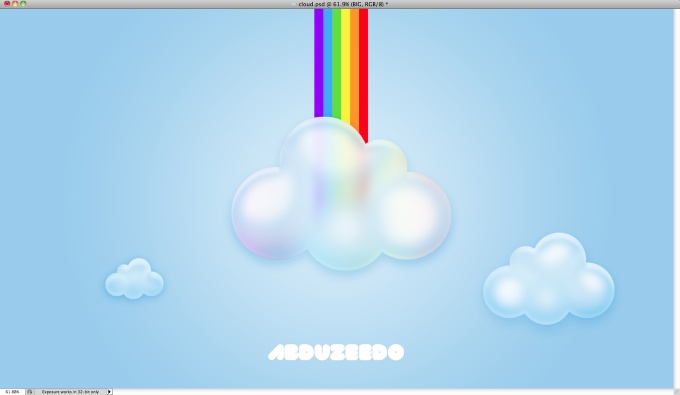
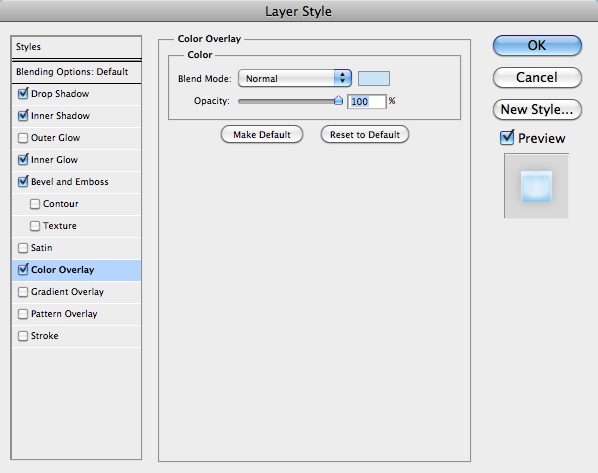
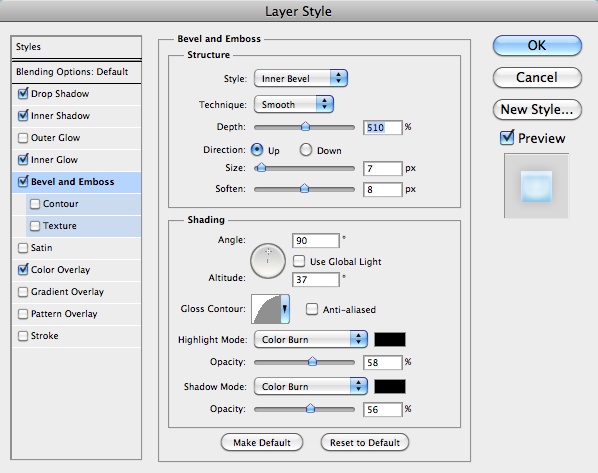
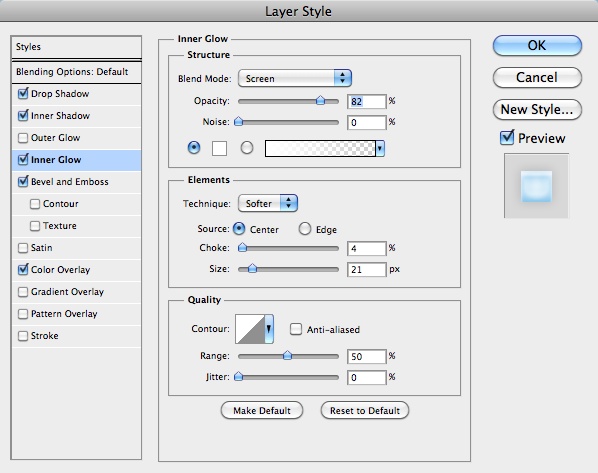
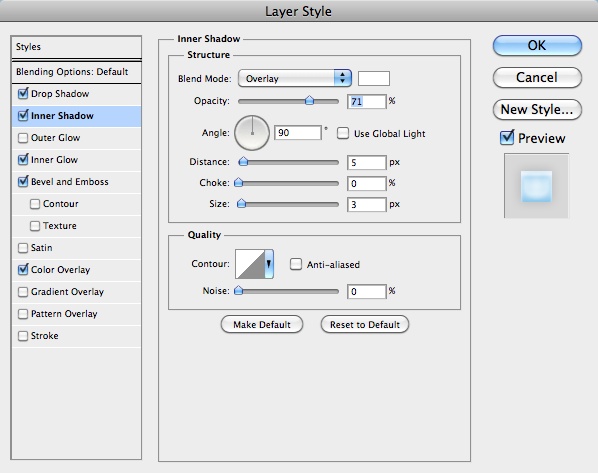
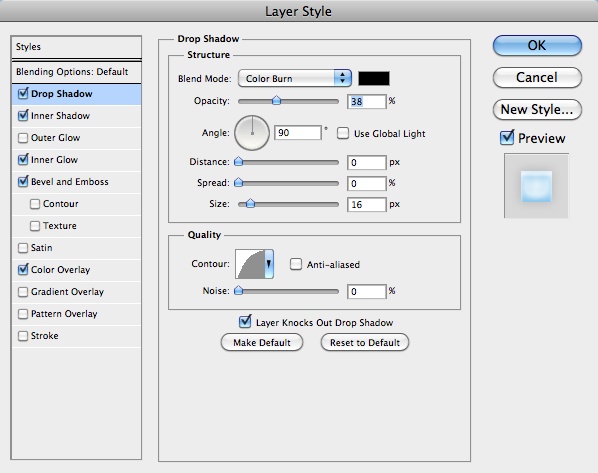
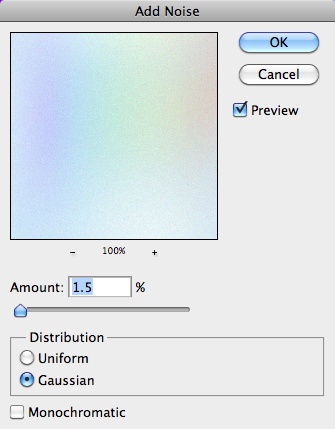
Last Saturday while chatting with a friend of mine he asked me how to create some fluffy style clouds, he told me that he has been seeing that quite often on Dribbble. I decided to check that out and there were indeed lots of amazing cloud designs, then I thought to myself that it would be a cool idea create one in Photoshop as well.So in this tutorial I will show you how to create an wallpaper with some very stylized and super fluffy clouds in Photoshop. We will use basic tools and Layer Styles to create the effect. The whole process will take from 30-45 minutes but I believe there is quite a few nice tips for those who are beginning in Photoshop. Step 1Open Photoshop and create a new document. I am using 2560x1440 pixels for the size. After that make the background layer editable by double clicking on it, then go to Layer>Layer Styles>Gradient Overlay. Use Radial for the Style and for the colors use #ddeffa and #96ccee for the light and dark colors. Step 2With the Ellipse Tool (U) create a circle. The color doesn't really matter at this point. Step 3Createa nother circle and move it to the right side of the previous. Make it a little bit smaller too. Step 4Add another circle next to the previous one. Use the image below for reference, notice that the circles overlap one another. Step 5Let's add yet another circle, this time a much smaller one and on top of the previous one. Step 6To finish the shape of the cloud add another circle, this time a bigger one. Once you have the cloud shape you like, group them and duplicate the group, then go to Layer>Merge Layers. You will have one layer with the cloud but the circles will be necessary later on in the tutorial Step 7Select the layer with the cloud, the one we merged, and go to Layer>Layer Styles>Color Overlay. Use white for the color. Step 8Select Bevel and Emboss. For the Style use Inner Bevel, for the Depth 100%, for the Size 8 pixels, for the Soften 16 pixels, for the Angle 90º, for the Altitude 37º, for the Gloss Countour use the one I used in the image below. Also for the Highlight Mode and Shadow Mode use black for the color with Color Burn for the Blend Mode and 54% opacity for the first and 60% for the last. Step 9Select Inner Glow. Use 100% Opacity with white for the color and then Edge for the Source, 0% for the Choke and 100 pixels for the Size. Use the image below for more values. Step 10Now select Inner Shadow and then folow the image belo for the values. Step 11The last Layer Style we will use is Drop Shadow, it wold not be exactly necessary in terms of realism but the idea of the shadow is to give some contrast between the cloud and the background as they use the same colors. Step 12Here is the final result of the cloud we created with the layer styles. It's already a very nice outcome however I think it still needs some depth. Step 13To add depth we will do something really simple. Using the circles for reference, we will create new layers with them so they will have the same layer styles as the cloud but in circles, that way we will add some volume to our cloud. The first thing though will be reduce the opacity of the cloud layer to 30%. Now, create a marquee selection of one of the circles, then select the cloud layer and duplicate and go to Layer>Layer Mask>Reveal Selecion. Move this new layer so it is underneath the cloud. Step 14Select the mask of the circle we created in the previous step and go to Filter>Blur>Gaussian Blur. Use 20 pixels for the Radius. Step 15With that amount of blur the circle gets very subtle, like the image below. So if you want to have more highlight use less blur. Step 16Repeate the same thing for the other circles. Notice that you can unlink the layer mask from the alyer and move the layer to create some more random effects, like I did here in the circle on the left. Step 17Here is the final result I got after adding the volume. The cloud now looks super fluffy. But still it's not done. Step 18Time to add some rainbows, I created this one using rectangles with the rainbow colors. After that I merged into one layer and applied a gaussian blur in the area that is underneath the cloud to create a nice transparency effect. Step 19Create a marquee selection with the shape of the cloud and add a new layer, the fill it with the rainbow colors and apply a guassian glur with at least 100 pixels for the radius. After that move it underneath the other layers used to create the cloud. Step 20Duplicate the cloud twice. Resize and flipp them horizontally to create a nice composition. Notice that I didn't duplicate the rainbow colors. Step 21Now let's add some text. I used Val for the font and just add the word Abduzeedo in white. But applied some Layer Styles to create the same fluffy effect. Step 22For the text layer styles just follow the values in the images below. Step 23Duplicate all layers and merge them into a one, then go to Filter>Noise>Add Noise. Use 1.5% for the Gaussian. ConclusionAfter a few steps and a good 45 minutes of work we have a nice fluffy style cloud design. I am always trying to learn new ways to use layer styles, I think it's one of the most powerful features in Photoshop, for this tutorial I answer a question of a friend of mine who wanted to know how to create some nice icon style clouds but next time might be one of your questions. So if you have any suggestion for tutorials just send us an email with the effect you would like us to show how to do it, if we cn of course :) Download the Photoshop fileClick here to download the Photoshop file used for this tutorial |


| You are subscribed to email updates from Abduzeedo | Graphic Design Inspiration and Photoshop Tutorials To stop receiving these emails, you may unsubscribe now. | Email delivery powered by Google |
| Google Inc., 20 West Kinzie, Chicago IL USA 60610 | |
Tidak ada komentar:
Posting Komentar