Abduzeedo - graphic design | design inspiration | tutorials - |

- Daily Inspiration #769
- Music Genres Poster Series
- Art to Support Japan
- Create a Lava Island Scenario in Illustrator
- The Perfect Office #79
| Posted: 14 Mar 2011 01:35 PM PDT
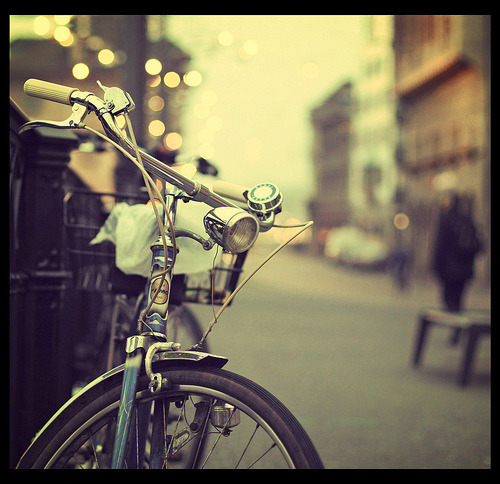
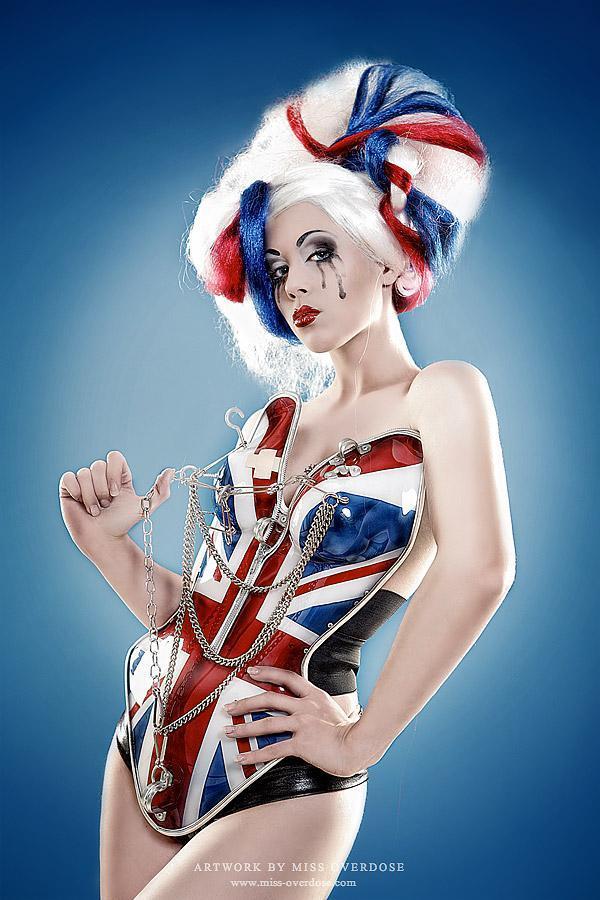
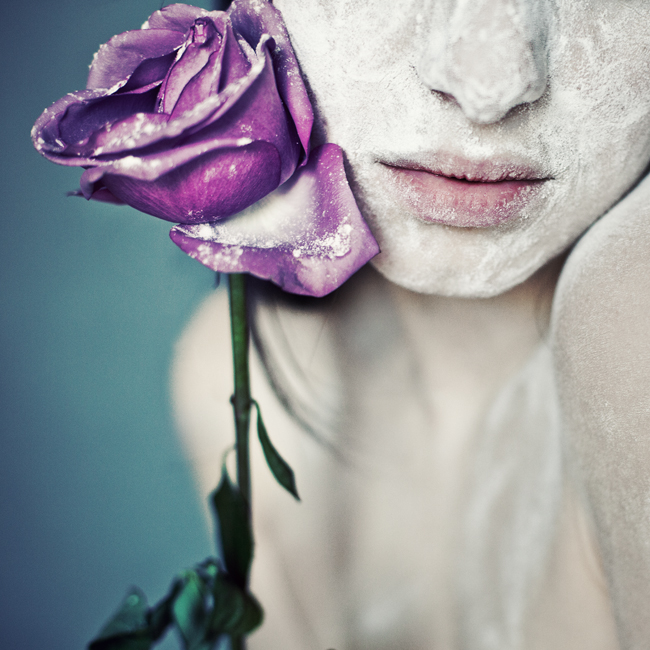
This post is part of our daily series of posts showing the most inspiring images selected by some of the Abduzeedo's writers and users. If you want to participate and share your graphic design inspiration, just send us, via email, the image with the link from where you found it, also use "Daily Inspiration" in the subject, and don't forget to send your Abduzeedo username; or via Twitter sending to http://twitter.com/abduzeedo.<!--break--> If possible use the HTML code: <p class="imgC"><a href="Link to the page you found the image"><img src="Link to the Image" /></a></p> Do you want to see all images from all Daily Inspirations? Check out http://daily.abduzeedo.comAdamp class="imgC">
al b sure
Anderson Tomazi
Arthur William Presser
bertrand
Best Bookmarks
colourofair
Coolvibe
Cuded
DanielMuntean
Eugene Kim
Evan Bourcier
Fabiano
Fabio
fksd
Funky MonkeyGisele
HdK
Kutan
Meng To
Miguel da Silva
Newyorkiz
Sam Randazzo
Sergey
silz
Via Twitter@marcos333
MXRCOFER
@SaAndrade
Send your suggestions via Twitter to http://twitter.com/abduzeedo using #abdz in the end of the tweet. |
| Posted: 14 Mar 2011 07:39 AM PDT
A poster series curated by Edit where a bunch of different designers were asked to represent a musical genre using one shape and one type. The result is awesome, every poster has a unique style and represents its music genres very well.<!--break--> About the authorHi there! I'm Paulo Canabarro, 25 year old web designer from Brazil currently living in Providence RI, USA. I'm truly passionate about design of all kinds. Finding and sharing inspiration has become part of my life. If you have any suggestions or requests just get @ me - pvpcanabarro@gmail.com For some cool stuff make sure to Follow me on twitter! Sponsored Links:
|
| Posted: 14 Mar 2011 03:40 AM PDT
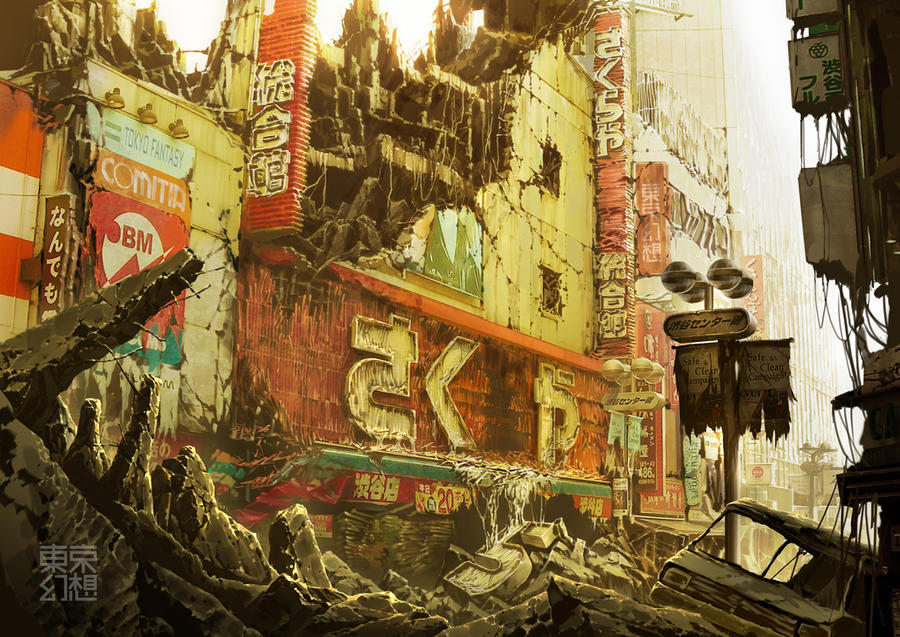
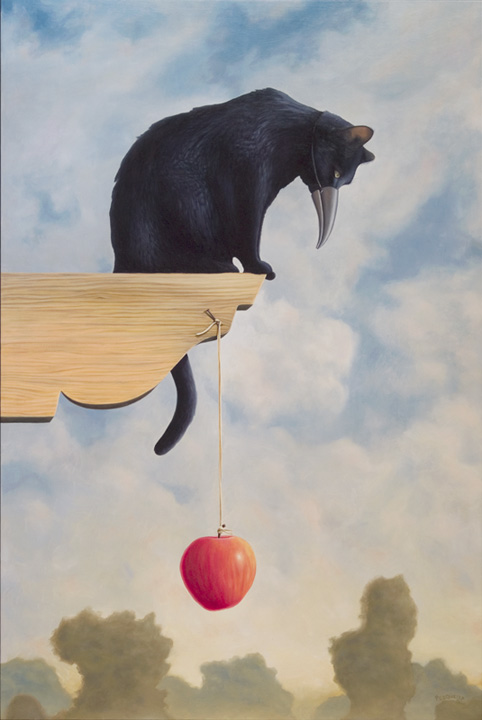
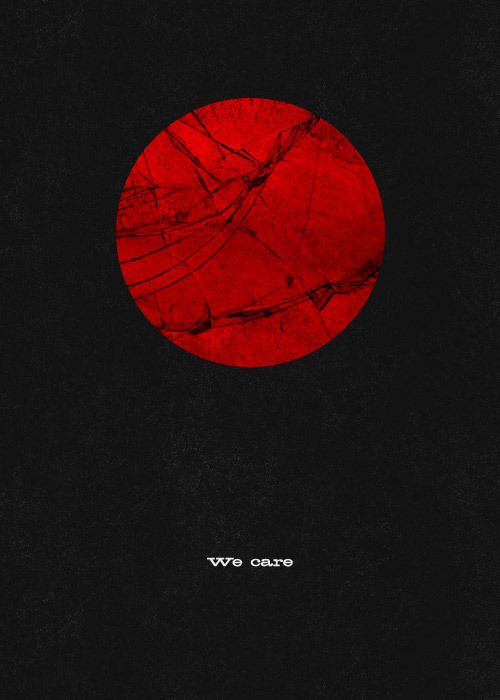
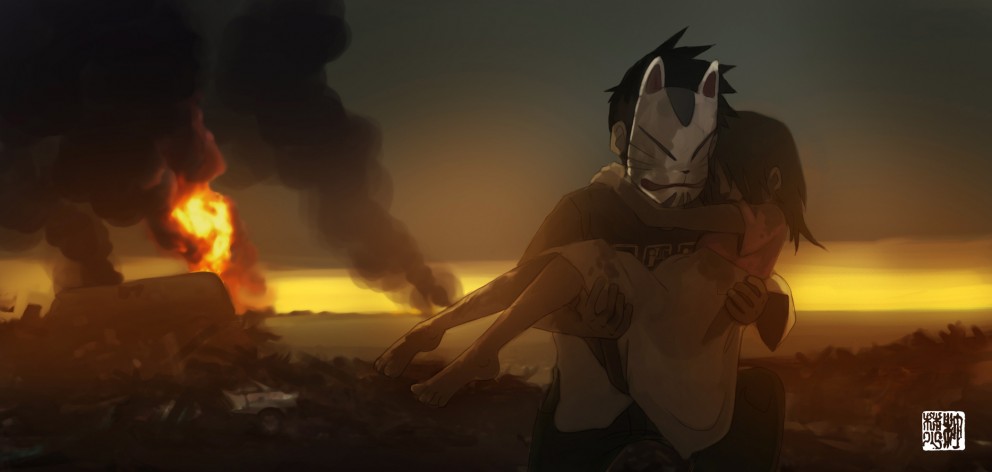
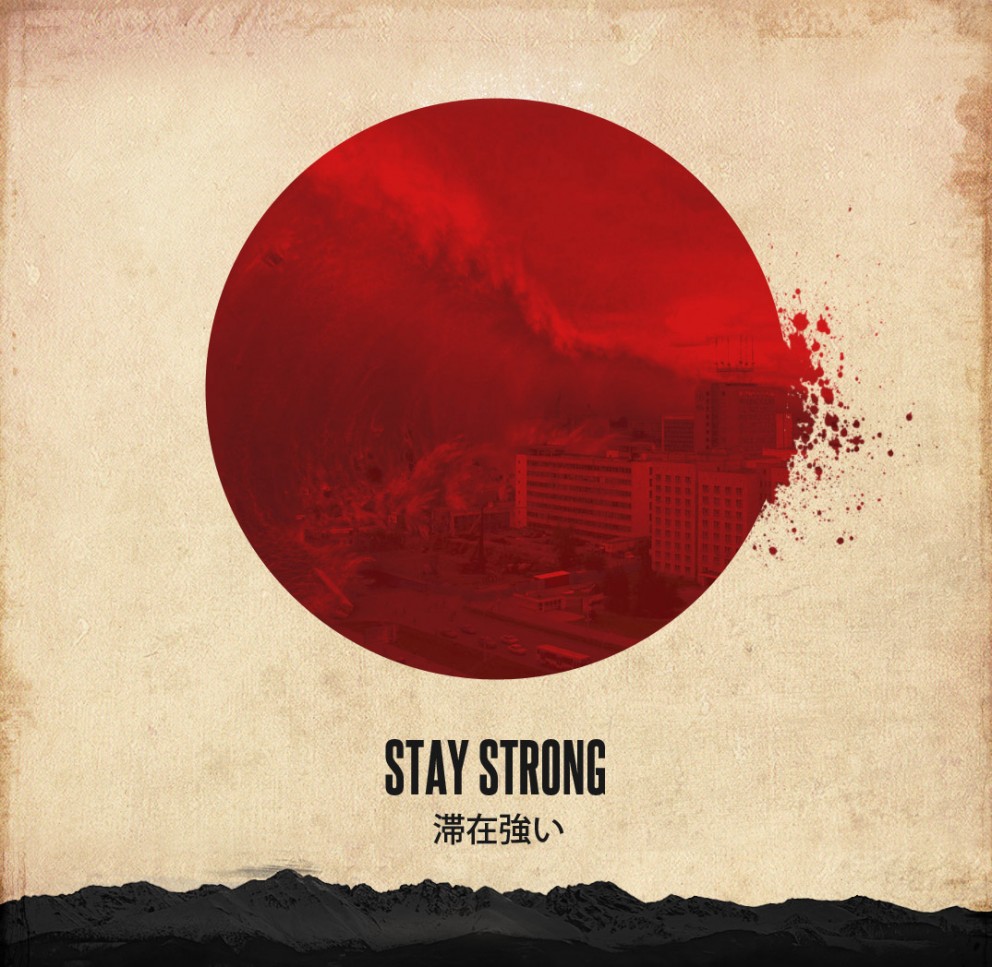
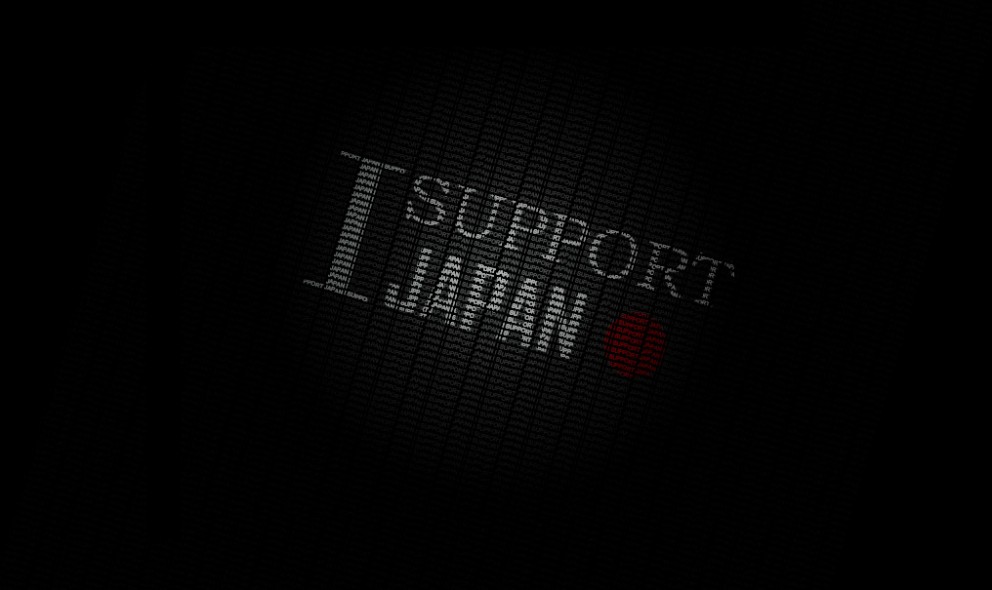
As you may have heard, there's been an 8.9 earthquake and tsunami devastating Japan very badly. The whole world is trying their best, to support and help over this terrible disaster. Even the design community has risen to do their part.Such artists as Hydro74, The Hejz especially James White aka Signalnoise has started a movement to help Japan by expressing their support with art. This is a some samples of designers expressing their own support for the Japan Disaster Relief.
James White aka Signalnoise
Hydro74
PJ Tierney
Aoiro Studio
Rob Dobi
W+K Studio
Ars Thanea
Leukocyt
TypCut
Steve Schiavello
Jelle Pingen
Zac Neulieb
Kevin Alves
Hannes Beer
Hannes Beer
K-Dot
Pussies on Parade
To DonateTo donate for the Japan Disaster Relief, please do at your choice for those following relief organizations: USA: Text REDCROSS to 90999 to donate 10$ You may also post your designs on the Abduzeedo Flickr Pool and help us spread the words and help us over this disaster. Thank you everyone for your support! |
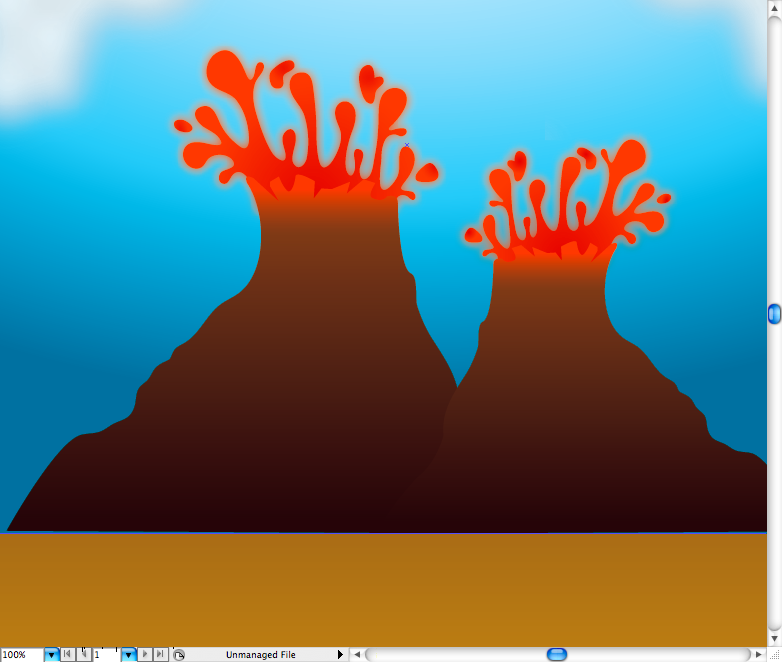
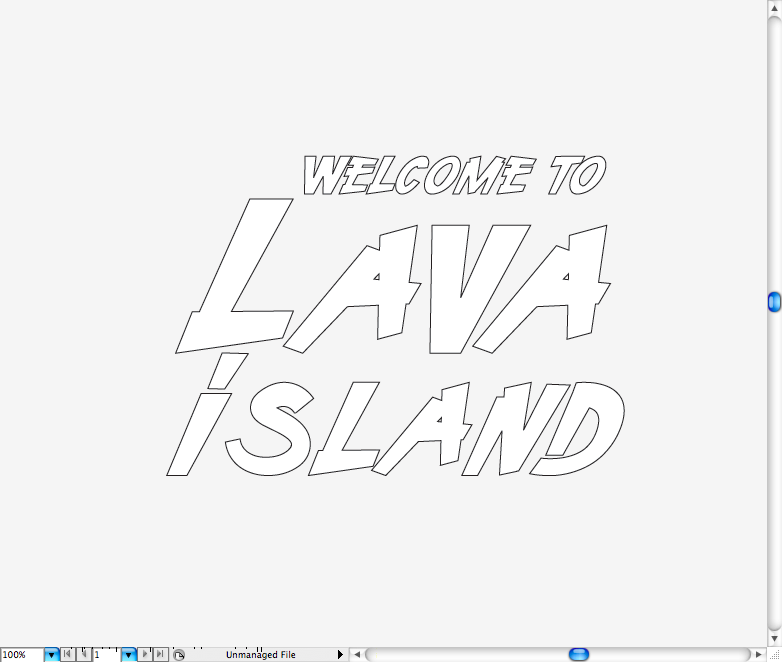
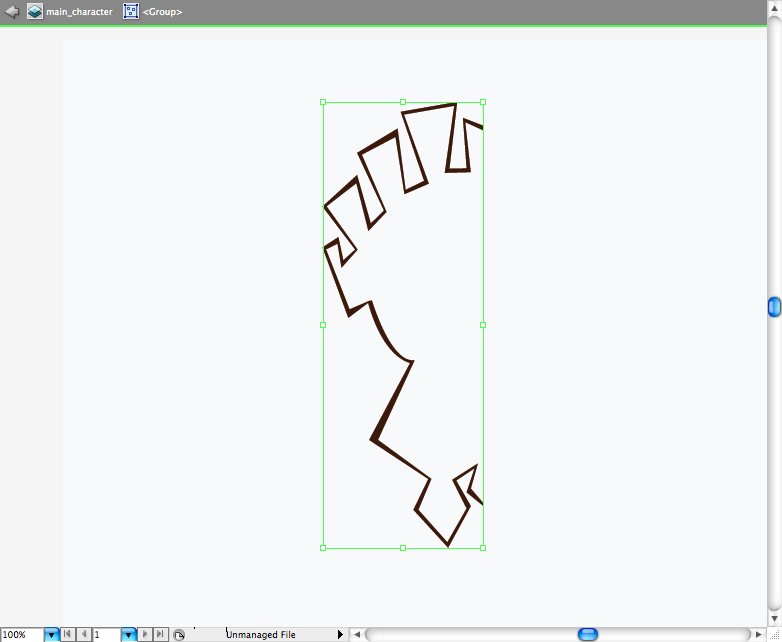
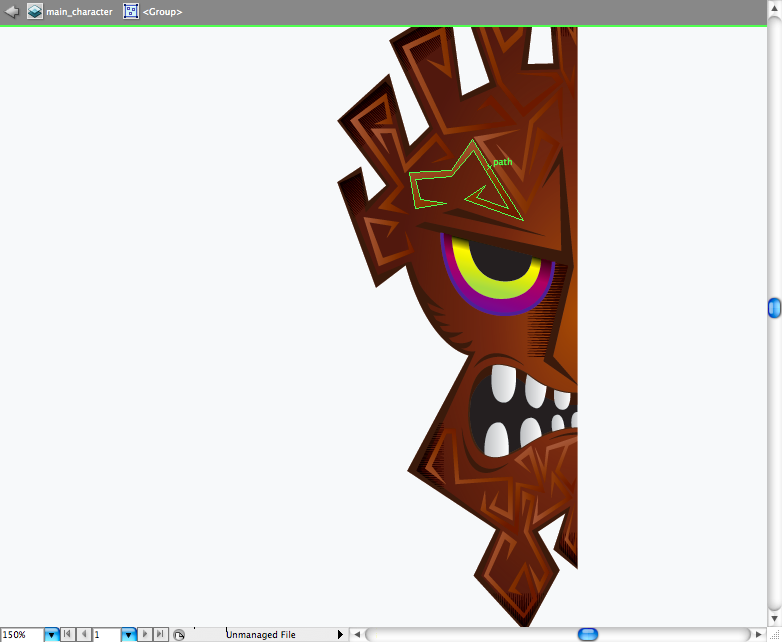
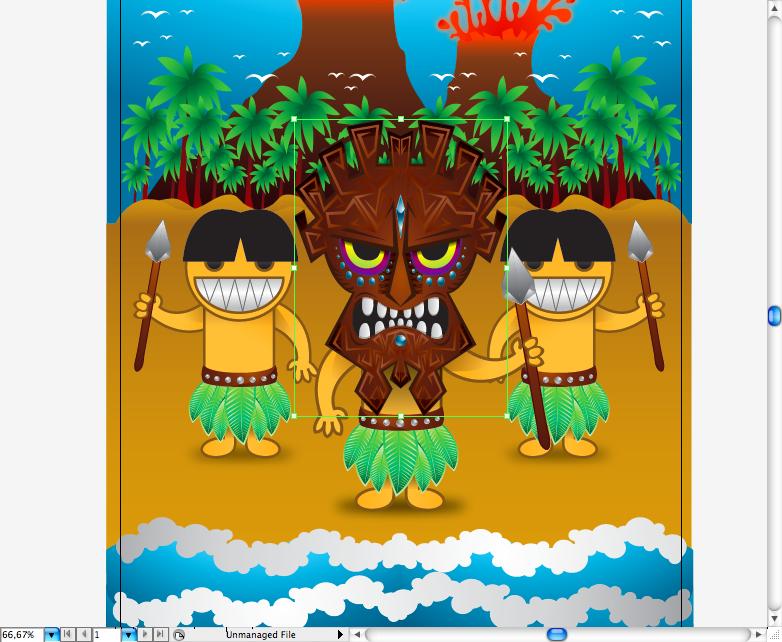
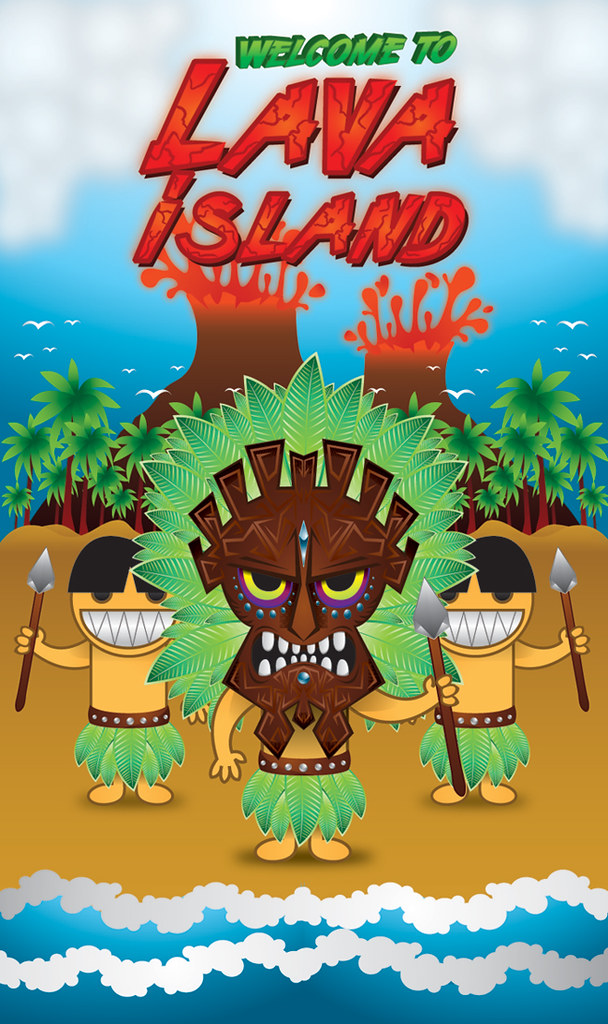
| Create a Lava Island Scenario in Illustrator Posted: 13 Mar 2011 09:10 PM PDT
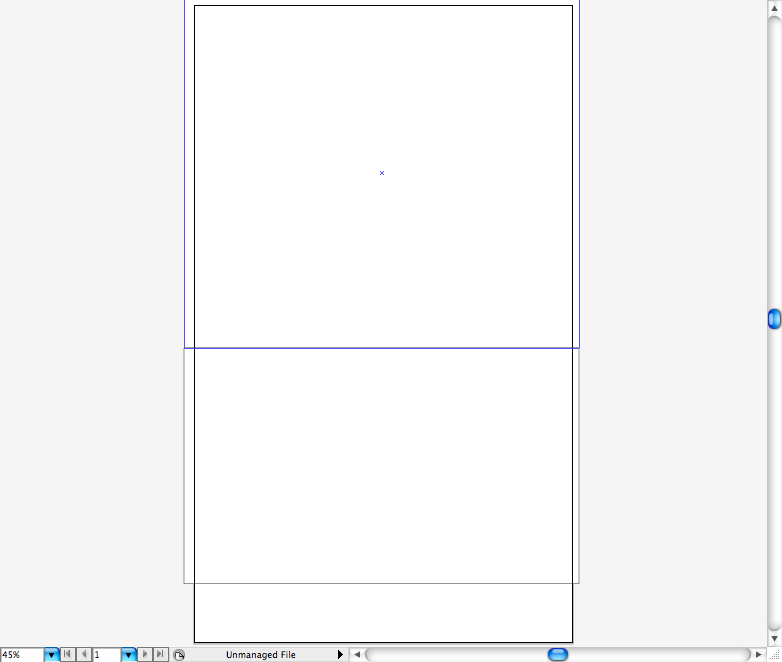
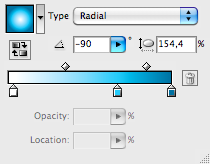
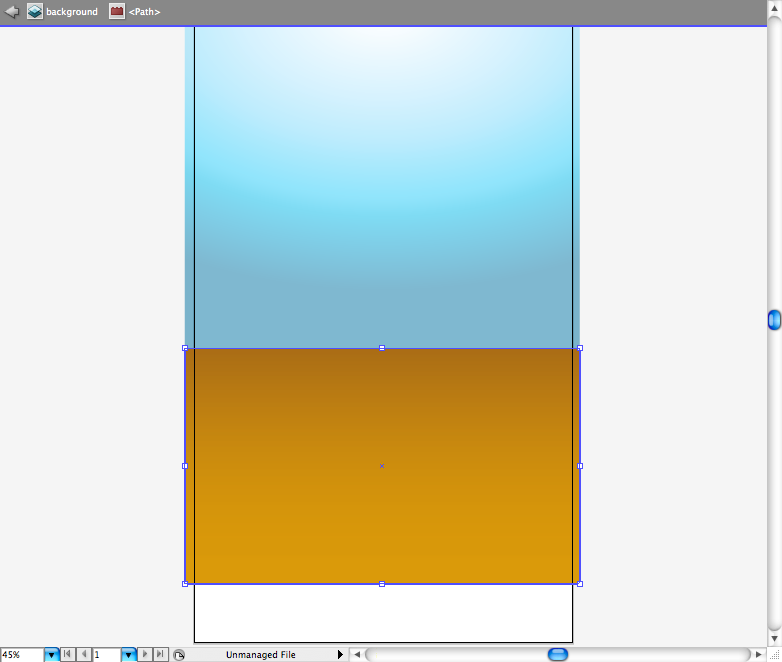
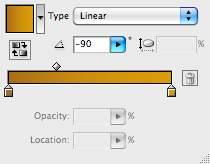
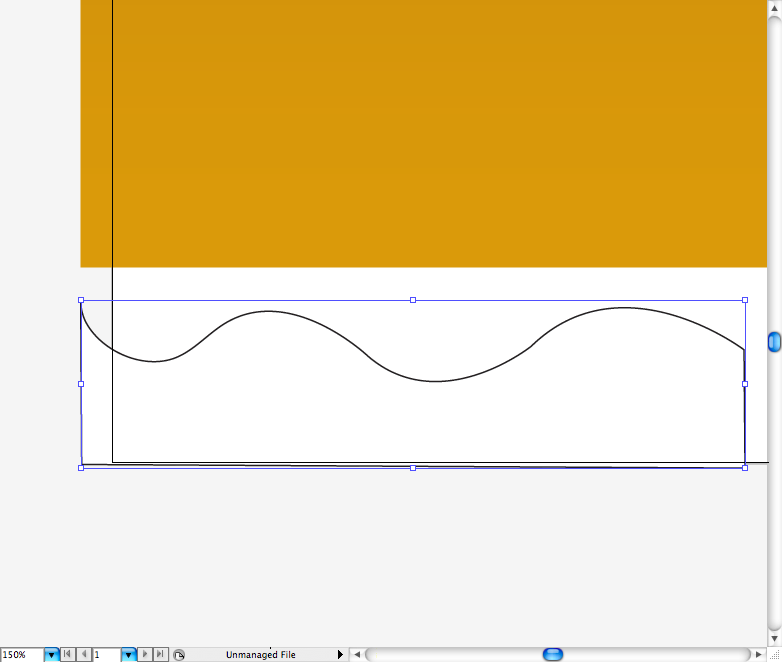
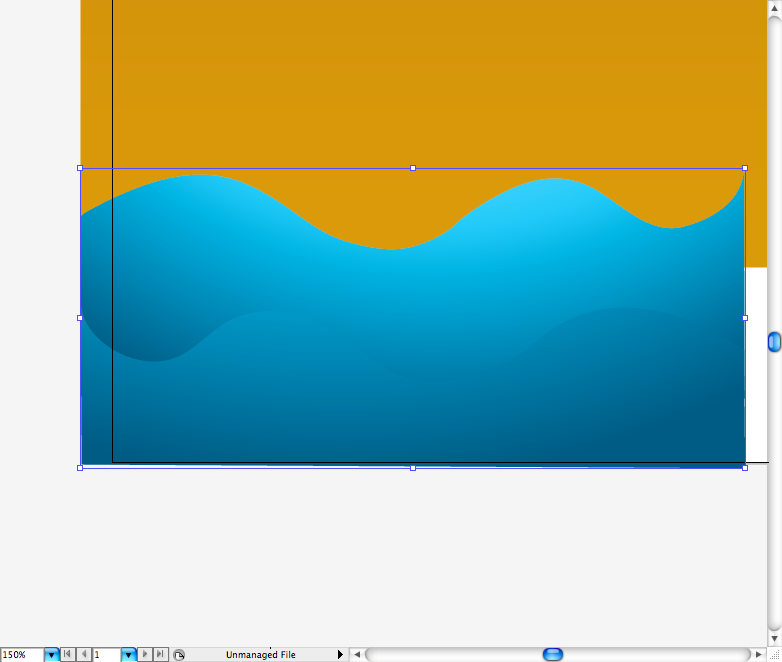
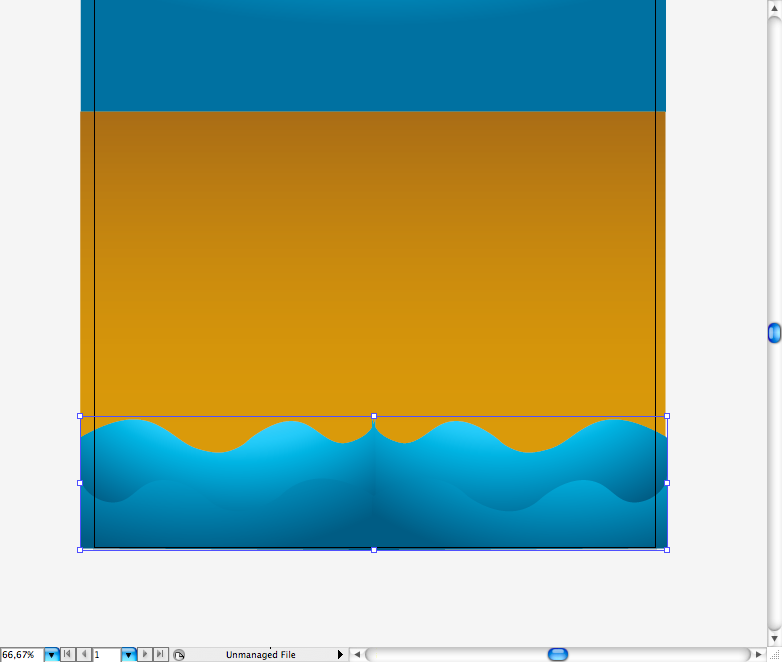
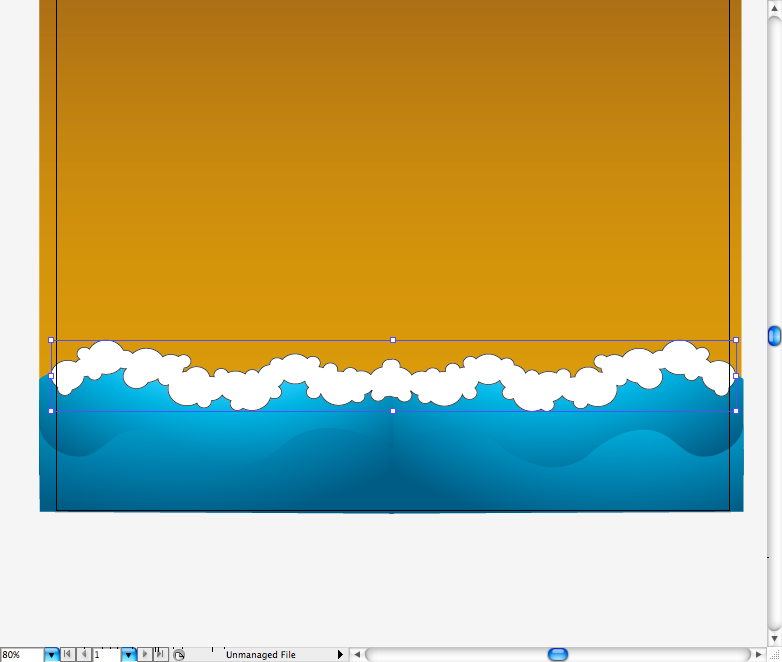
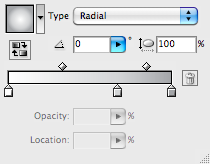
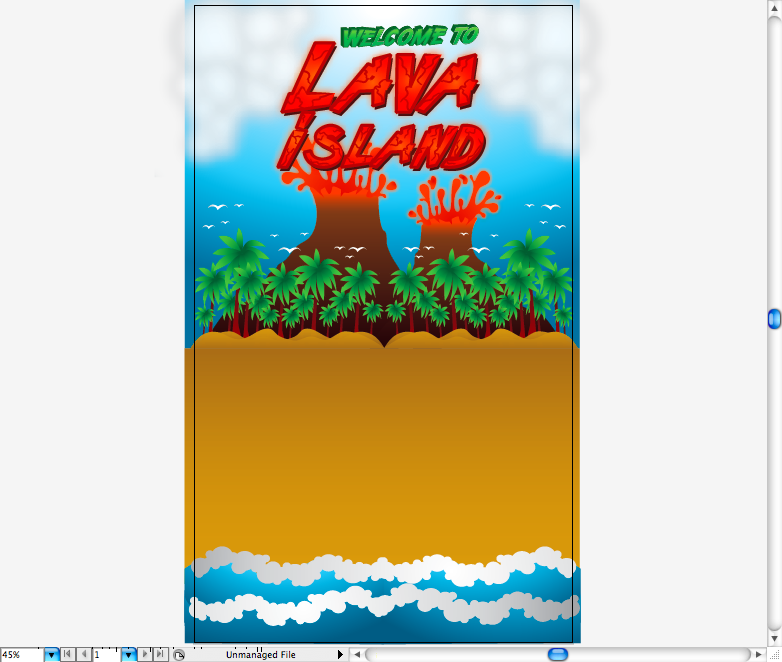
For this week tutorial I got inspired on the Tiki and Maori culture and made this big illustration. Tiki refers to large wood and stone carvings of humanoid forms in Central Eastern Polynesian cultures of the Pacific Ocean. The term is also used in M?ori mythology where Tiki is the first man, created by either Tumatauenga or Tane. ( Wikipedia ).This is a advanced tutorial, however with you're a illustrator beginner you won't find bigger problems to do it, since I tried to explain it the best way possible, enjoy it guys :) . Step 1First of all, open Adobe Illustrator and create a 29,7 x 50 cm ( 11,69 x 19,68 inches) canvas, let's try to use a different canvas this time. Lets begin with the background, using the rectangle tool ( M ) create two rectangles that almost fit like 50/50 of the page, let a small space at the bottom, we're going to make the waves there. Then using the gradient tool ( G ) create a radial blue gradient for the upper rectangle and create a linear dark yellow gradient for the lower rectangle.
Step 2Using the pen tool ( P ) create this simply wave shape, duplicate it using the selection tool ( V ) + alt and then reflect it. Now copy the same gradient used in the sky using the eyedropper tool ( I ), just adjust the intensity and range of it. Again, duplicate the waves using the selection tool ( V ) + alt and then reflect it.
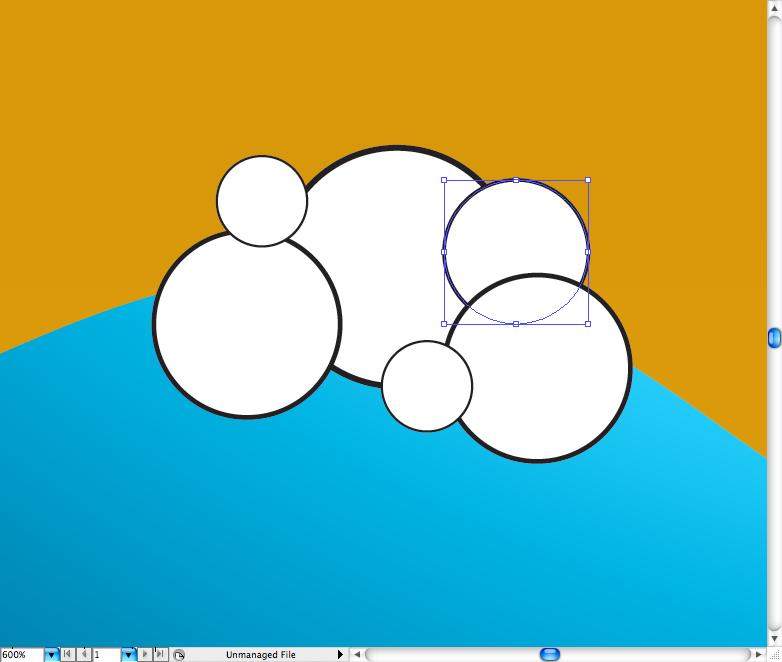
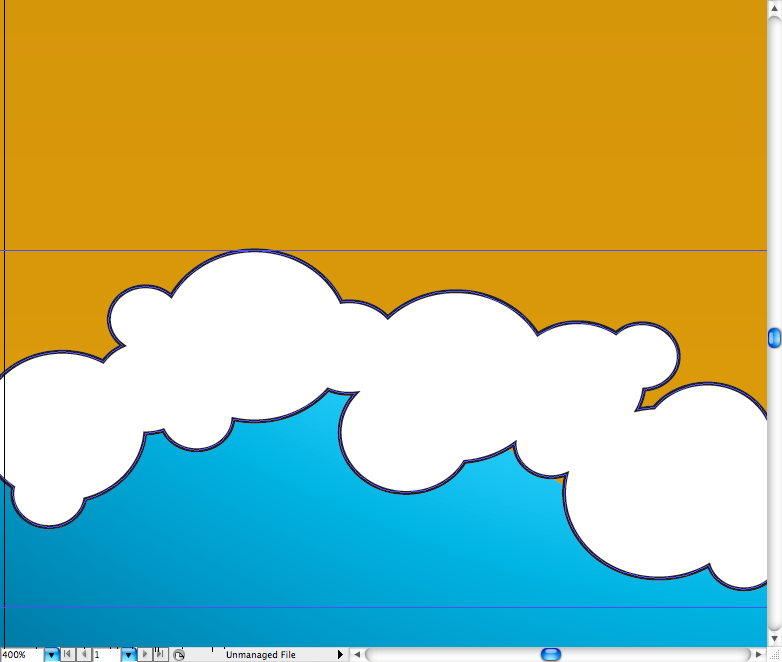
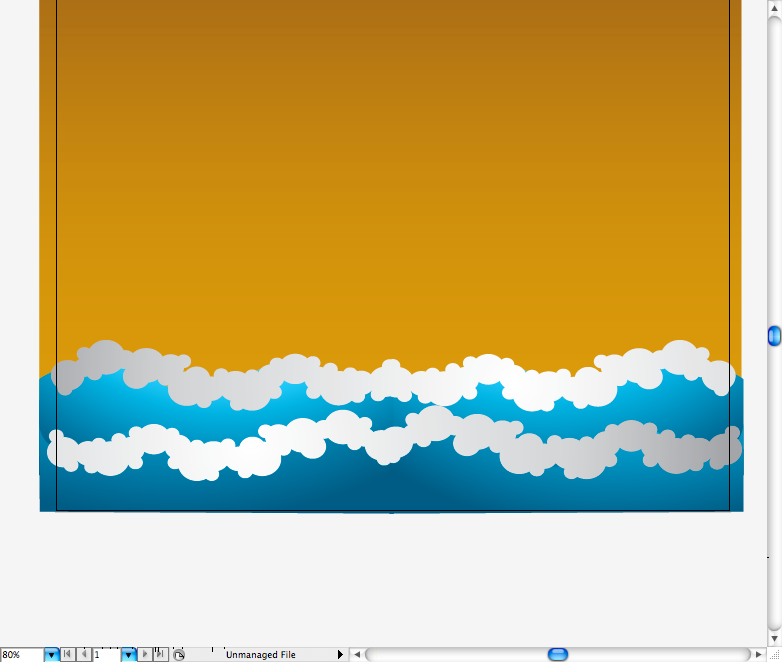
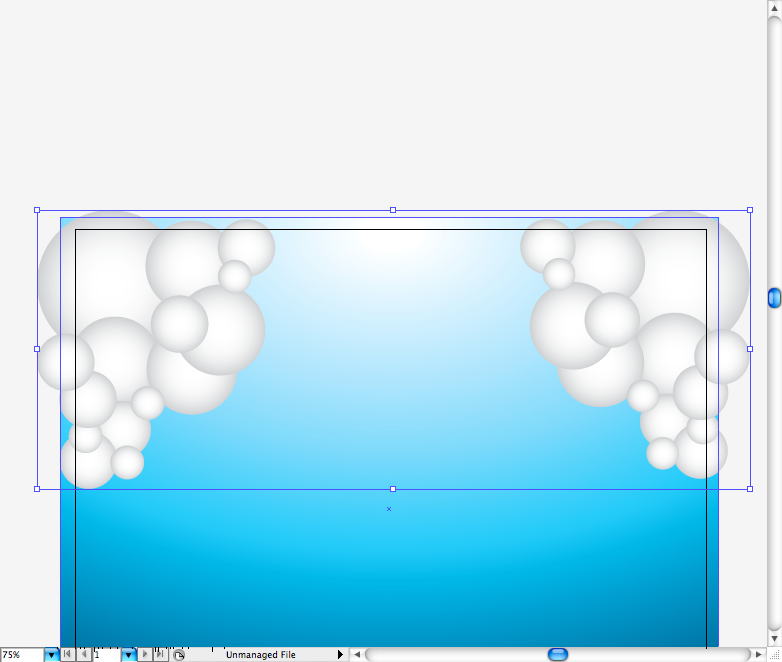
Creating the bubbles: Using the ellipse tool ( L ) create circles in different sizes, put them all together along the wave line. Select all of them using the selection tool ( V ) and access the pathfinder panel and choose the option called Unite. This will turn all into one path, duplicate it using the selection tool ( V ) + alt and add a light grey gradient using the gradient tool ( G ).
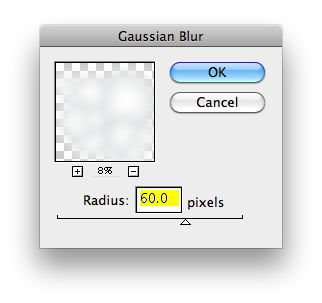
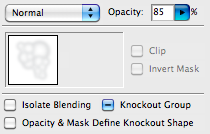
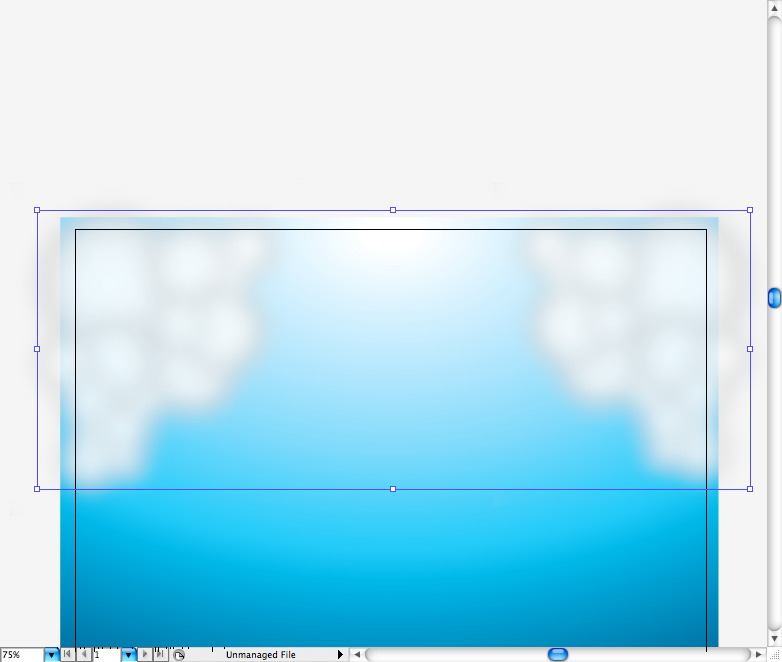
Step 3Let's repeat the same procedure of the bubbles to create the clouds, but this time use a radial gradient on the circles and don't use the pathfinder tool. Go to Effect > Blur > Gaussian Blur and set radius to 60 pixels. Go to the Transparency panel and set Opacity to 85% percent, you should get something like these.
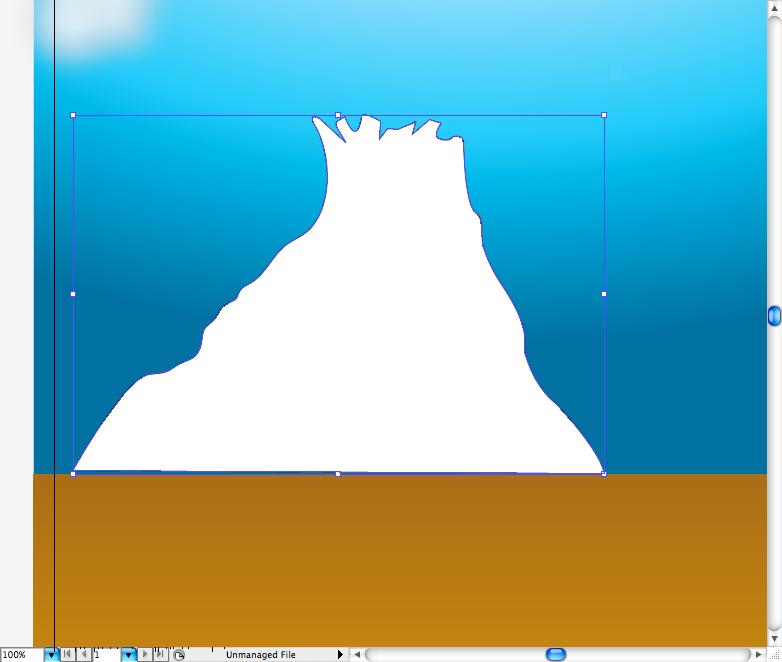
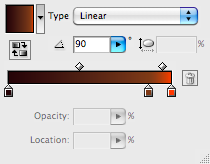
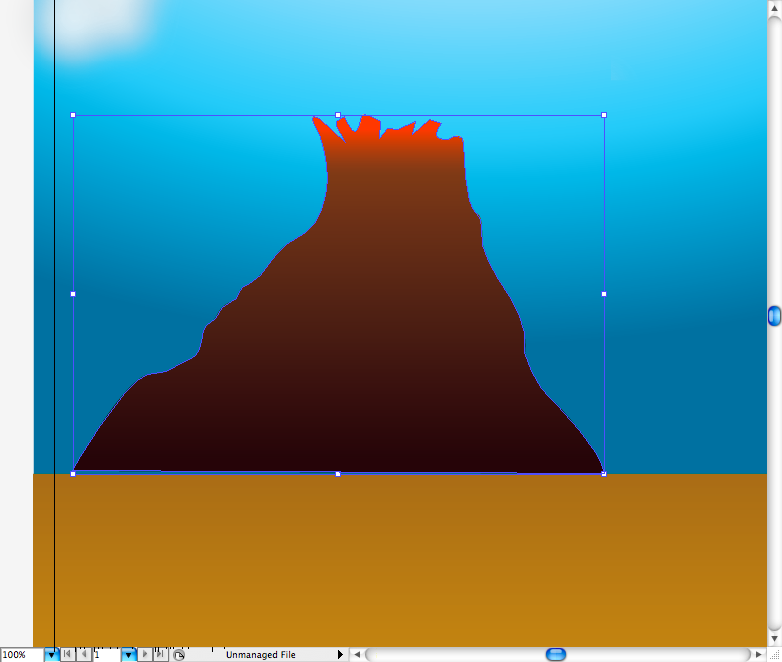
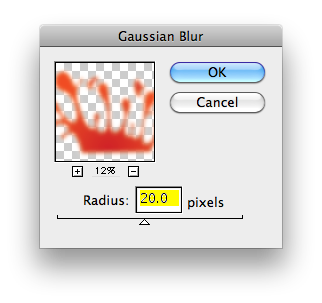
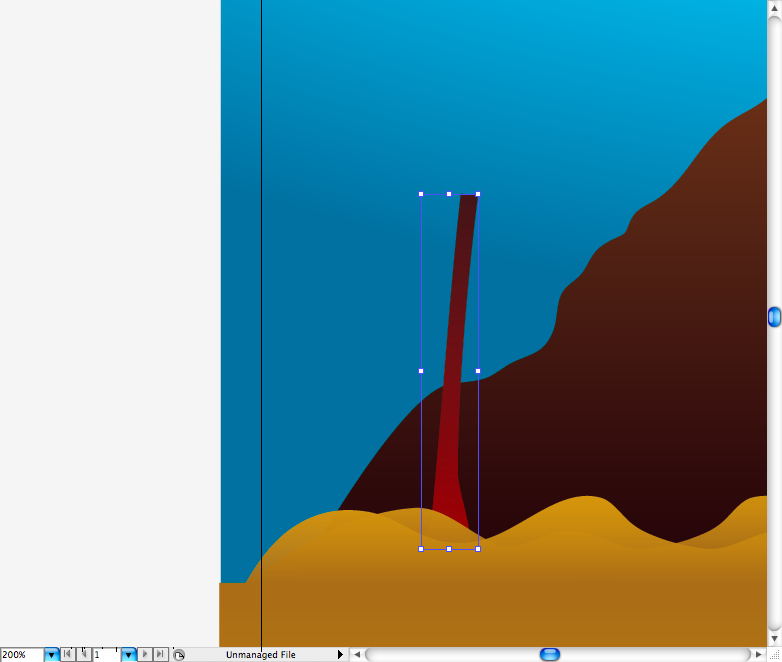
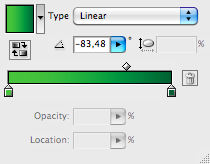
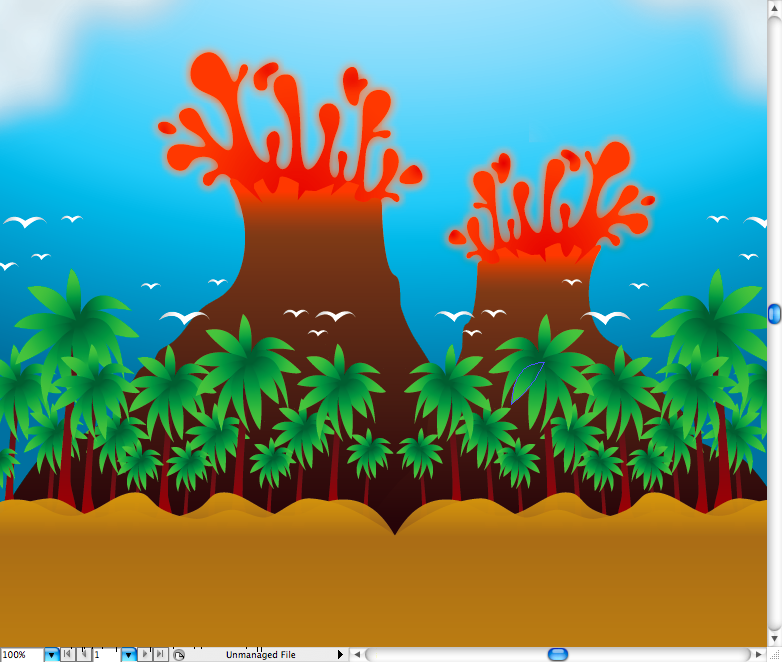
Step 4Let's create the volcanoes, using the pen tool ( P ) make this mountain shape, then use brown to orange linear gradient, using the gradient tool ( G ) adjust it making only part of the top orange. Again, using the pen tool ( P ) make the lava exploding out of the vulcano, add a strong red gradient to it. Duplicate the lava using the selection tool ( V ) + alt and go to Effect > Blur > Gaussian Blur and set radius to 20 pixels. Then, just duplicate the whole vulcano, resize and place it on the other size.
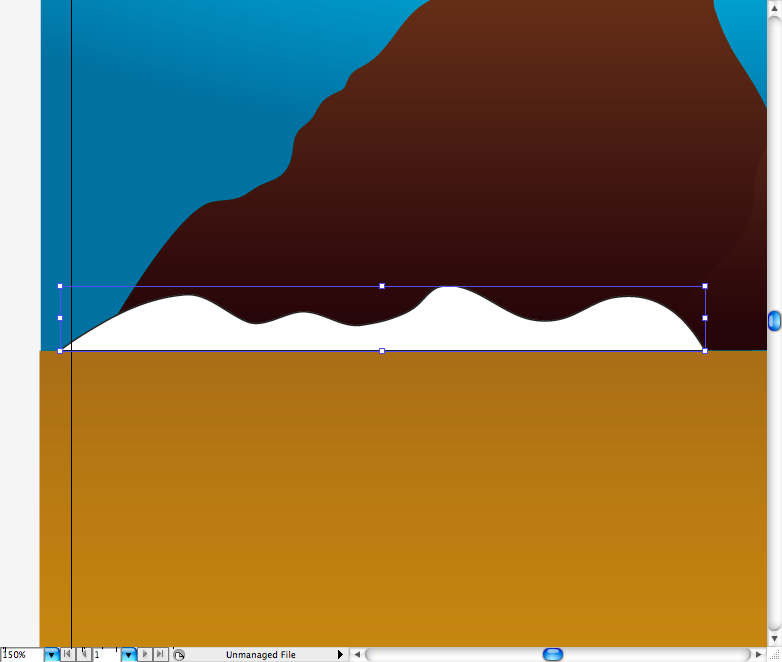
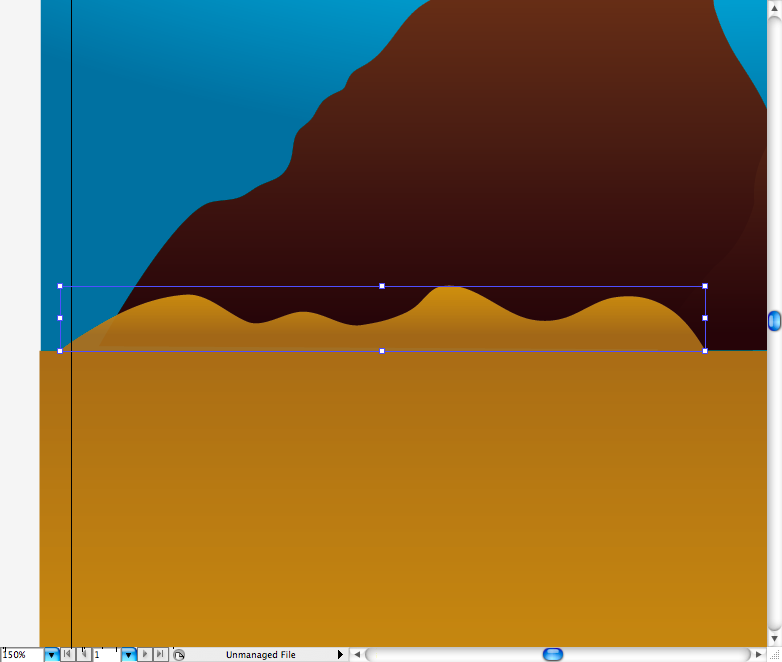
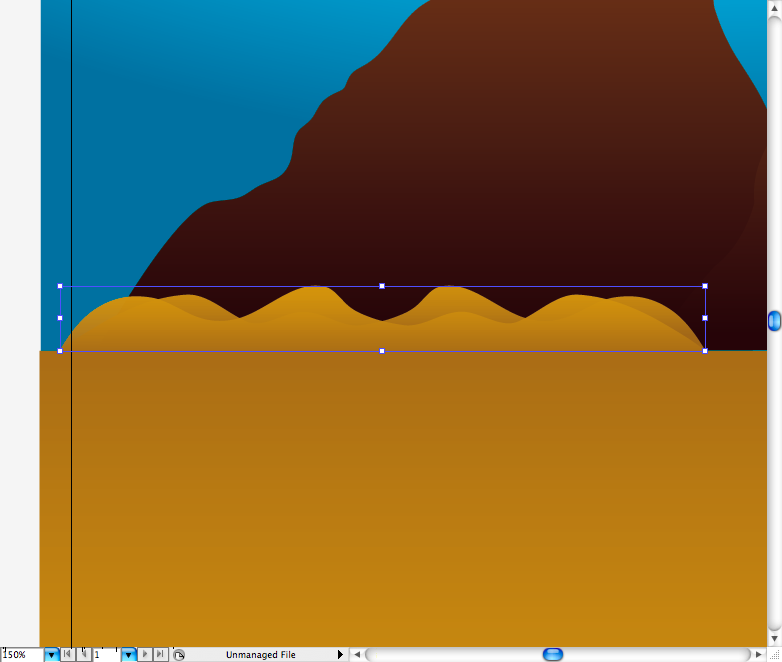
Step 5Making the dunes: using the pen tool ( P ) create this dune silhouette, add the same gradient used on the rectangle bellow by using the eyedropper tool ( I ). Duplicate it using the selection tool ( V ) + alt and reflect it.
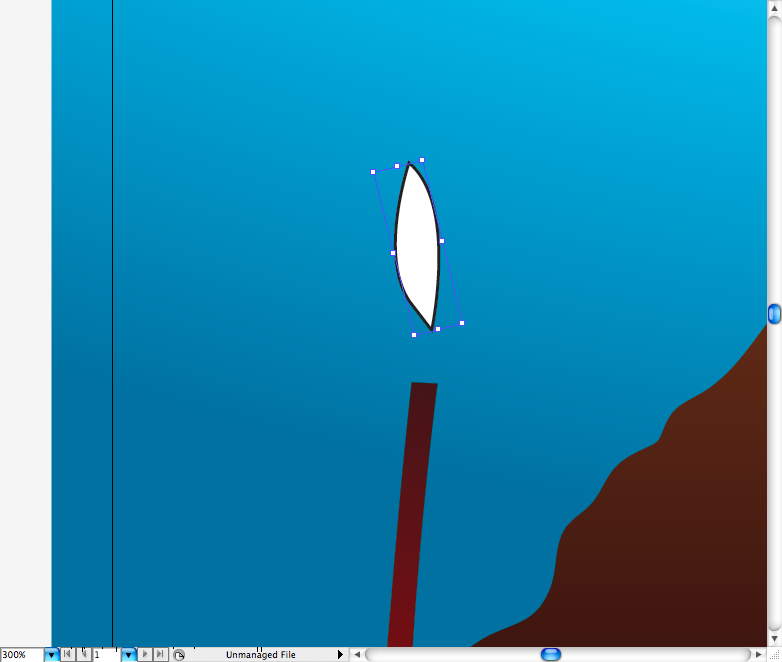
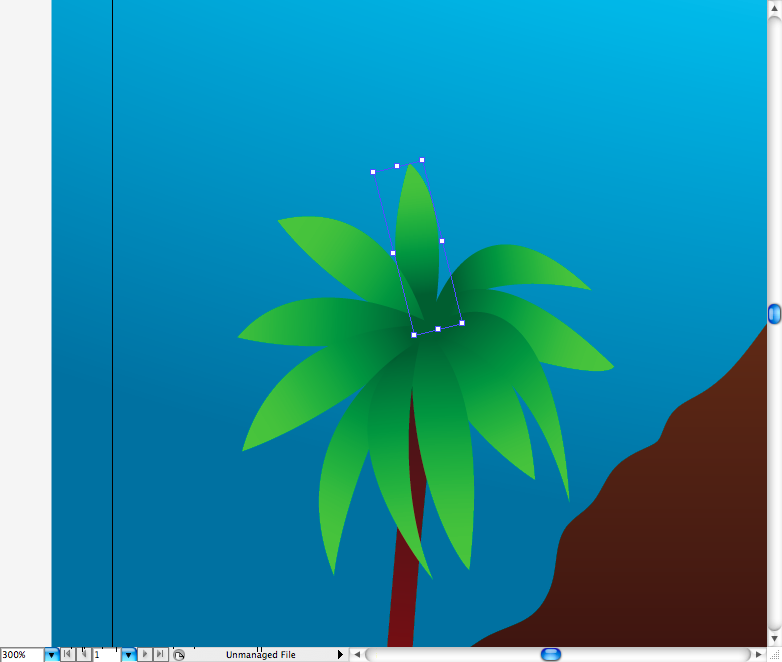
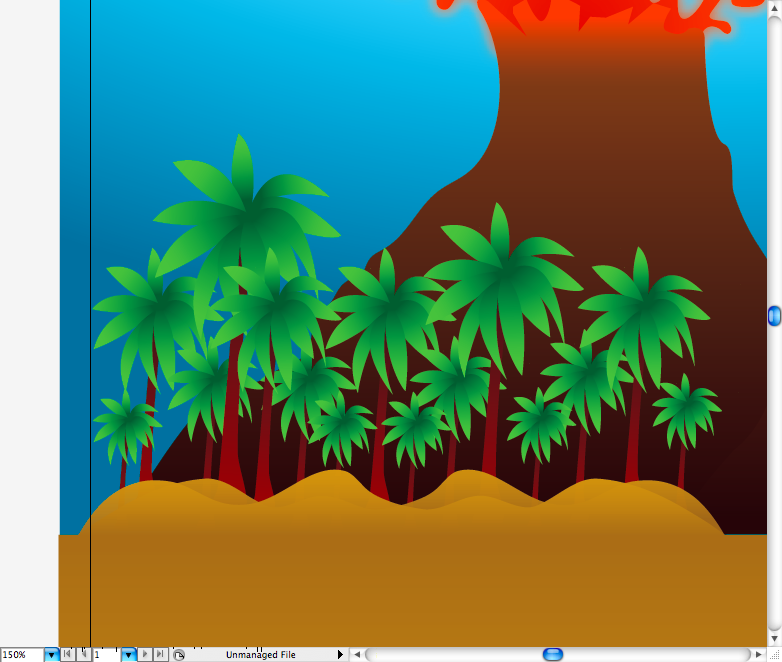
The first part of the part of the palm tree to be created is the trunk, draw a shape like this using the pen tool ( P ) then add a brown gradient to it. Use again the pen tool ( P ) to create the leaves, duplicate them and place them around the trunk top, using the gradient tool ( G ) add a green gradient to them. Group all this elements (ctrl + G / command + G ) and duplicate the palm tree using the selection tool ( V ) + alt till you got pretty much a forest.
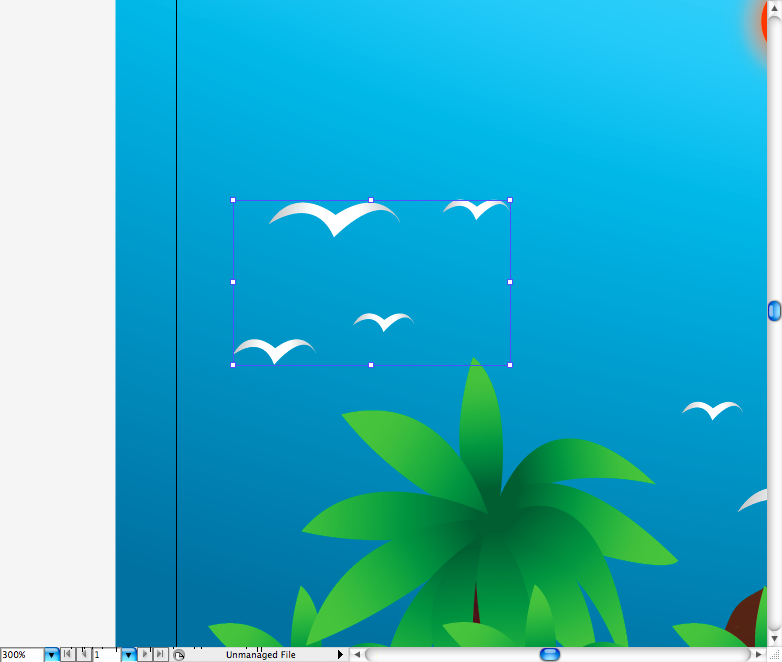
I also drawed this classic "M" shaped birds using the pen tool ( P ) and distributed them along the top of the palms. Finally, group (ctrl + G / command + G ) , duplicate using the selection tool ( V ) + alt and place these elements on the other side. The background is done.
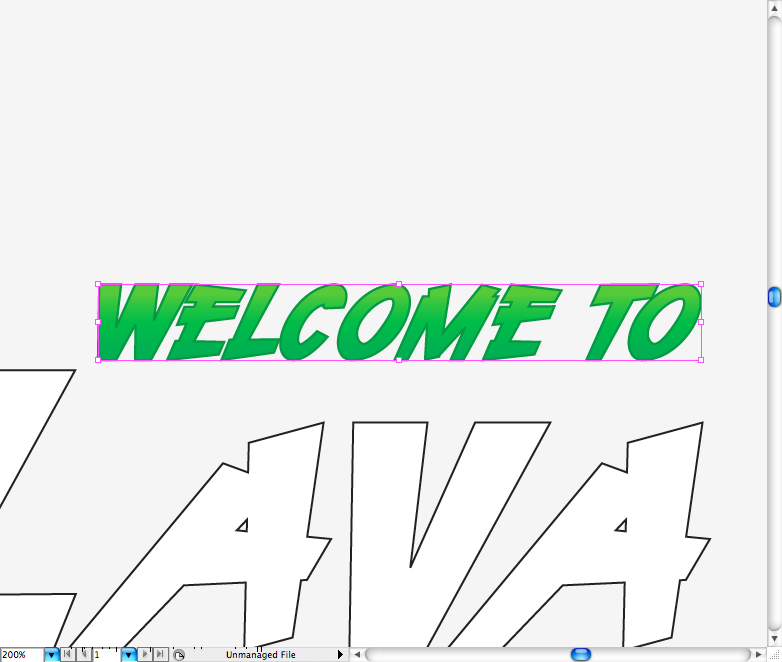
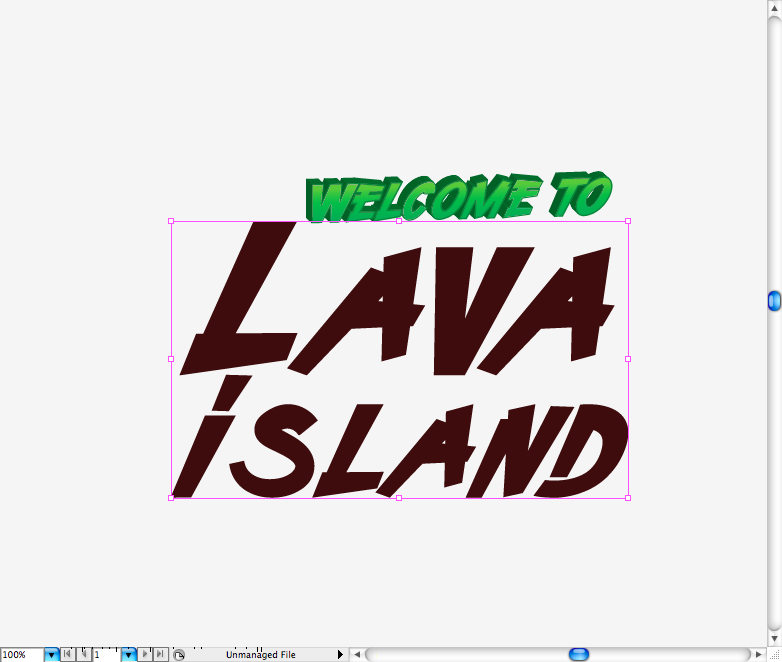
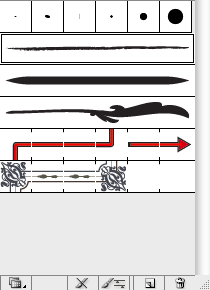
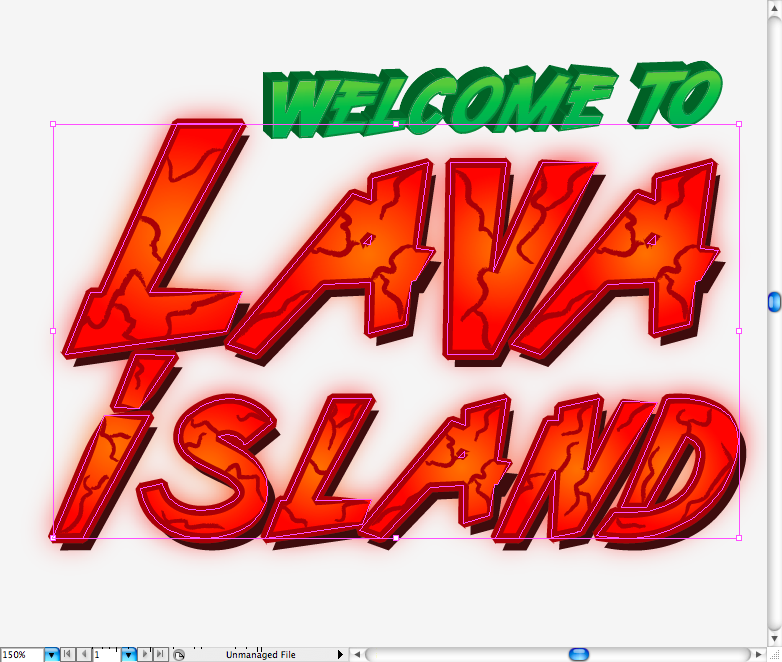
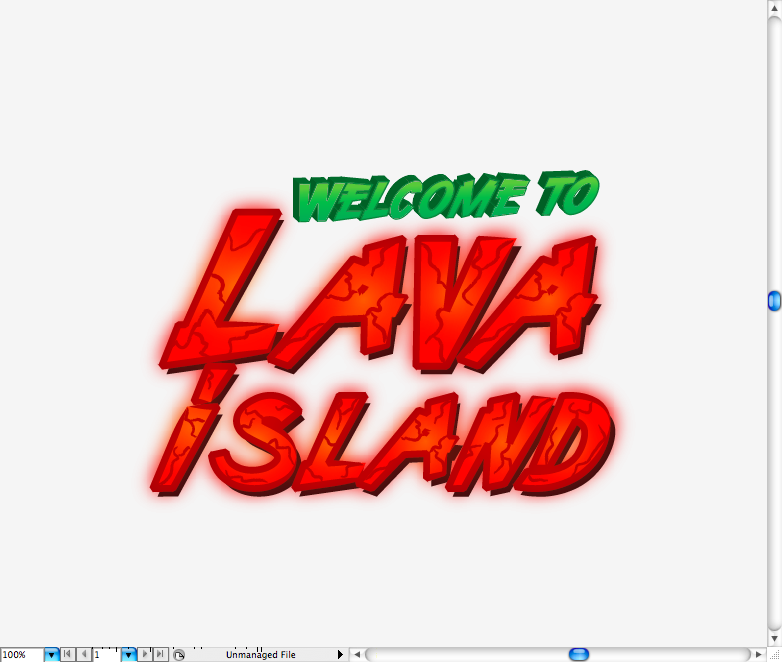
Step 6For the title I used the Demon Racer font, you can grab it at Legacy of Defeat , there's a bunch of nice free fonts designed by Hydro 74 there. Well, using the text tool ( T ) type "Welcome to", make another text box with a bigger font size and type "Lava Island" in two lines. You will probably have to adjust the kerning beetween the letters, after that transform all in outlines.
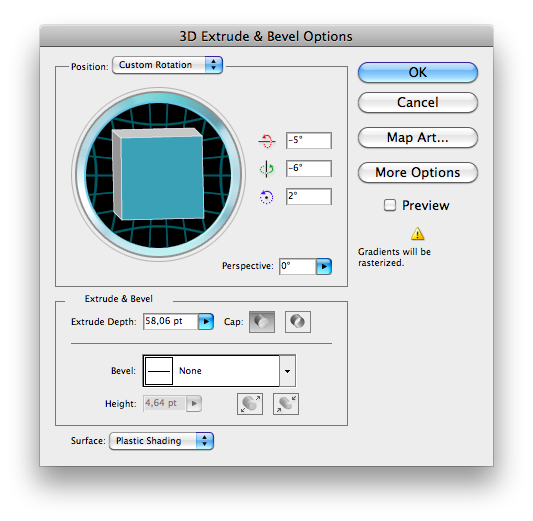
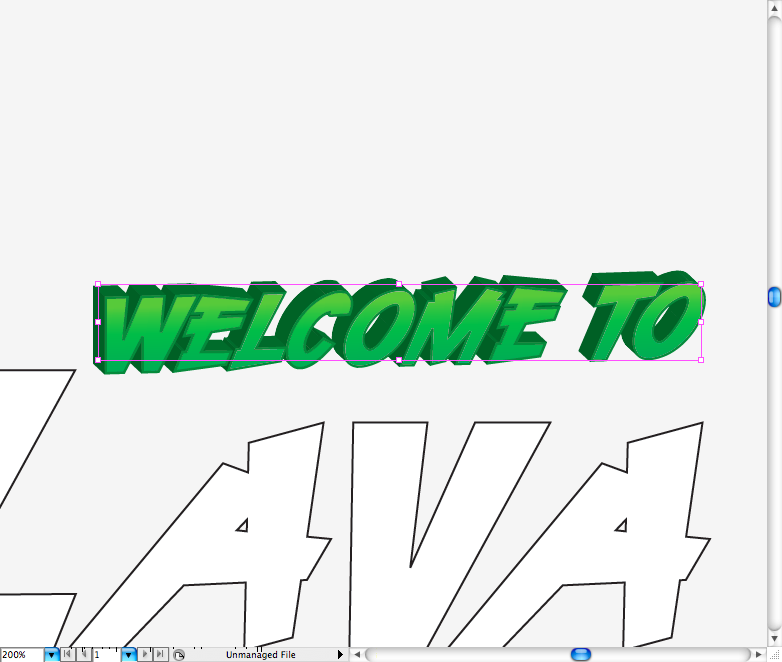
Get the "Welcome to" and add a green linear gradient to it, also add a green stroke to it. Then go to Effect > 3D > Extrude and Bevel set the parameters like the image bellow. You should get something like these.
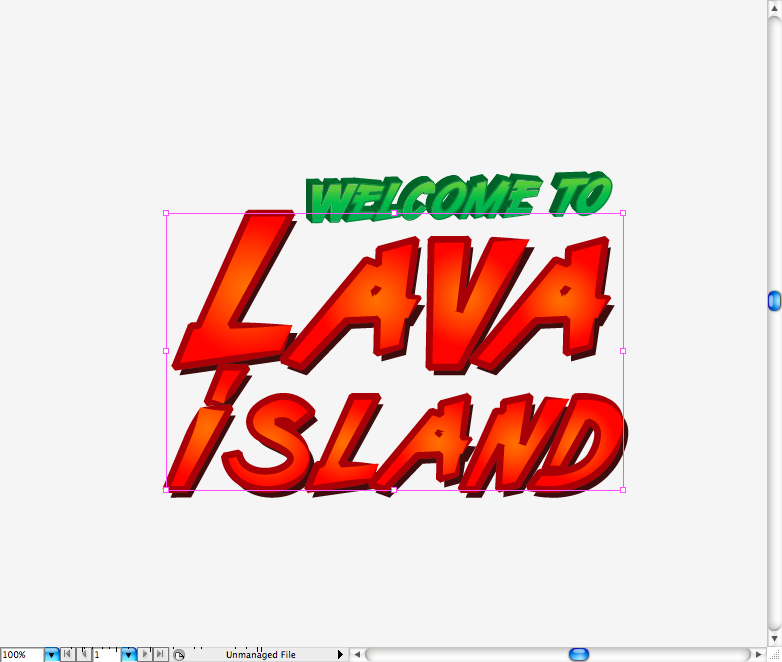
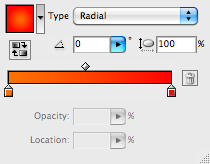
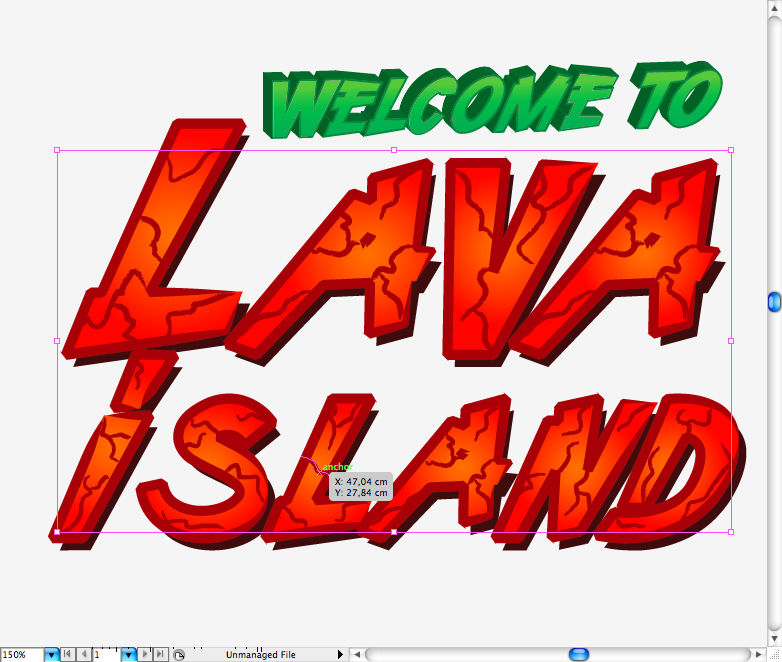
Now turn the "lava island" fill into brown and then duplicate it using the selection tool ( V ) + alt. Add a radial red gradient to it then using the brush tool ( B ) and a 1 pt charchoal brush, makes this cracks inside the letters.
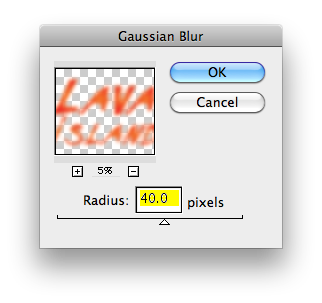
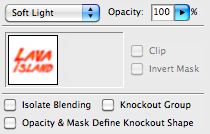
Duplicate only the letters and access Effect > Blur > Gaussian Blur and set radius to 40 pixels. Place this one on the back of the letter, duplicate this blurred layer and place it on the top, access the Transparency panel and choose the blending mode called Soft light. Place the title at the top of the illustration.
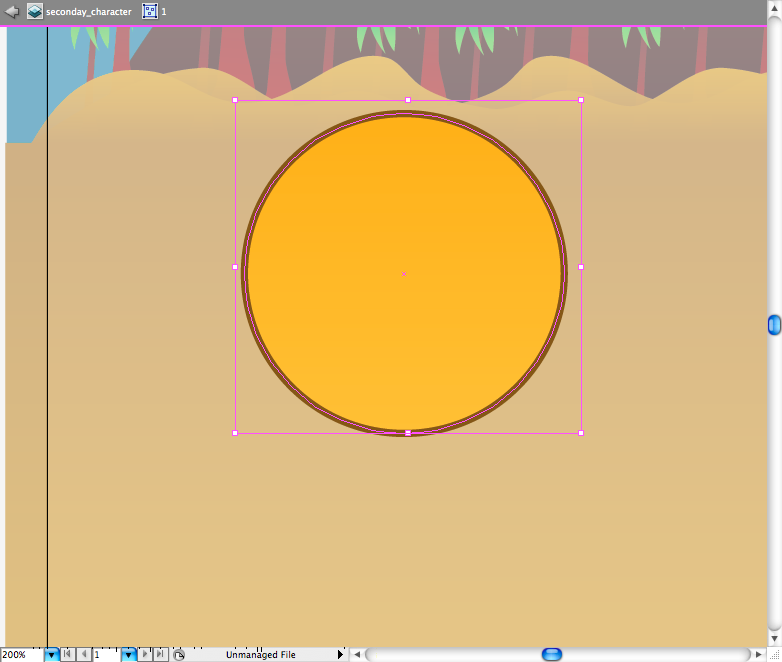
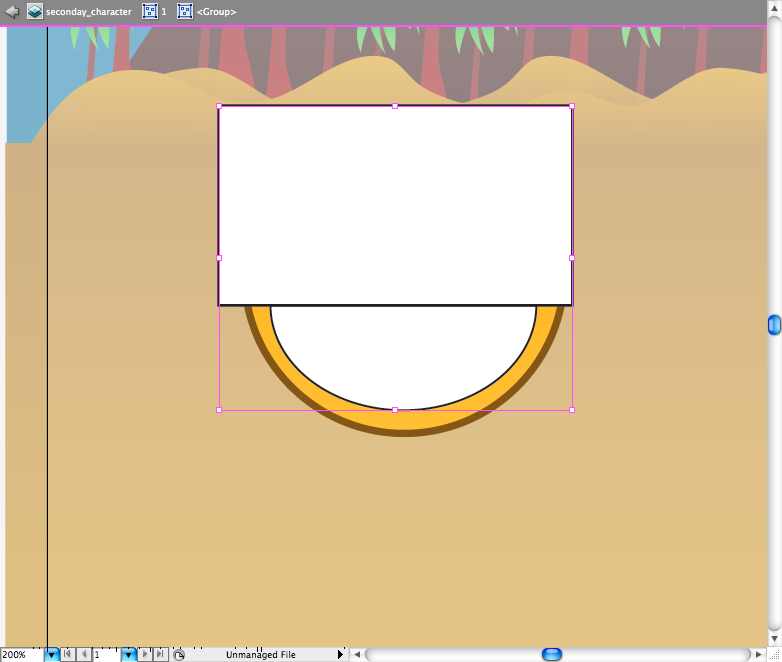
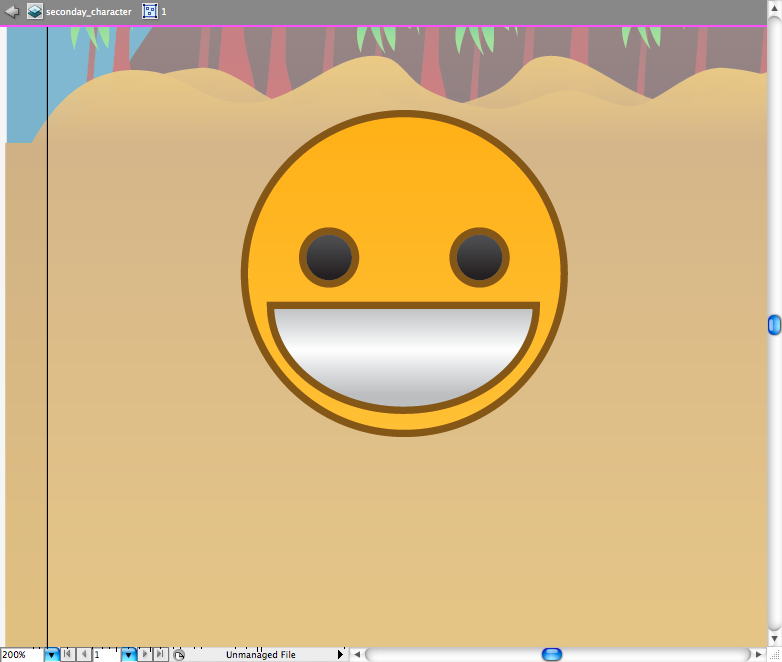
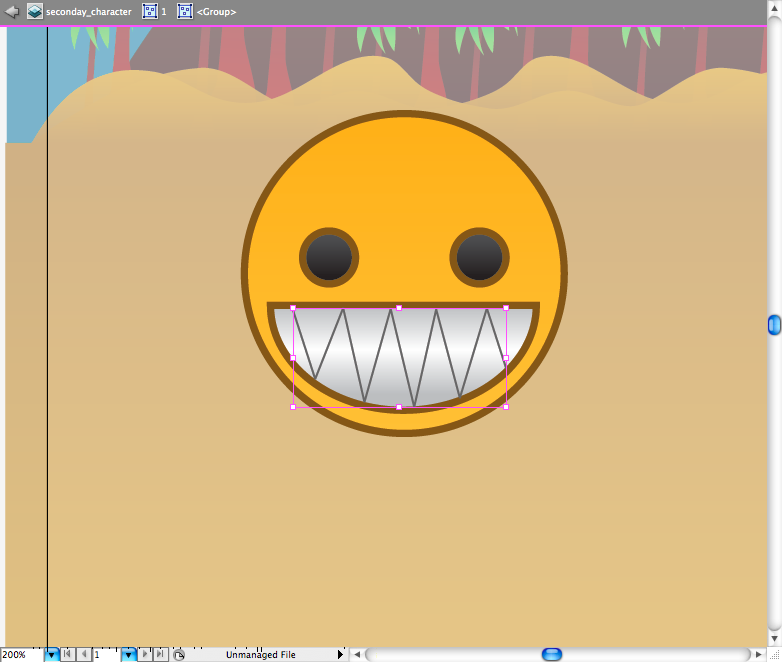
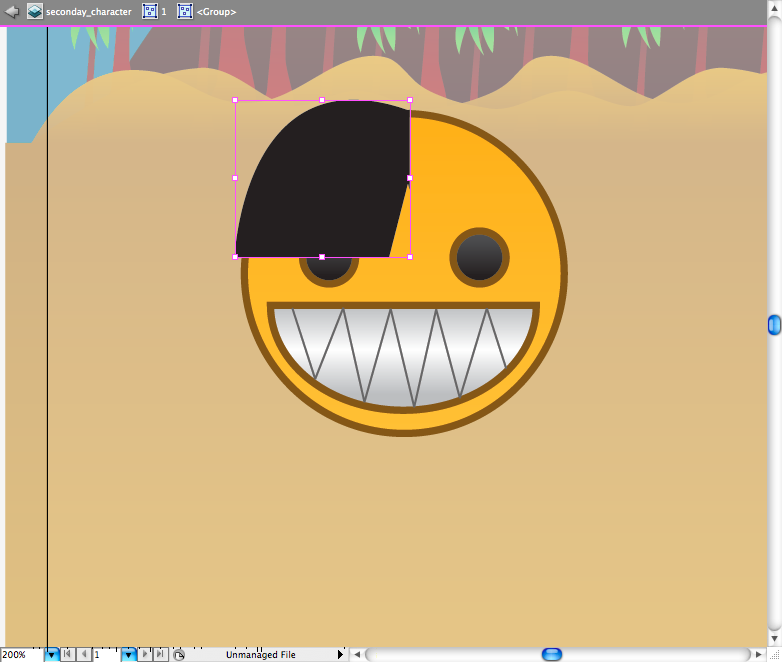
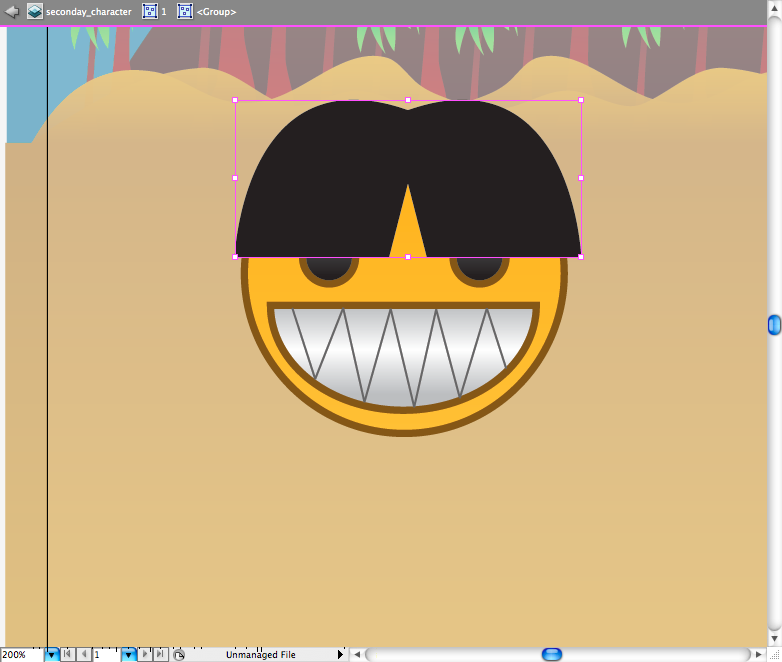
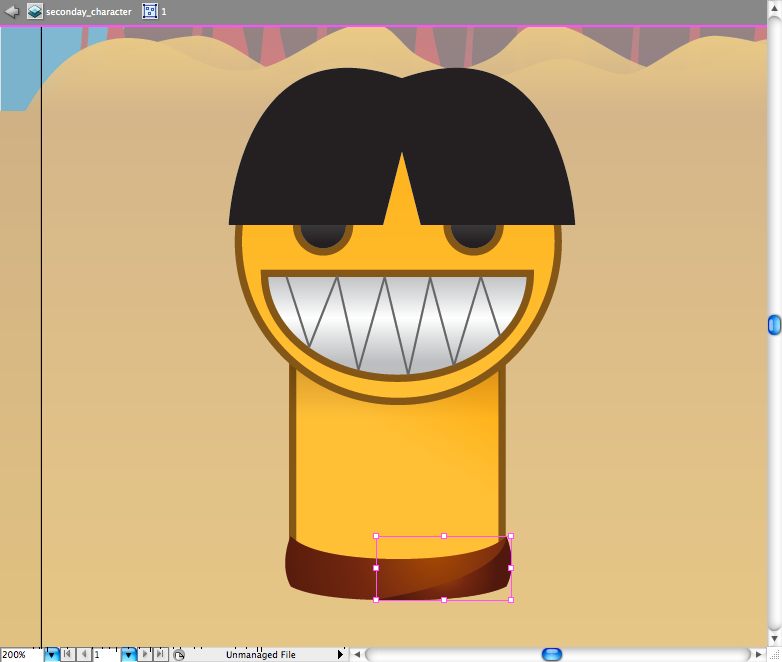
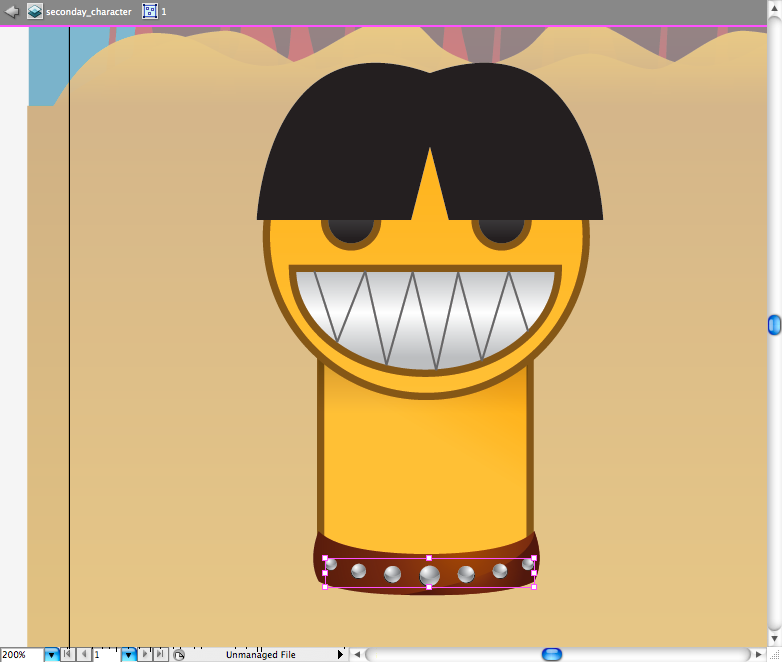
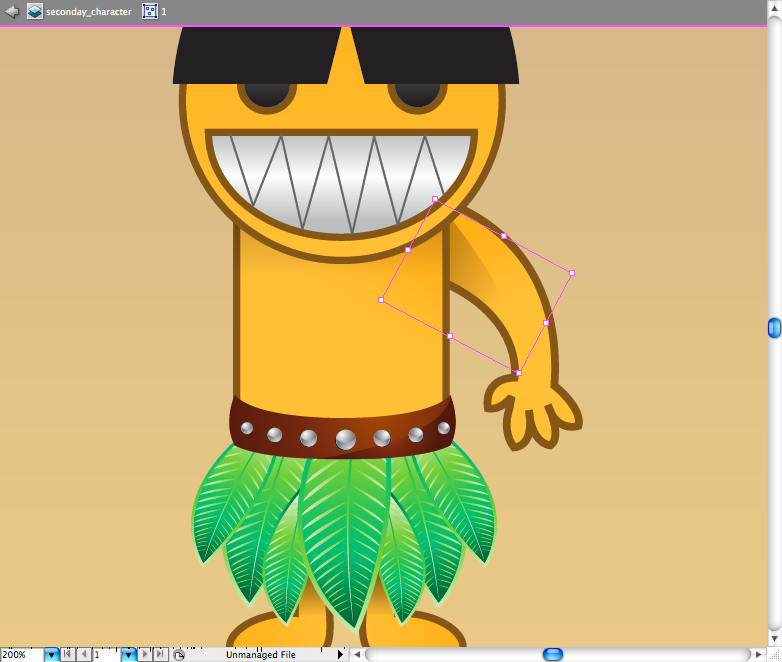
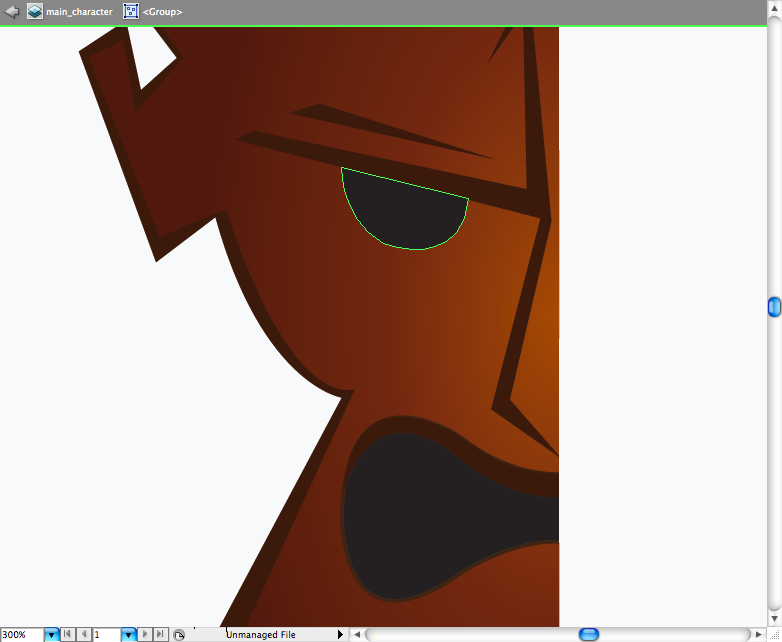
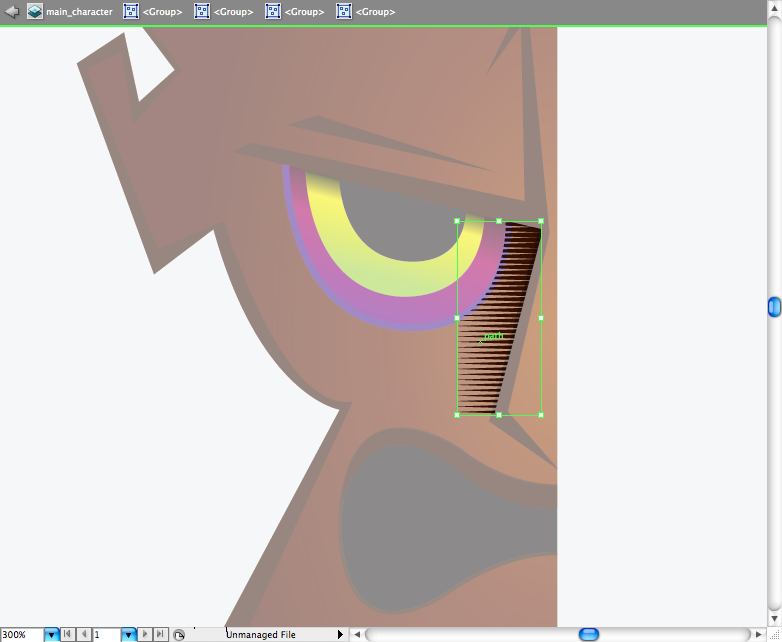
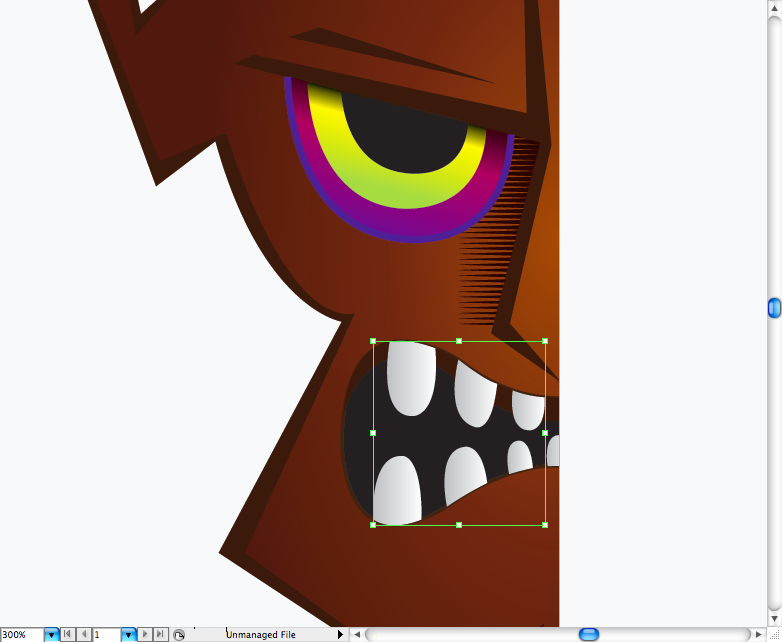
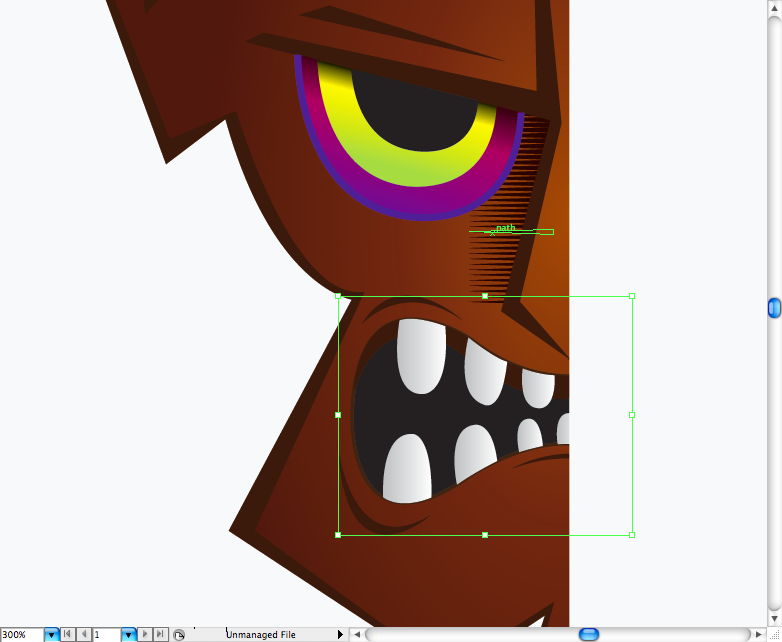
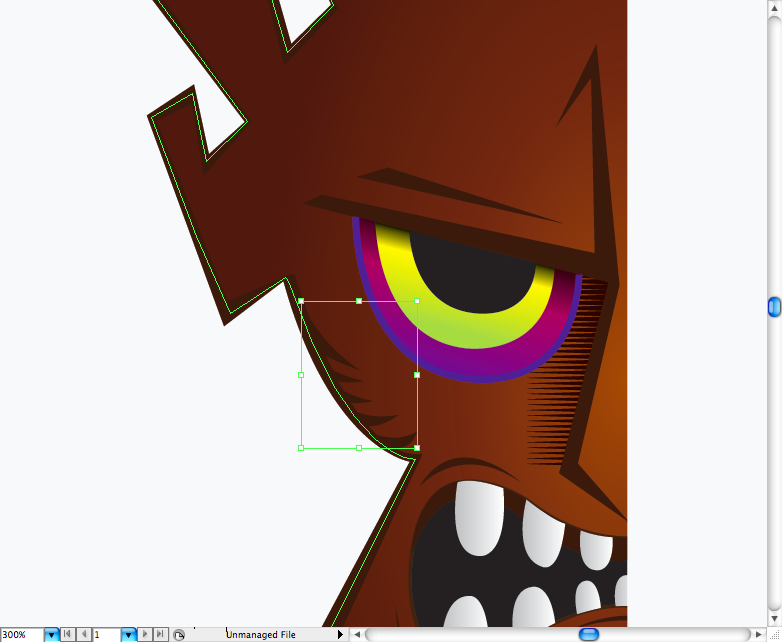
Step 7So let's skip to the characters, first using the ellipse tool ( L ) create this circle with a brown stroke and a dark yellow gradient fill. Then again use the ellipse tool ( L ) create another circles and using the rectangle tool ( M ) create a rectangle on the top of it, access the pathfinder panel and choose the option called Minus front. You should get a semi circle, add a light linear grey gradient to it. The eyes are just to circles with a grey gradient fill and brown stroke, create them using the ellipse tool ( L ). Now using the pen tool ( P ) draw line inside the mouth to look like sharpy teeth. The hair can be done using the pen tool ( P ) and then duplicating and reflecting it.
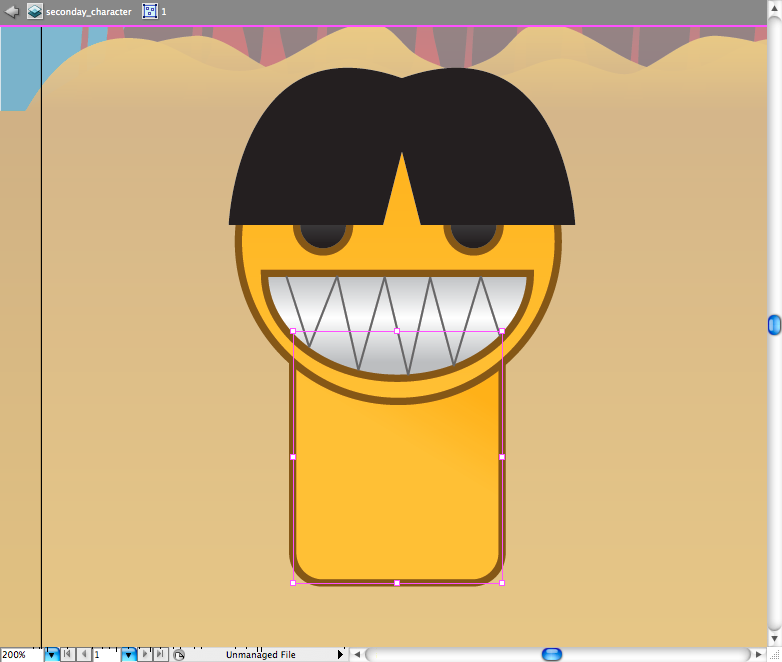
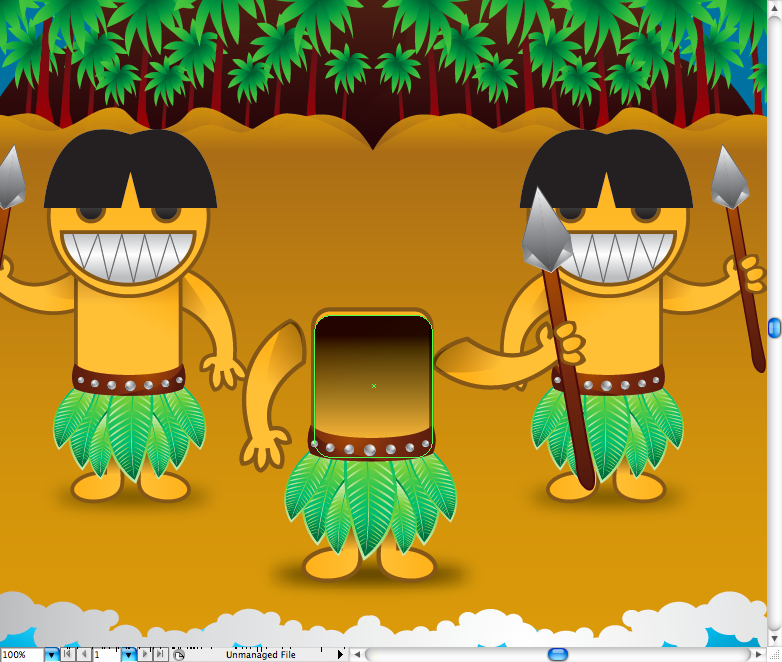
Step 8Well the body is quite simple, just use the round rectangle tool , then duplicate it and use a gradient with transparency.
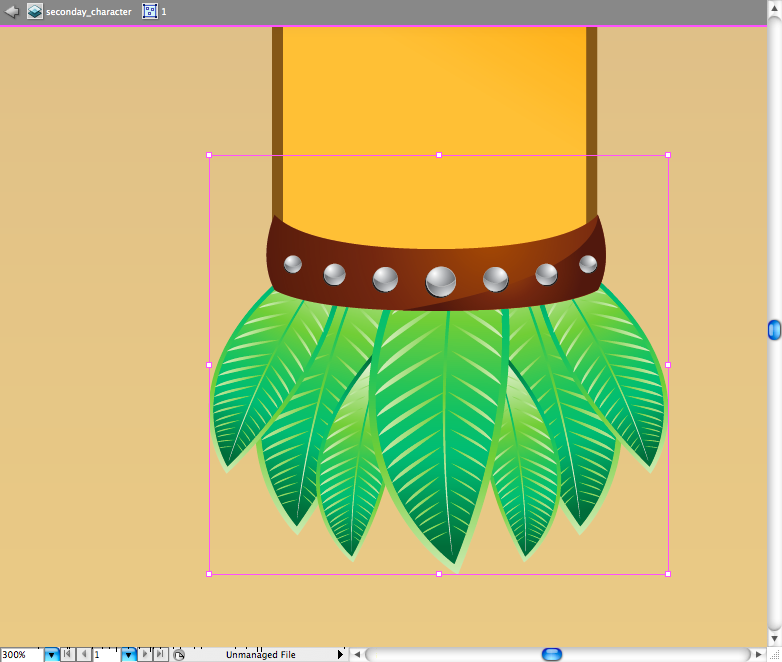
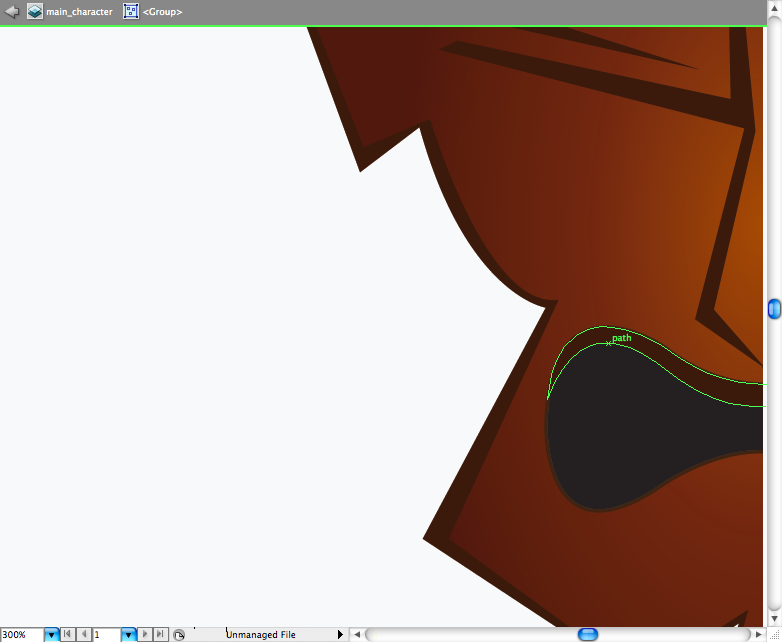
Draw the belt using the pen tool ( P ) , add a brown gradient to it. Let's just add a detail, using the pen tool ( P ) create this shadow and add the same gradient of the belt using the eyedropper tool ( I ).
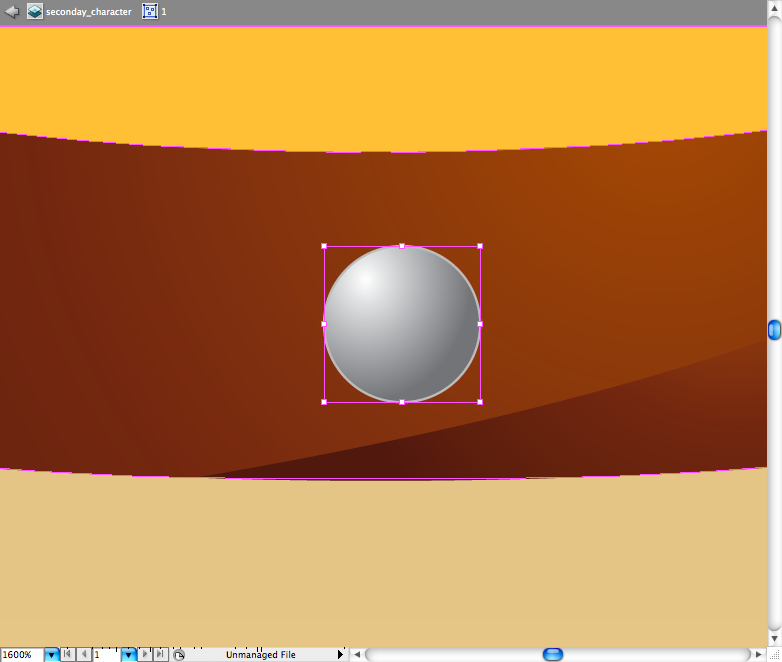
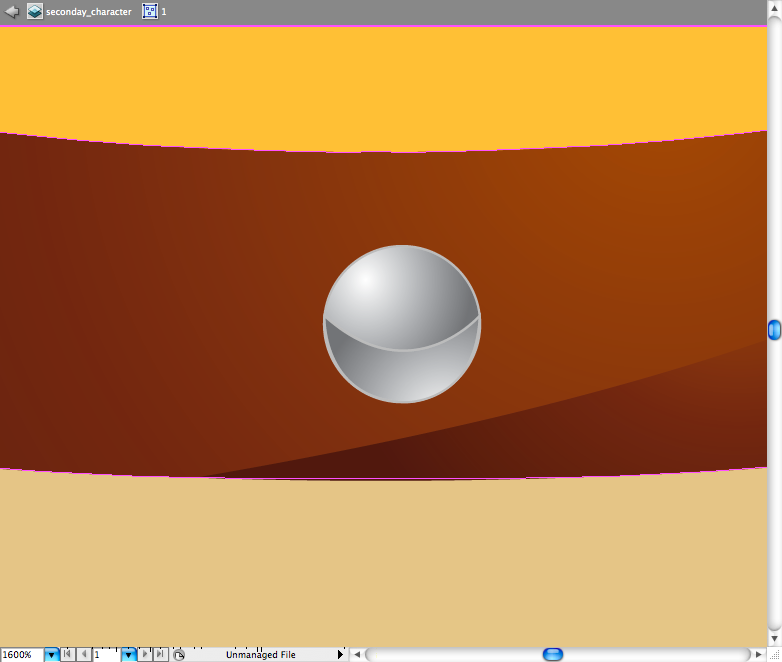
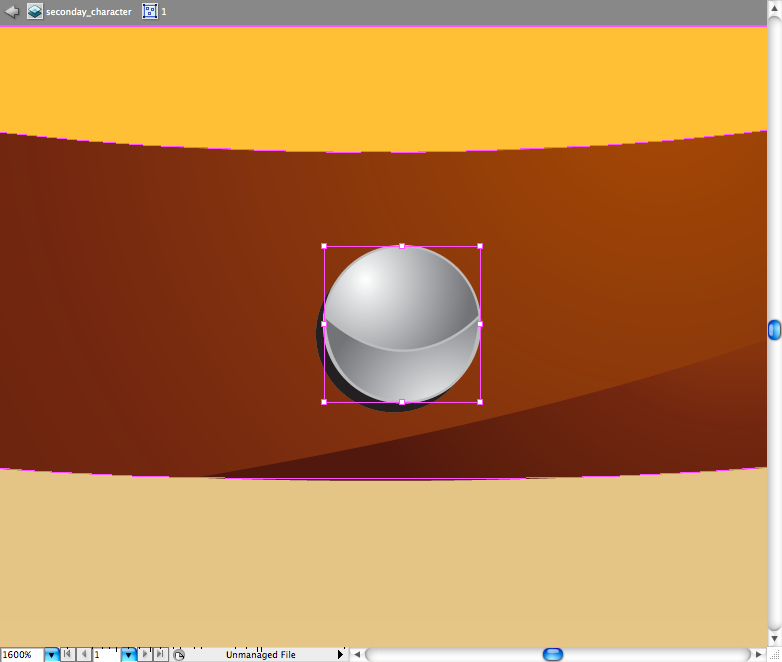
Lets make the shinning stones on the belt,pretty simple, just draw a circle using the ellipse tool ( L ), add a grey stroke and a grey gradient fill. Using the pen tool ( P ) draw this half moon on the top of the circle, copy the same gradient using the eyedropper tool ( I ). Make another circle behind with a black fill. Duplicate and distribute this stones around the belt, rezising it when needed.
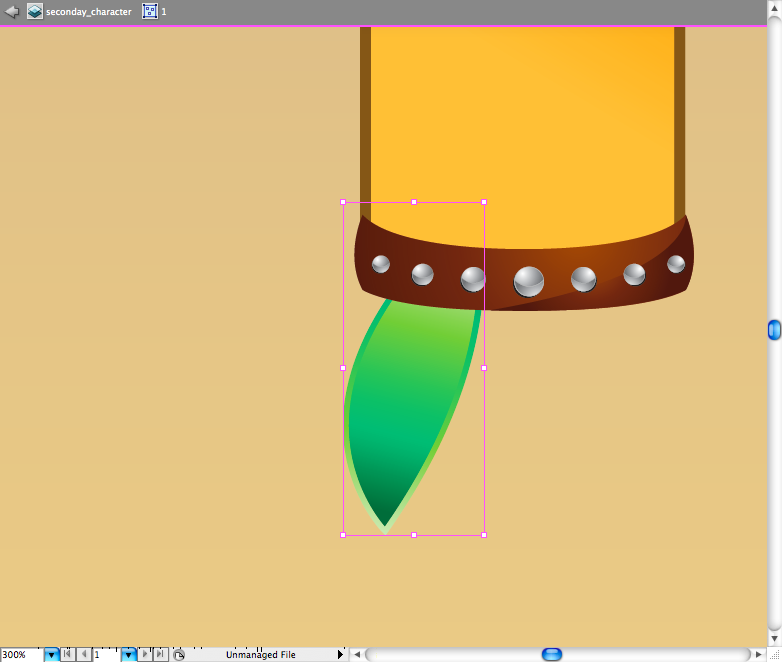
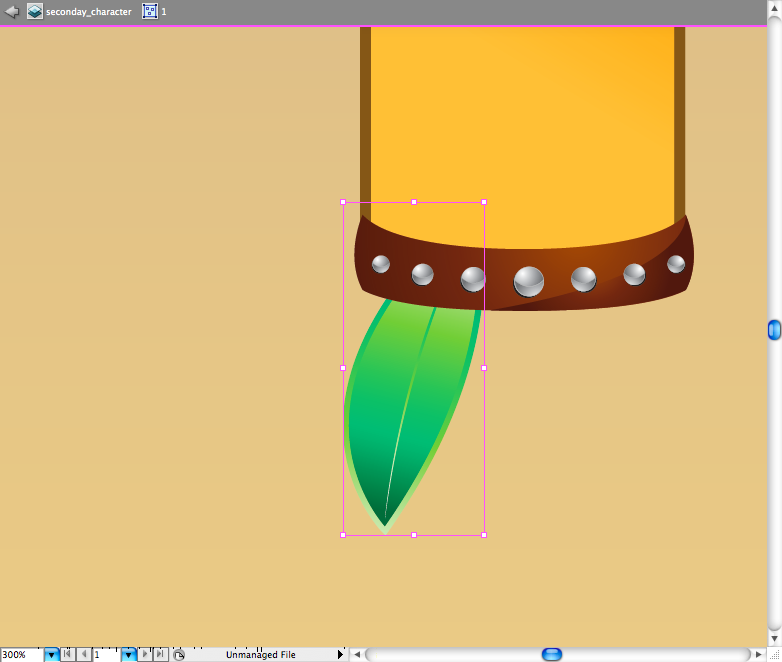
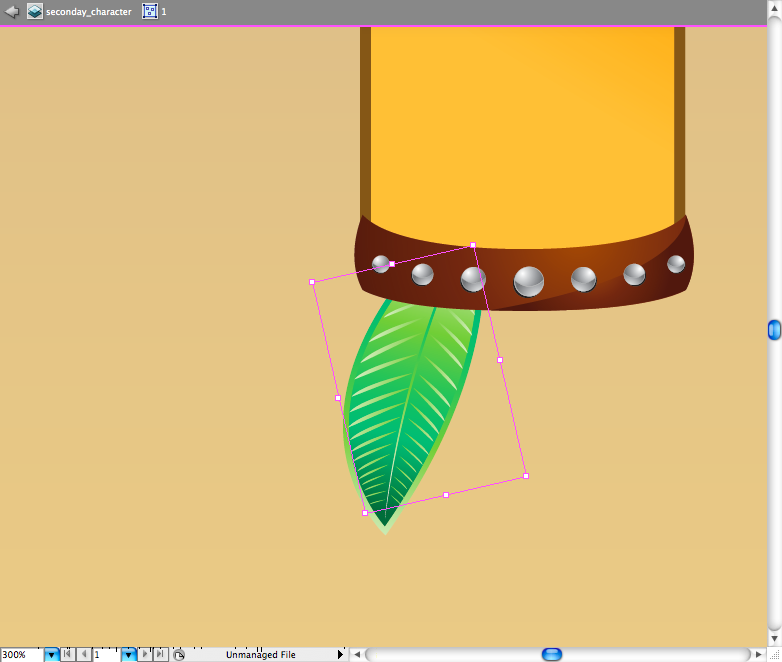
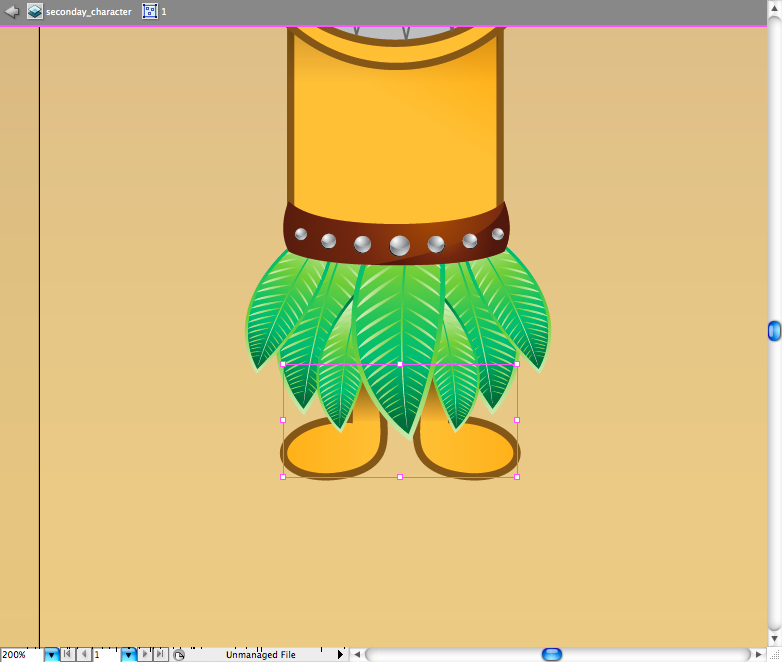
Step 9Now let's try to draw the leaves skirt, using the pen tool ( P ) draw this leaf shape, then add some green gradient anda green stroke to it. Using the pen tool ( P ) create all this lines and then put a gradient on it, I suggest you to first create the main line and then resize and duplicate it using the selection tool ( V ) + alt. Group ( ctrl + G / command + G ) all the elements of the leaf and duplicate and resize it till you got a skirt, this should take sometime.
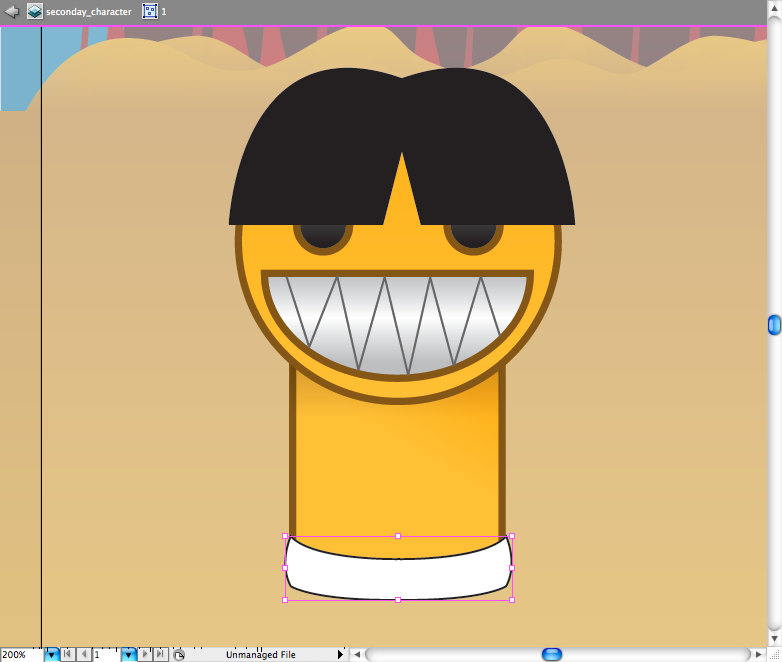
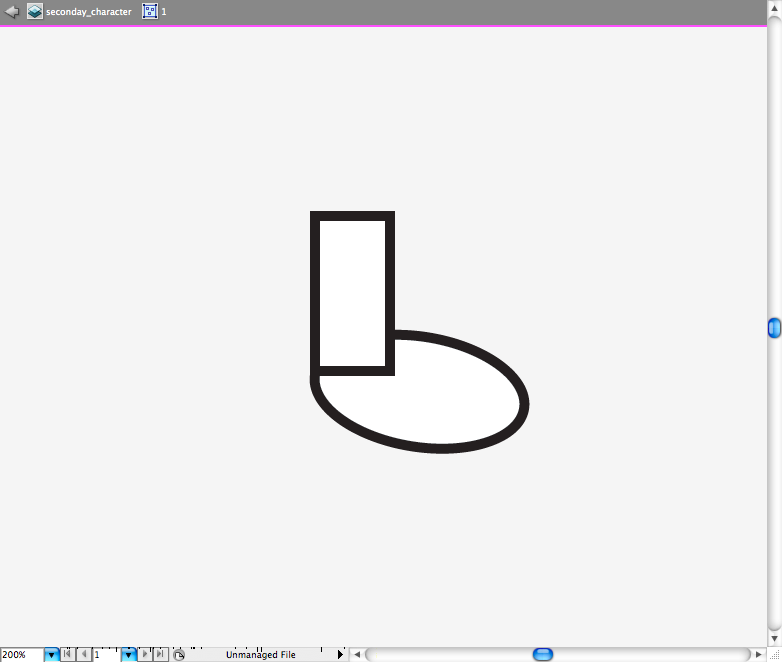
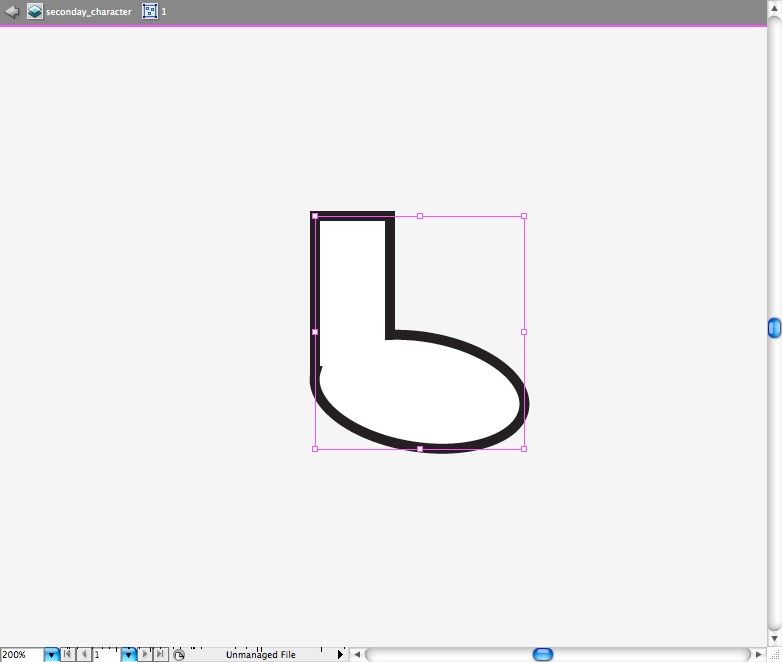
The easiest way to make a foot is to create a rectangle and a circle and posicionate them just like the image bellow, then access the pathfinder panel and choose the option called Unite. Duplicate the foot and put them above the leaves skirt.
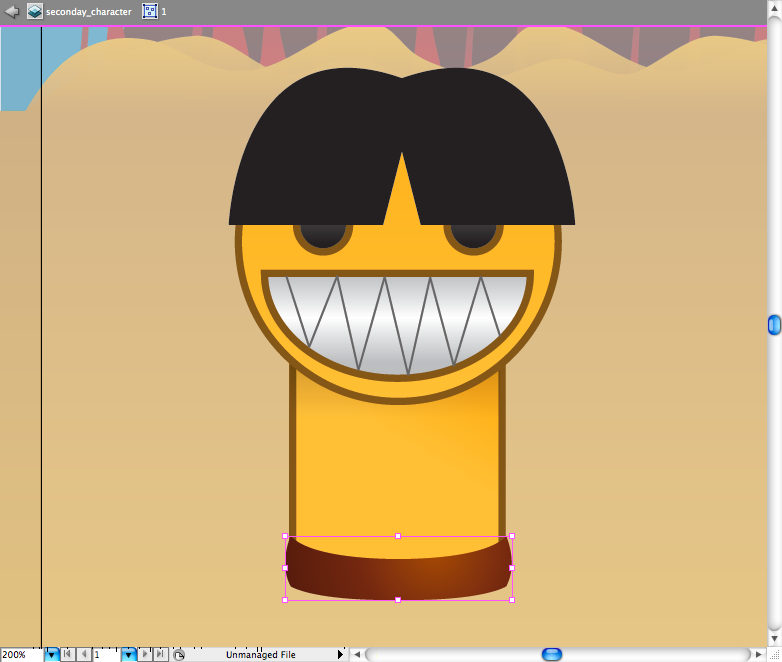
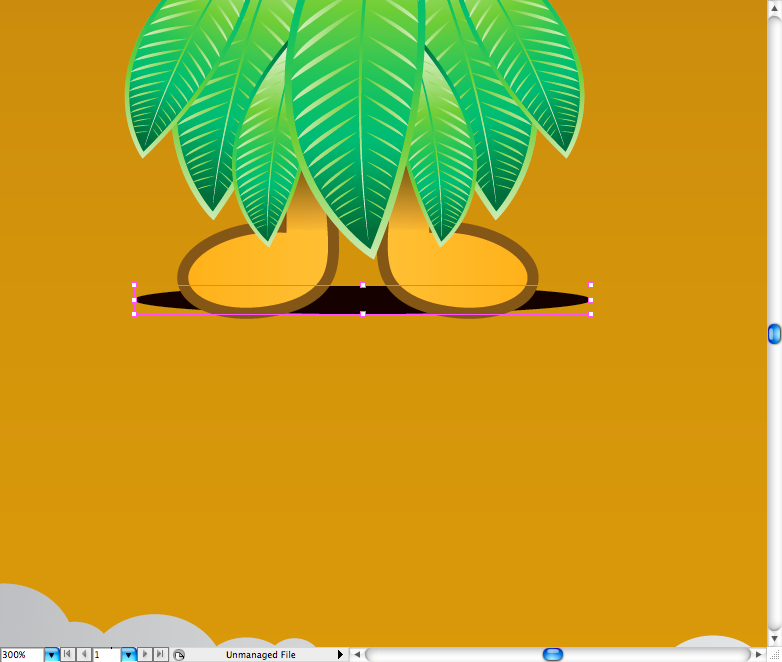
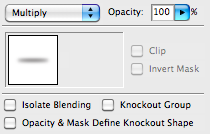
The shadow it's pretty easy to do, just make a circle using the ellipse tool ( L ) and then go to Effect > Blur > Gaussian Blur and set radius to 35 pixels. Access the Transparency panel and choose the blending mode called Multiply.
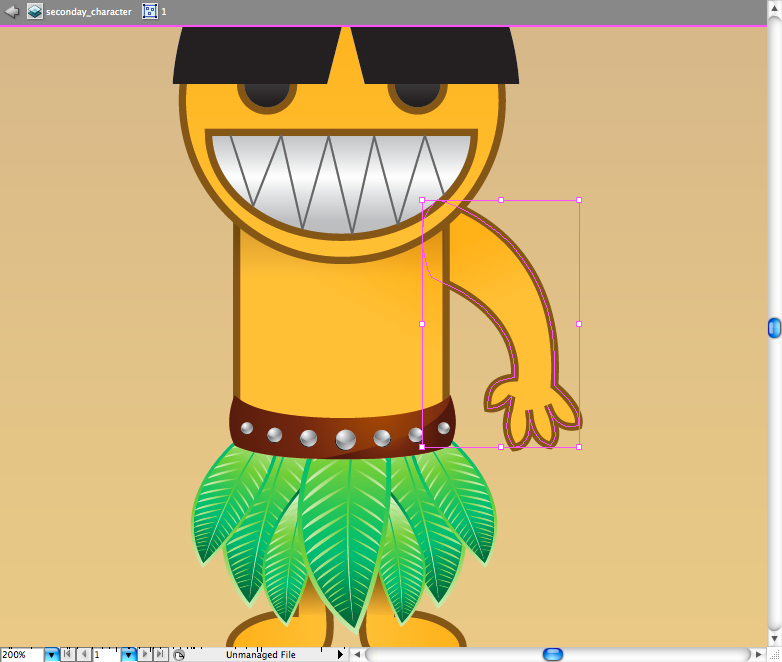
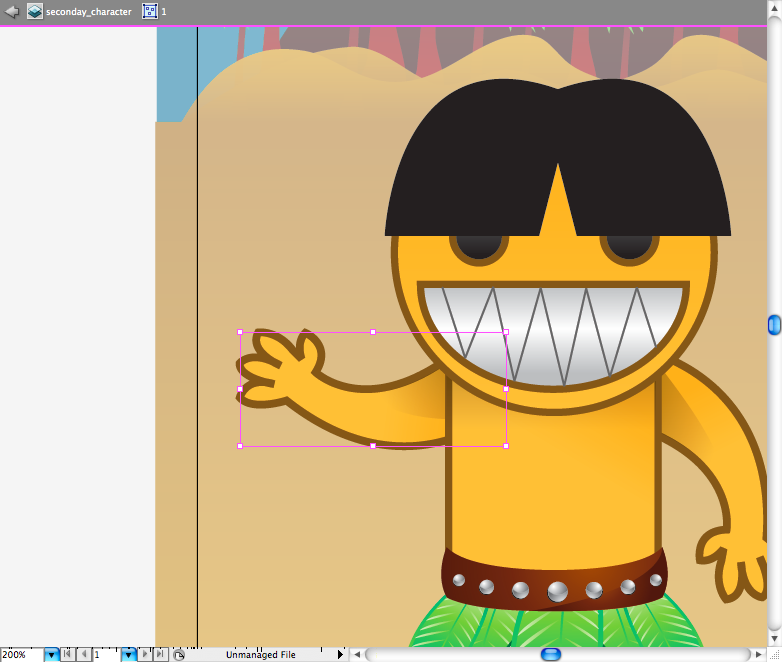
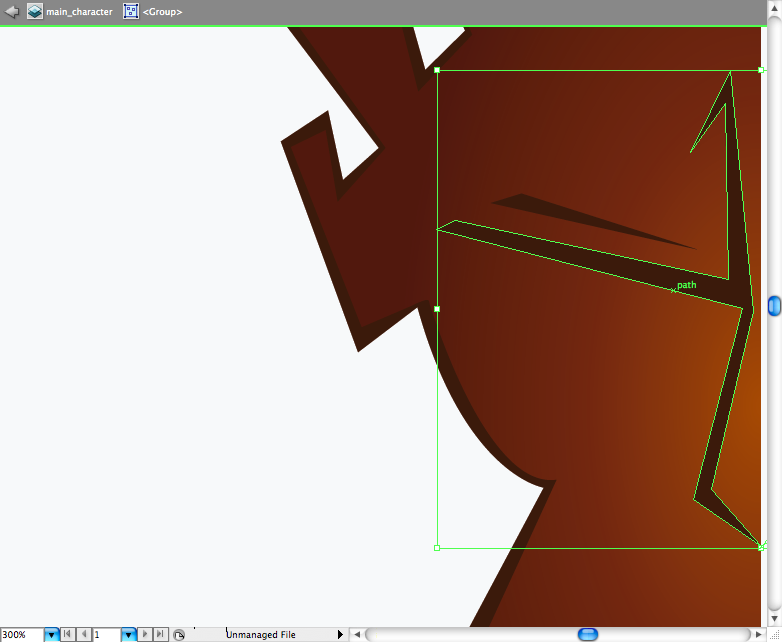
Step 10Well, I really don't know any shortcut to draw the arm, so you gonna have to try to draw it with the pen tool ( P ), I also drawed the shadow of the army on the same way. To make the left army I just copied and pasted the arm, then rotate it.
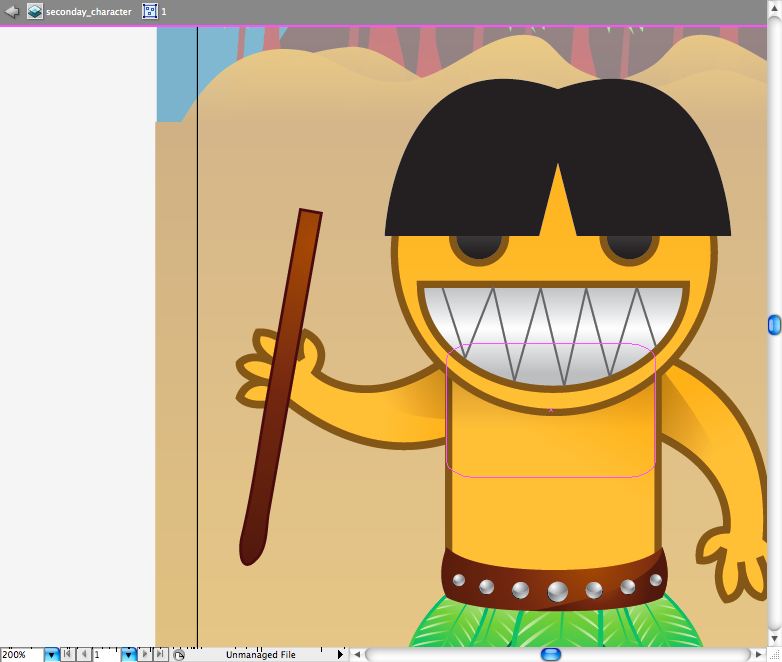
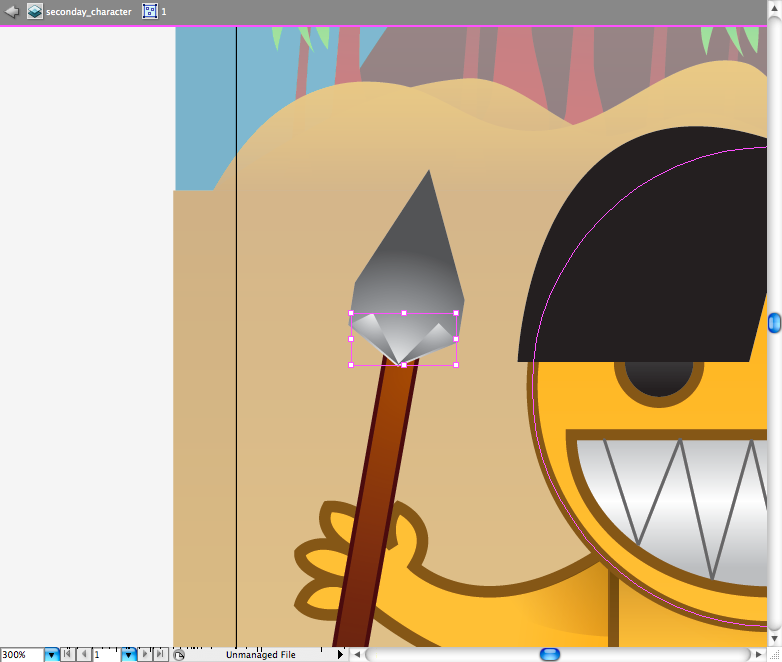
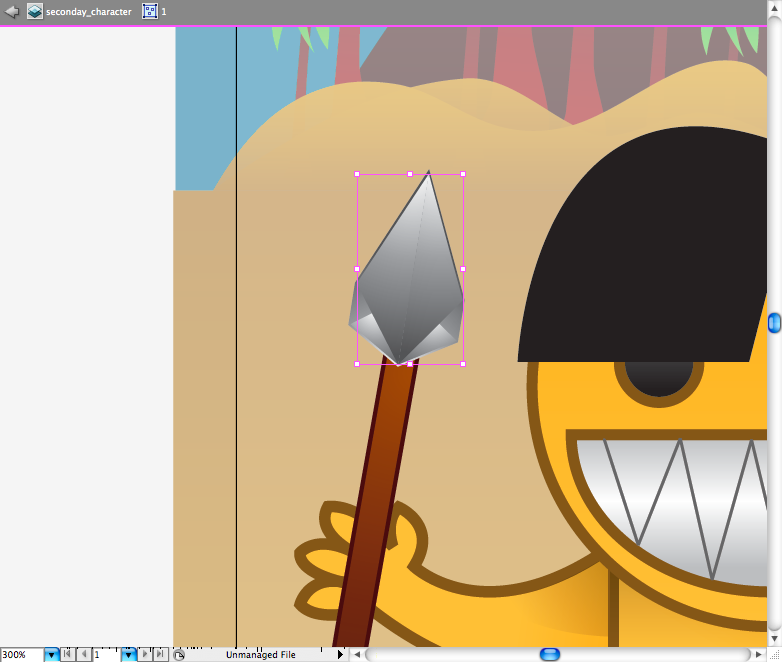
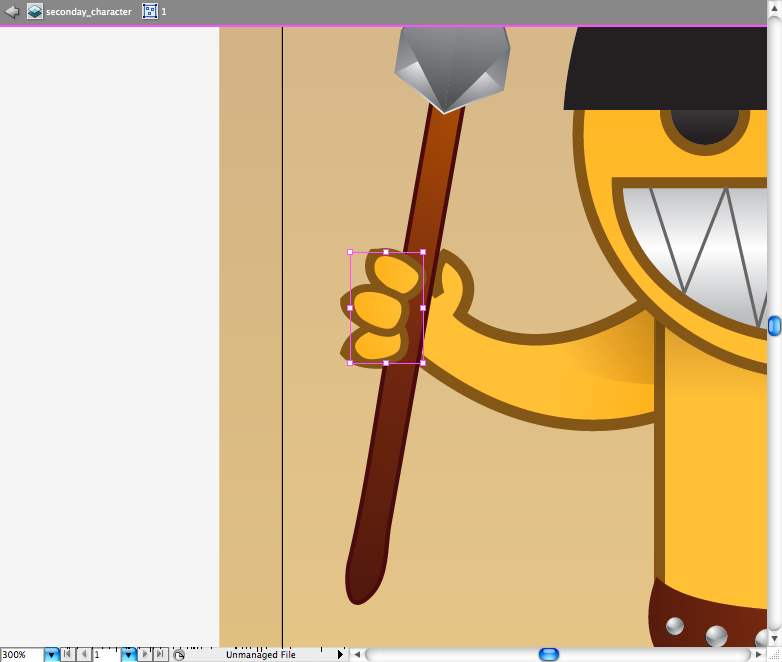
Making the spear was quite a experiment with gradients, first using the rectangle tool ( M ) I create the stick, use the pencil tool ( N ) to make the bottom of it round. I don't know exactly how to describe the process of making the stone of the spear, like I did a couple of grey gradients with the pen tool ( P ) and then adjust them with the gradient tool ( G ) till they it get some depth effect. But you can't let the spear floating so make some fingers using the ellipse tool ( L ) and adjusting it with the direct selection tool ( A ).
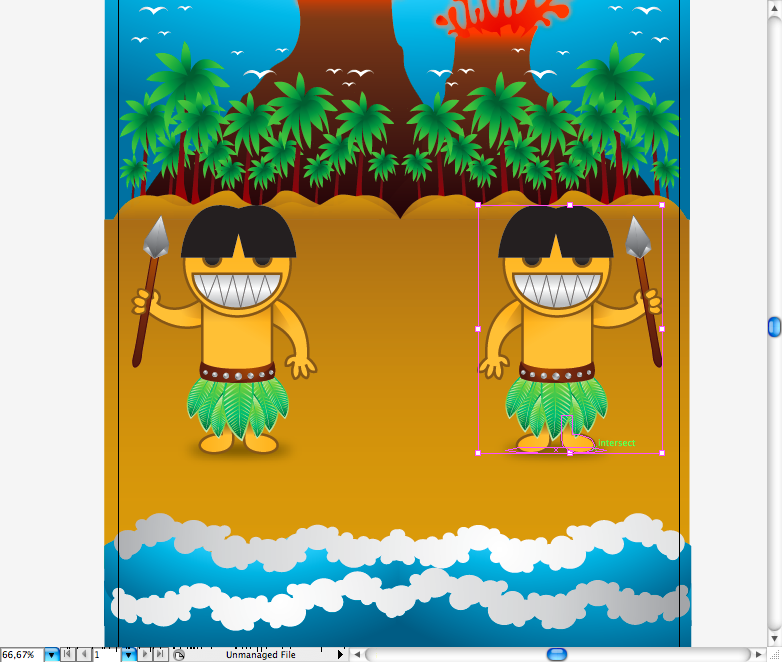
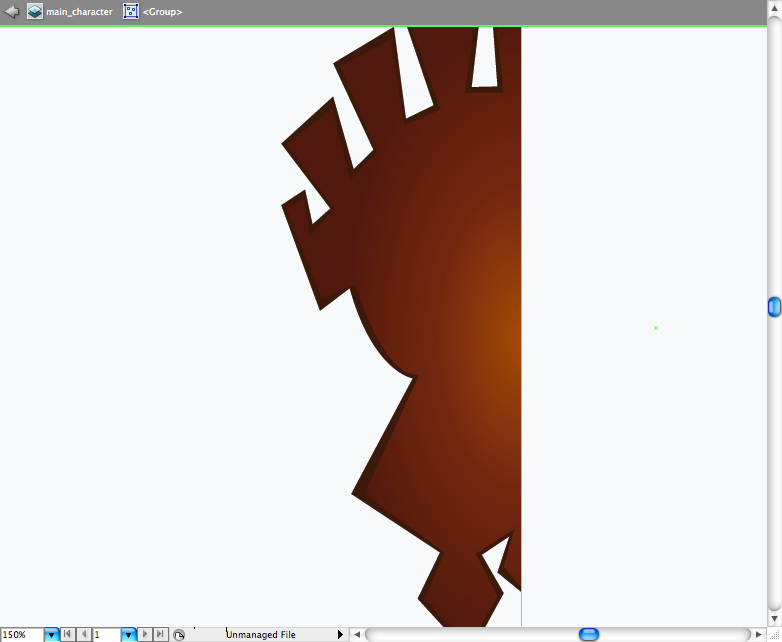
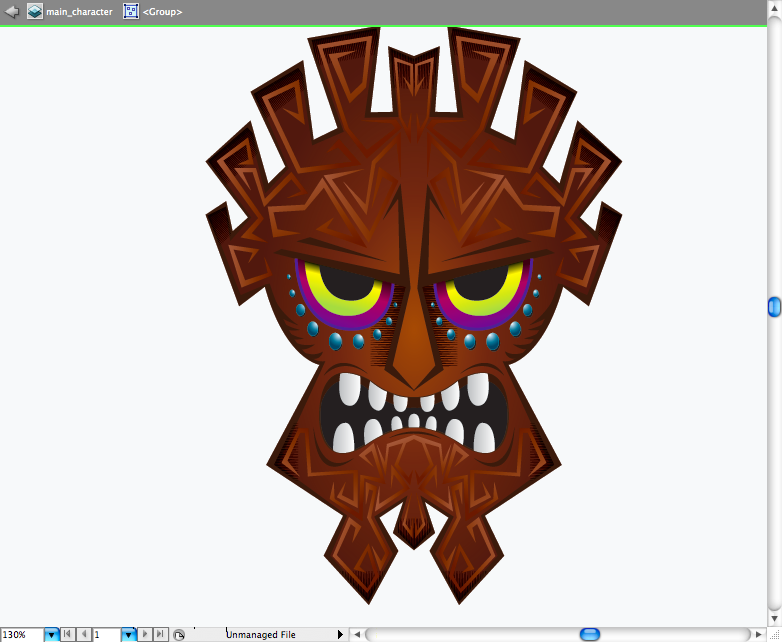
Step 11Now just copy and reflect the native to the other side using the selection tool ( V ), did the same thing for the main character, but put a bigger shadow on the body and put the arms more far from the body, because of the size of the mask we are going to do next.
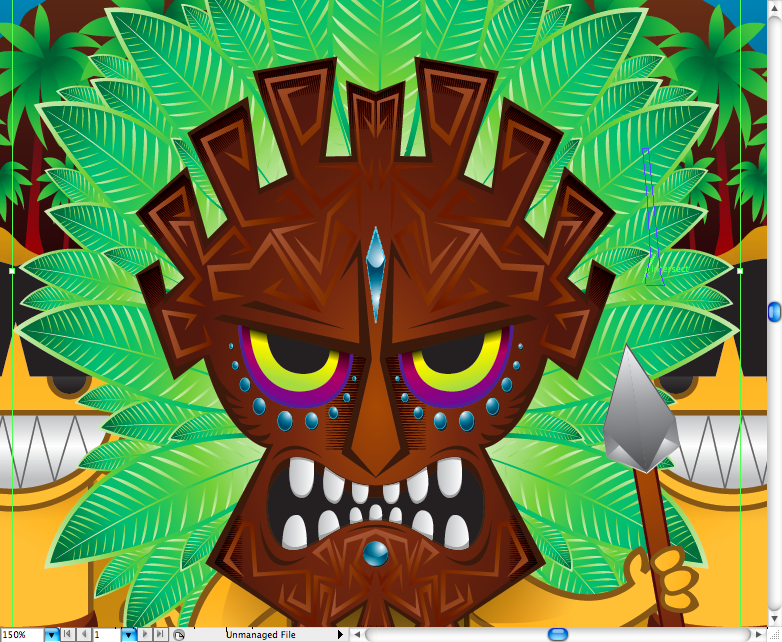
Step 12Well, sometime ago I did a tutorial of how to create a Hellboy Poster , if you already read it you will find this part a lot easier to do, if not I'd suggest you to read when you got the time. First we're going to draw the shape of the mask with the pen tool ( P ) , you don't have to draw the same shape as me, feel free to create your own version. Next I made the fill withe the pen tool ( P ) and added a radial brown gradient.
Again using the pen tool ( P ) , let's draw the nose and the eyebrown. Then, using the pen tool ( P ) let's draw the mouth hole and a brown shape to create depth.
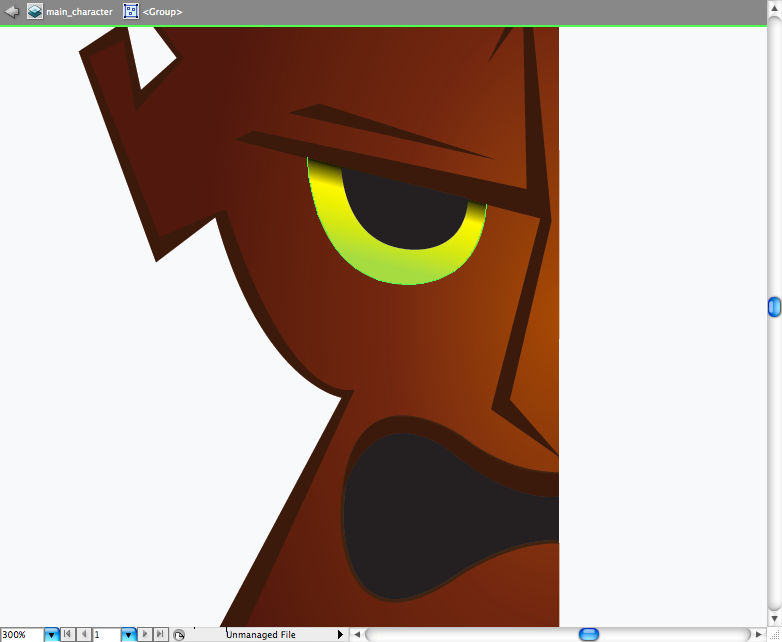
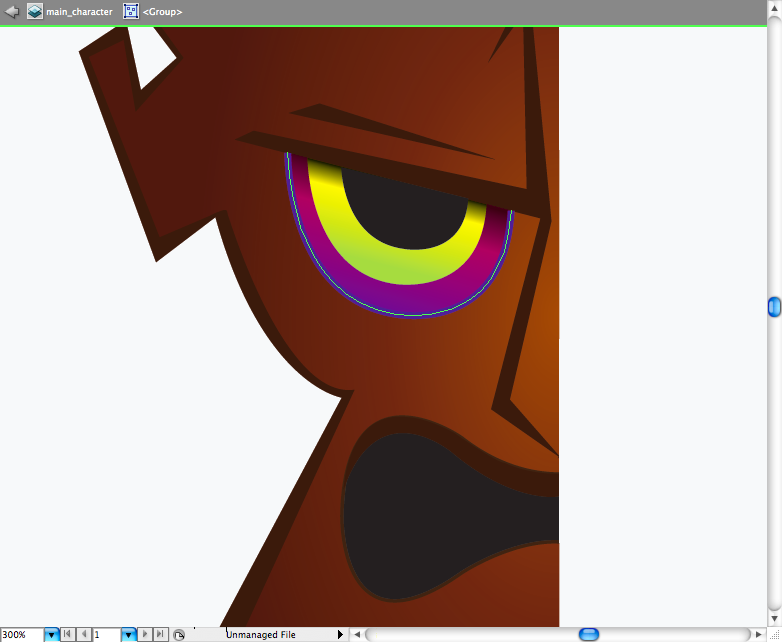
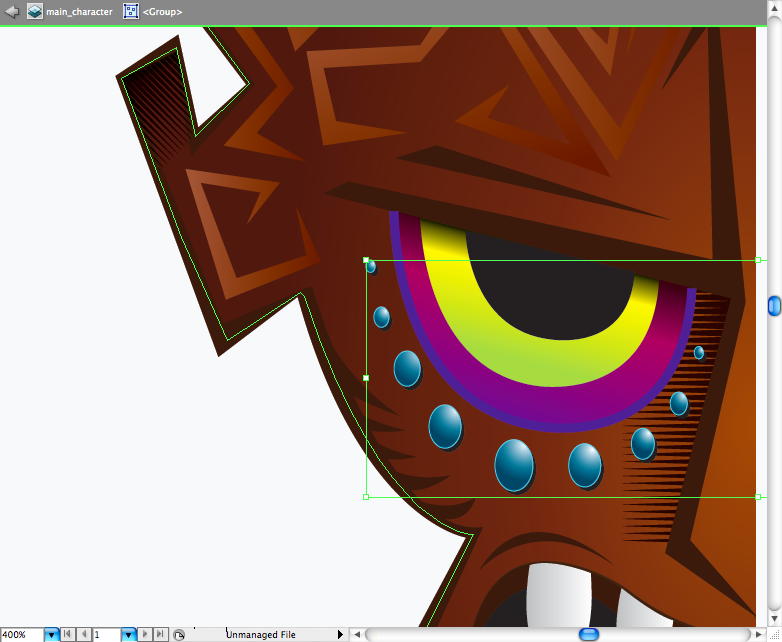
Remember the procedure we did to create the native mouth? Yep, that's pretty much this same step, but this time you will rotate and adjust it with the direct selection tool ( A ). Duplicate the eye and resize it using the selection tool ( V ) , choose a yellow gradient with a bit of black on it, adjust using the gradient tool ( G ) so it get on the top next to the eyebrown. Repeat this procedure but this time use a purple/pink gradient with a purple stroke, adjust till you get some depth.
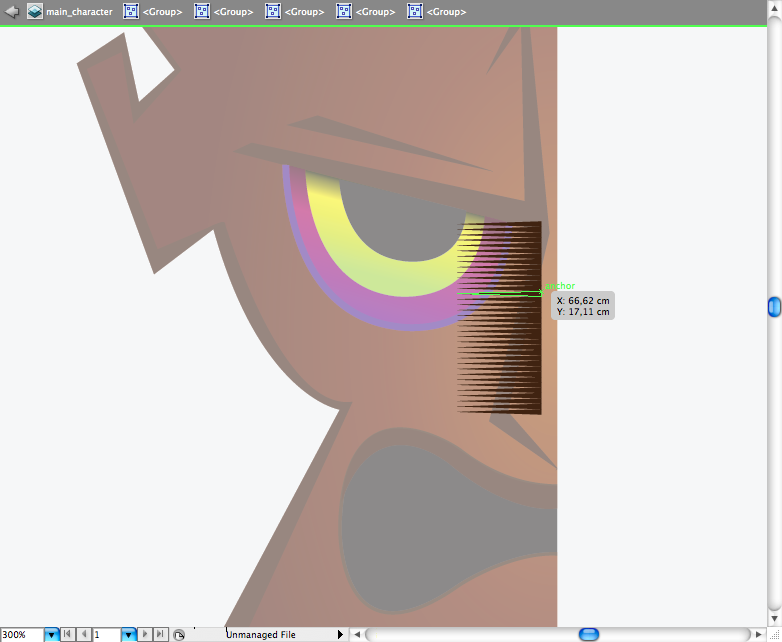
This is another nice trick: make a series of triangles, the easiest way is to make it with the pen tool ( P ) and them duplicate it many times. Posicionate it next to the nose to make the shading, then again with the pen tool ( P ) trace the area you want the shade to appear, select all the triangles and make a clipping mask ( ctrl + 7 / command + 7 ).
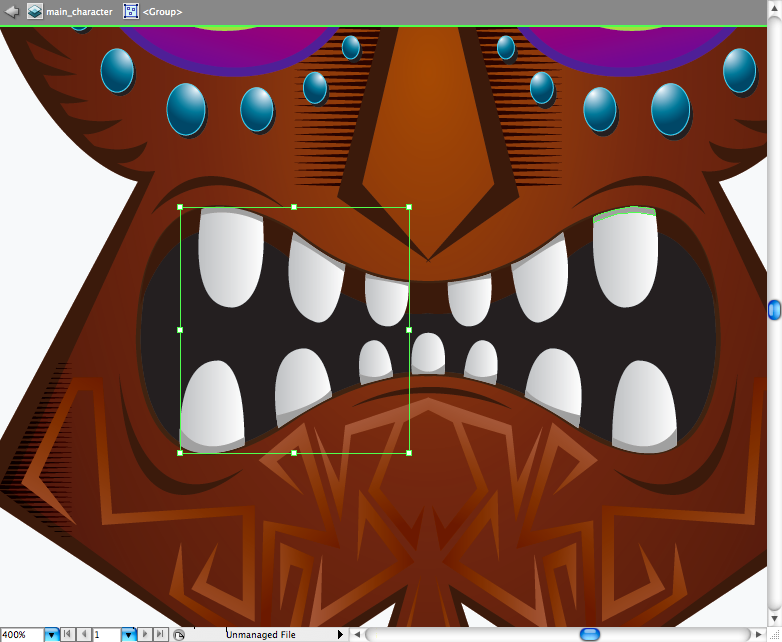
The teeth is pretty easy, just make this oval shapes with the pen tool ( P ), then add some wrinkles to the mouth.
I added some more shading to it, just make the same procedure I've explained above.
The tribal drawings are pretty easy to do, just make this sharpy shapes around the face of the mask with the pen tool ( P ) , then add a light brown gradient.
Remeber the shinning stones on the native belt? Go there get it, then just delete the half moon shape and duplicate it along the eyes.
Magic trick: select all the elements, duplicate it and reflect it. Now that's a tribal mask, huh?
Using the pen tool ( P ) add some details in grey to the teeth.
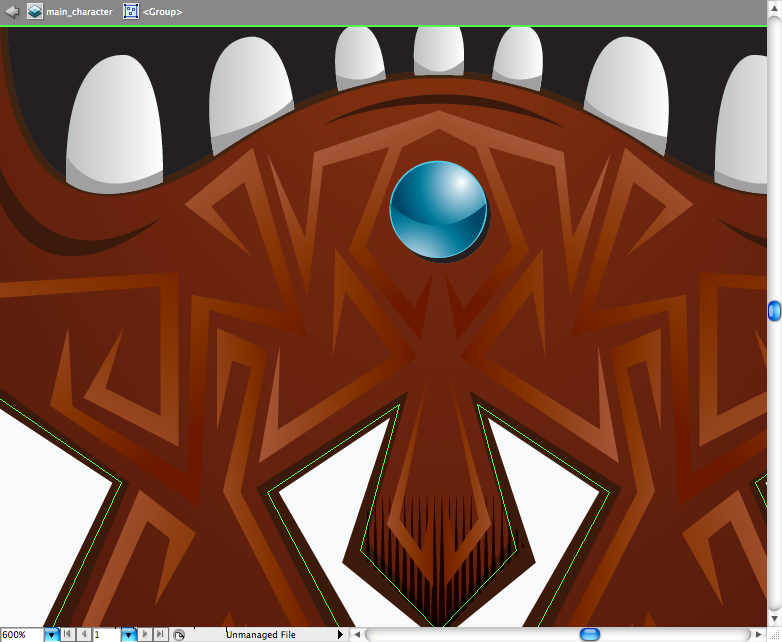
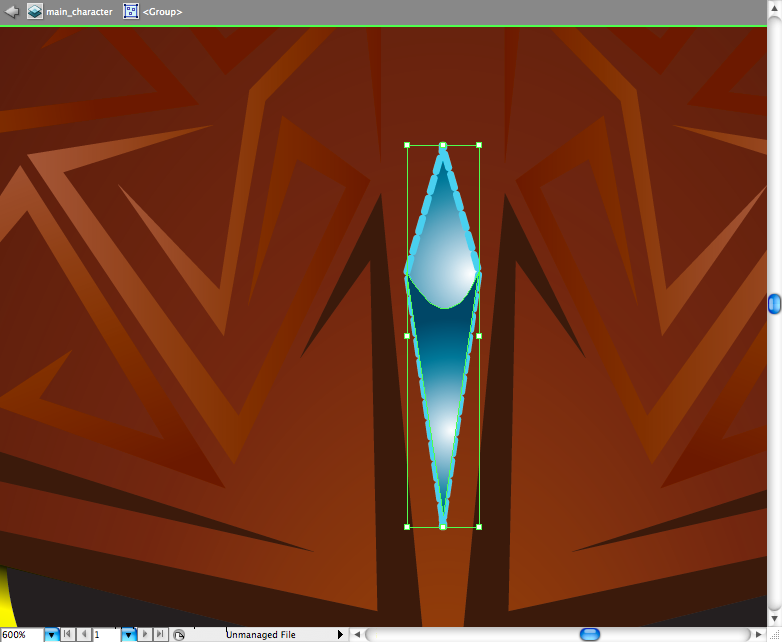
Again, get the shinning stone but this time just change the color of it to a blue gradient, posicionate it right bellow the mouth. You can also make a shinning stone beetween the eyes doing the same procedure of steps ago. Then finally place it on the body we did on step 11.
The cockade is basically the leaves of the skirt larger and repeated along the mask, pretty easy to do.
Final ResultI think after all this work we must admit: illustrator is 70% pen tool, it's the best tool to make illustrations and shapes at all. So if you had some difficulty on this tutorial, i would suggest you to train more this skill, it's really important to know how to manage it. Hope you have enjoyed this time guys, see you next time.
Download the filesCLICK HERE TO DOWNLOAD ALL FILES USED FOR THIS TUTORIAL |
| Posted: 13 Mar 2011 08:00 PM PDT
We've seen some great gadgets and equipment for designers. So many cool stuff, that we could actually assemble infinite perfect office spaces! Every week we'll assemble a perfect office, and we'd like you to help us. What equipment would the perfect office have?<!--break--> Not only gadgets and equipment, but also furniture, sound system, gaming stuff (for lunch time!). A designer is totally allowed to dream with the perfect office, and that's what we're gonna do here! Also, tell us your suggestions, or even better, you may tell us via twitter (mine and fabio's), using #abdz_ofc so we can check it. Alright? I hope you guys enjoy this brief selection. Cheers! ;) Bigbang by Katarína Belicková The BIGBANG candlestick is a product created for non-traditional home revival. It consists of seven sections that can be used separately, but as a whole create the right effect BIGBANG. (at From Europe) Philips FloatingCushions headphones Comfort is certainly the aim for Philips' new SH series headphones, and they certainly have a compelling case. The magic behind these lightweight cans is FloatingCushion, which is essentially just memory foam that seals nicely around your ears for both comfort and reduced audio loss. Simple, but seemingly effective. No word on whether these softhearted headphones will make it to the US, but according to Pocket-lint there will be six of these in total, four of which being a Bluetooth SHB9100 model, an over-the-ear SHP8000, and two folding compact SHL9000 variants (one with in-line remote and mic). (at Engadget) Moshi Moshi 03i An awesome iPhone adapter to use it as a regular phone at home. (at Native Union) Verbatim Mini Wireless Slim Keyboard & Mouse Verbatim has launched a new and very portable mouse and keyboard set that is aimed at the mobile user wanting an external keyboard for more comfortable typing. The new mouse and keyboard set is called the Mini Wireless Slim Keyboard & Mouse and both connect with one wireless USB adapter. The system uses 2.4GHz wireless tech and has full media controls for playing music and video from across the room. The keys are quiet and provide good tactile feedback according to Verbatim despite the slim low profile design. (at Geeky Gadgets) New Sony VAIO S The VAIO S elicited some excitement it will be loaded with either the 2nd Gen Intel Core i5 or Core i7 processors. Key features of the Sony VAIO S laptop that you will find pretty interesting include - Intel WiDI 2.0 which allows wireless streaming to your HDTV and 15 hours of battery life. Other specs and features include - a 13.3-inch display with 1366x768 resolution, black or magnesium and aluminun chassis, up to 8GB of RAM, AMD Radeon HD 6630 GPU with 1GB RAM for video performance, up to 500GB HD (7200 RPM) or 750GB HDD (5400 RPM), Bluetooth 3.0, USB 3.0, backlit keyboards, multi-touch mousepad and MOTION EYE webcams. (at Gadgetell) |


| You are subscribed to email updates from Abduzeedo | Graphic Design Inspiration and Photoshop Tutorials To stop receiving these emails, you may unsubscribe now. | Email delivery powered by Google |
| Google Inc., 20 West Kinzie, Chicago IL USA 60610 | |
Tidak ada komentar:
Posting Komentar