Abduzeedo - graphic design | design inspiration | tutorials - |

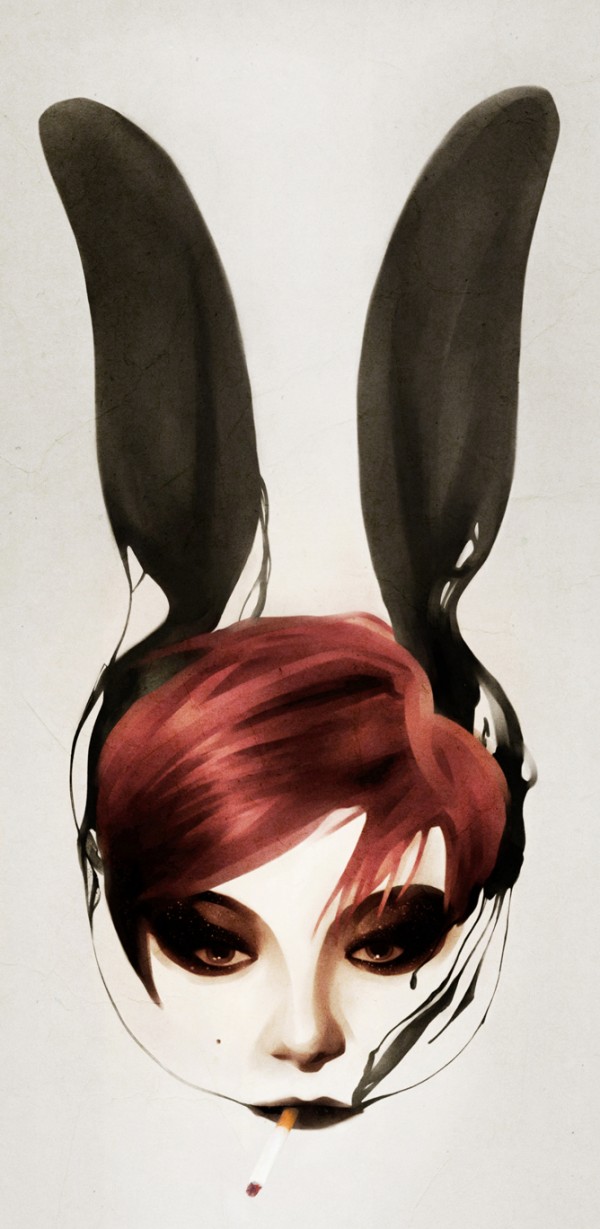
- Daily Inspiration #739
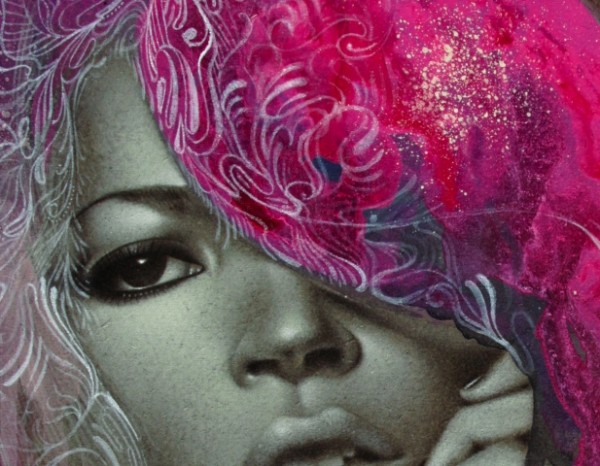
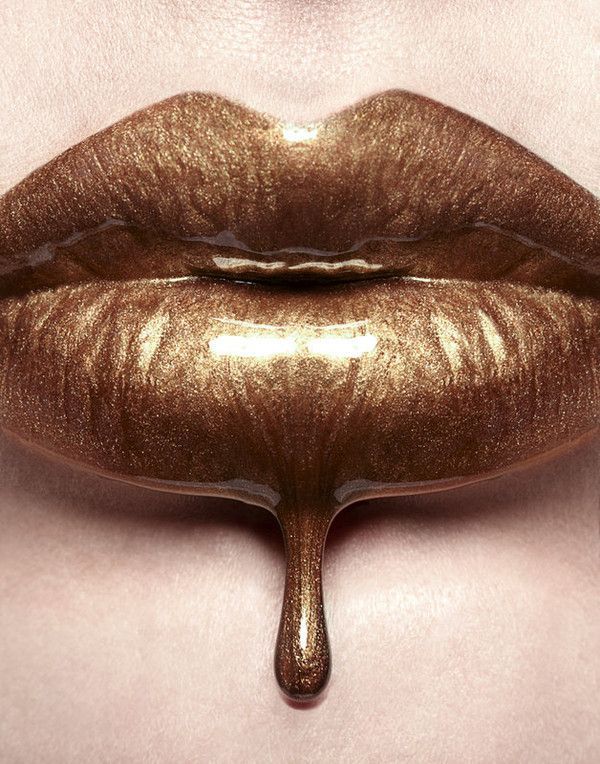
- The Creative Work of Vanessa Dualib
- The Art of Self Portrait
- The Perfect Office #75
- Create a Top Gun Badge on Illustrator
| Posted: 07 Feb 2011 11:11 AM PST
This post is part of our daily series of posts showing the most inspiring images selected by some of the Abduzeedo's writers and users. If you want to participate and share your graphic design inspiration, just send us, via email, the image with the link from where you found it, also use "Daily Inspiration" in the subject, and don't forget to send your Abduzeedo username; or via Twitter sending to http://twitter.com/abduzeedoIf possible use the HTML code: <p class="imgC"><a href="Link to the page you found the image"><img src="Link to the Image" /></a></p> Do you want to see all images from all Daily Inspirations? Check out http://daily.abduzeedo.comAnderson Tomazi
Arthur Presser
Best Bookmarks
coolvibeblog
DaCas
Fabiano
Fabio
Feature Me
Flyerfolio
Gisele
HdK
klefue
Hysterical Minds
Jeriko
TRAILER | Setubal, uma galinha que nao canta | TRAILER from Low Cost Filmes on Vimeo. moncayo
nenuno
Newyorkiz
oxana
romukbl
Rubén
shelbywhite
Shoeven
Stéphane Meyer
Hooked - Creation on canvas from Traz on Vimeo. veronica sanchez
Via TwitterSend your suggestions via Twitter to http://twitter.com/abduzeedo using #abdz in the end of the tweet. @FilmmakerMike
@marcos333
@daniel_nelson
|
| The Creative Work of Vanessa Dualib Posted: 07 Feb 2011 10:08 AM PST
Everyday we receive emails from our readers suggesting artists for us to write about, and this is pretty cool since we get to know tons of new and creative artists. Today we will present you the work of Vanessa Dualib, which was presented to us by our reader Michelle Cleef. ;)Vanessa is a photographer who was born in São Paulo but spent an interesting amount of her life traveling and working abroad. She already worked in Disneyland and in a ship, those big fancy cruisers ships. All this traveling and meeting people influenced her creative way as you will see below. Check out more about her and her work at webiste or her Flickr gallery.
Eggventures of Eggbert
Playing with Food
|
| Posted: 07 Feb 2011 06:55 AM PST
Everyone has done it before, either with their camera or using a phone. Standing in front of a mirror and taking a shoot of your self, the old and famous myspace shoot. Here a good selection of self portraits and if you have one, share with us on the comment area.<!--break--> About the authorHi there! I'm Paulo Canabarro, 25 year old web designer from Brazil currently living in Providence RI, USA. I'm truly passionate about design of all kinds. Finding and sharing inspiration has become part of my life. If you have any suggestions or requests just get @ me - pvpcanabarro@gmail.com For some cool stuff make sure to Follow me on twitter! Sponsored Links:
|
| Posted: 07 Feb 2011 04:36 AM PST
We've seen some great gadgets and equipment for designers. So many cool stuff, that we could actually assemble infinite perfect office spaces! Every week we'll assemble a perfect office, and we'd like you to help us. What equipment would the perfect office have?<!--break--> Not only gadgets and equipment, but also furniture, sound system, gaming stuff (for lunch time!). A designer is totally allowed to dream with the perfect office, and that's what we're gonna do here! Also, tell us your suggestions, or even better, you may tell us via twitter (mine and fabio's), using #abdz_ofc so we can check it. Alright? I hope you guys enjoy this brief selection. Cheers! ;) Audiophile Headphones HD 598 audiophile headphones inspired by European sport sedans; Ergonomic Acoustic Refinement technology; Plush Premium metal mesh and sophisticated burl wood accents luxurious velour ear pads for long listening sessions (at 7 Gadgets) Etch a Sketch iPhone Case This iPhone 4 case is as functional as it is whimsical. It's a protective iPhone case made of impact resistant ABS plastic and molded to look exactly like a tiny Etch-a-Sketch. Know why? It's made in the same factory that makes the original Etch-a-Sketch toy. You can even run the Etch-a-Sketch app while using your iPhone 4 in its Etch-a-Sketch case, which is so much awesome that our heads might explode. (at Think Geek) Multi Lines Extension Cord Multi Lines is a new way to use extension cords. Instead of plugging and jamming all your plugs into an extension cord's block, Multi Lines distributes the electricity through the wire itself and the plugs extend to where you need them. You can connect many cords to each other to extend the length. Multi Lines is available in many colors, allowing you to integrate them into your room's decor. (at Holy Cool) Enermax Aeolus Premium Notebook Cooler nermax offers you their latest notebook cooler, the Aeolus Premium. Measuring 350mm x 335mm x 45mm and weighing 1.3kg, the cooler supports for up to 17-inch notebook and comes with a brushed aluminum construction, a large 250mm fan that boasts 15 blue LED lights, rubber feet for a good grip and two USB 2.0 ports. (at Techfresh) NoteSlate Need something to digitally record your hand-drawn notes but have no use — or no money — for the iPad's do-everything awesomeness? Meet the NoteSlate. This simple device sports a one-color eInk display in either white, black, green, blue, or red, a smooth, simple design, a battery good for 180 hours of work, and a simple list of inputs including a special pen with eraser, a mini-USB port, an SD card slot, and a 3.5mm headphone jack for listening to MP3s — okay, so they snuck that last unnecessary feature in, but what doesn't play MP3s these days? (at Uncrate) |
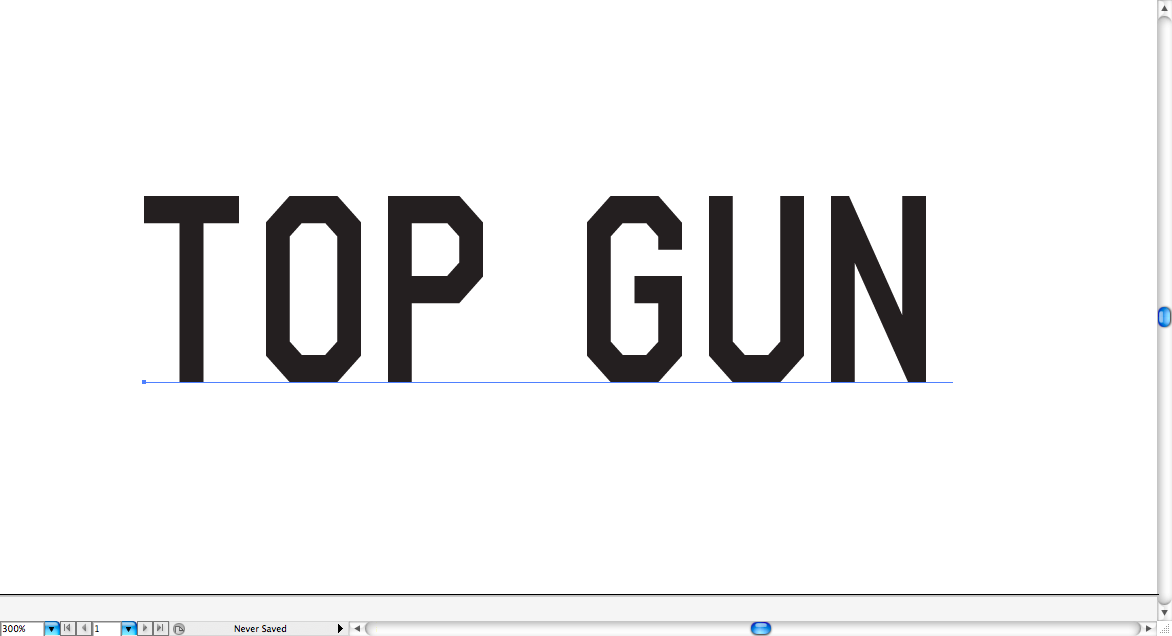
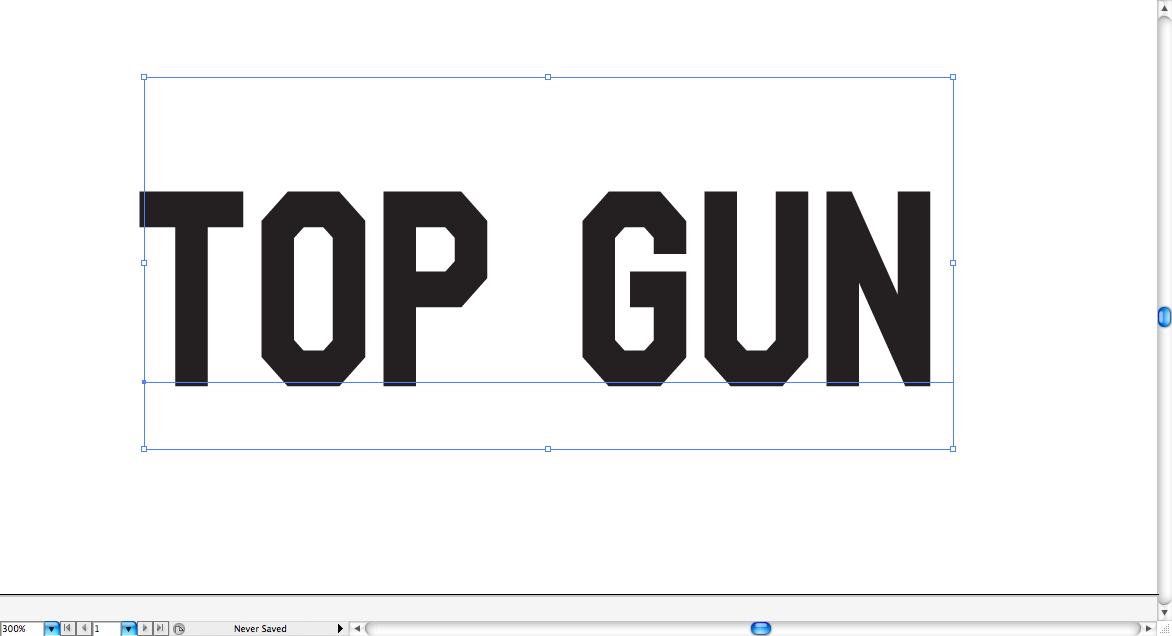
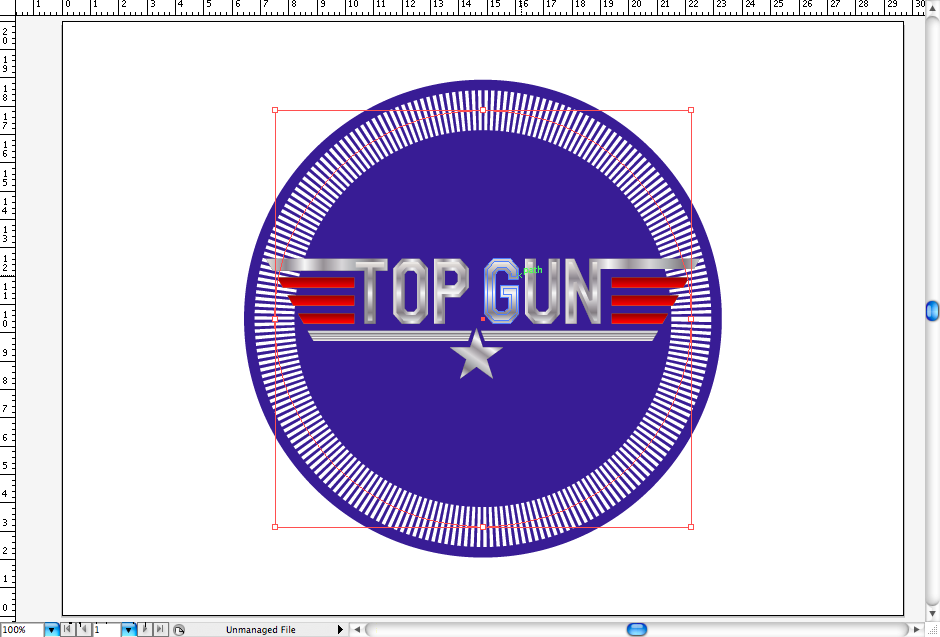
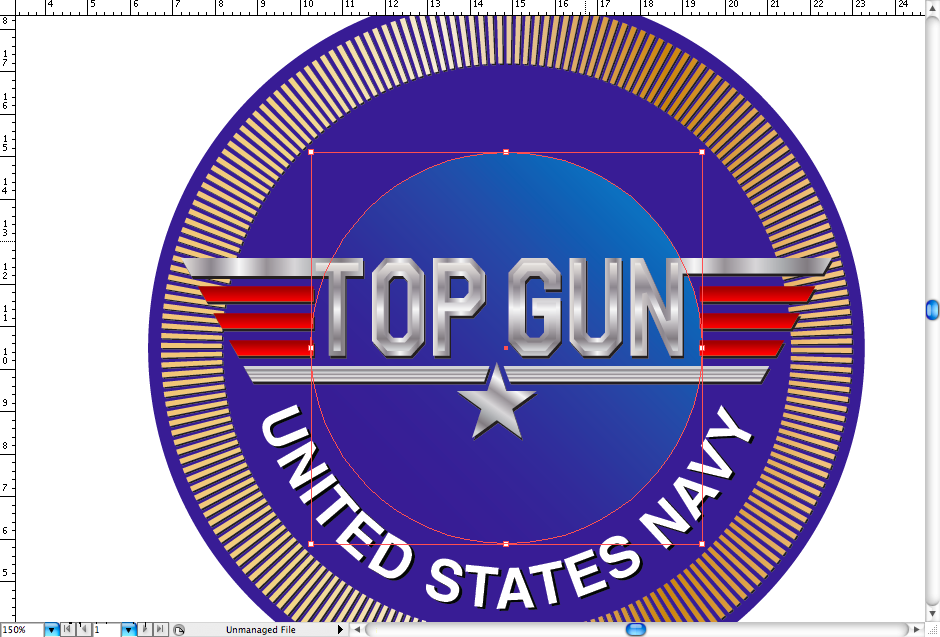
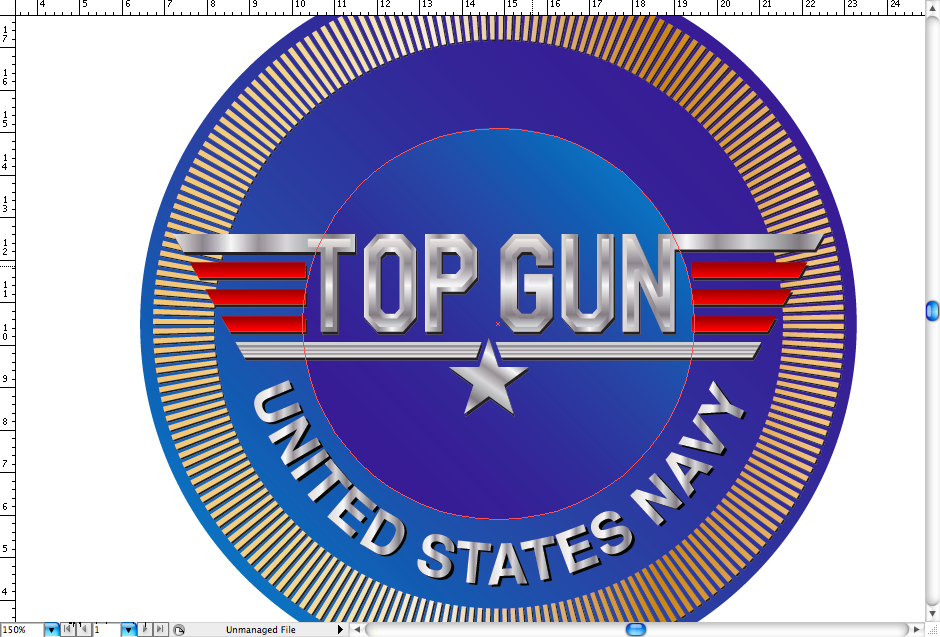
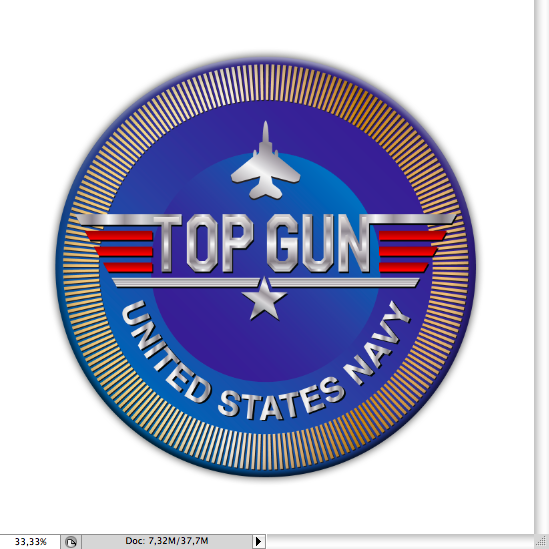
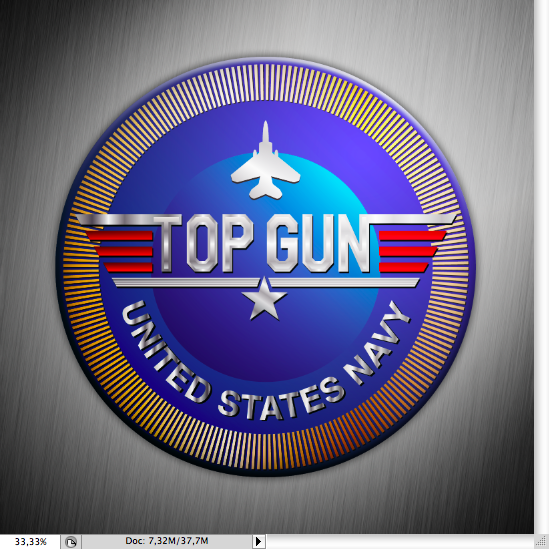
| Create a Top Gun Badge on Illustrator Posted: 07 Feb 2011 01:15 AM PST
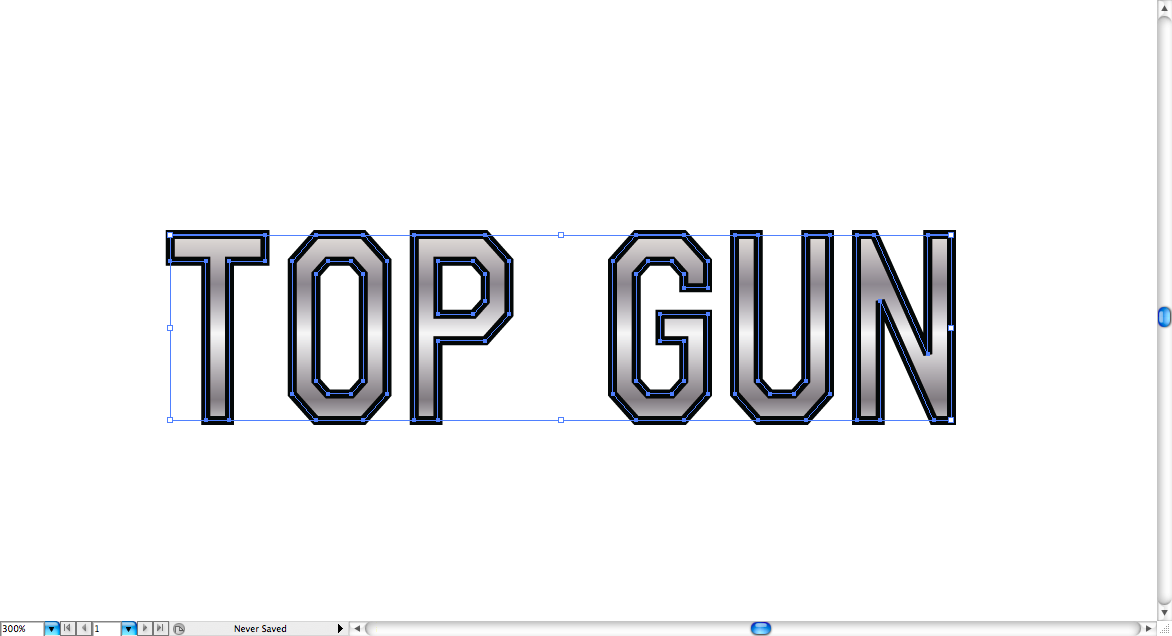
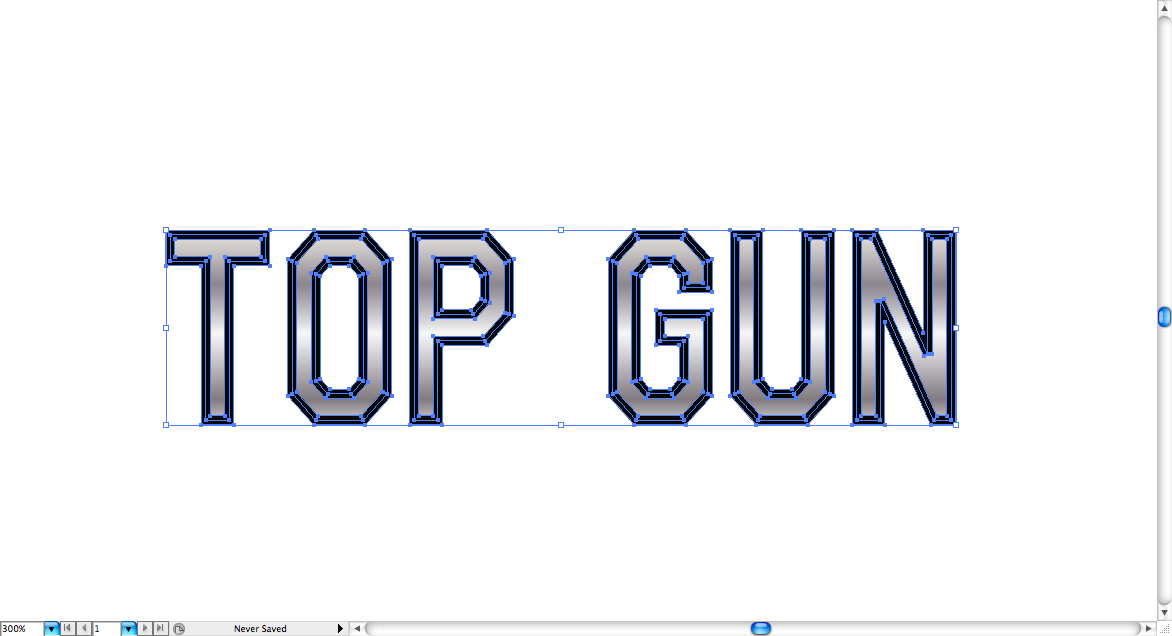
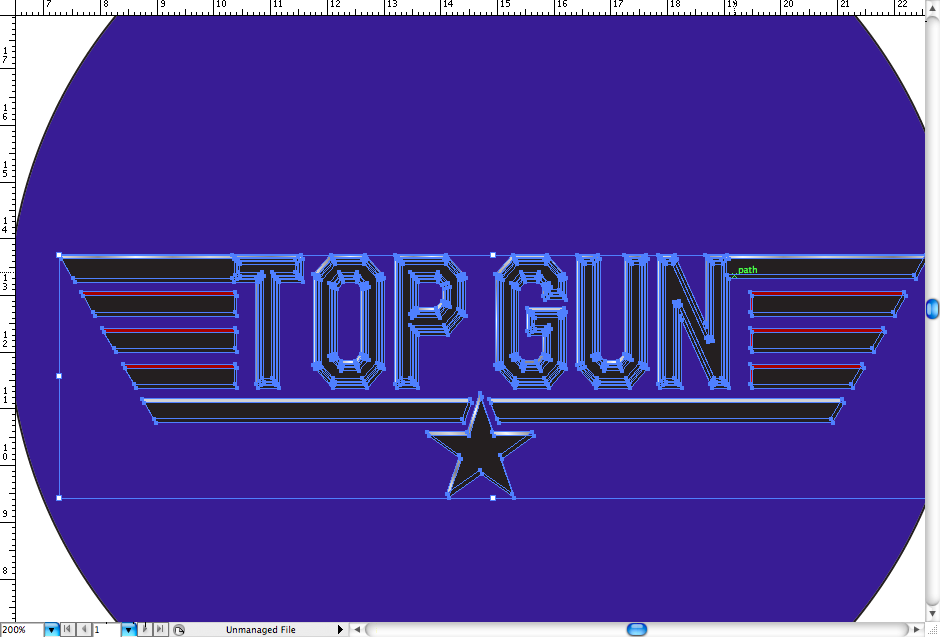
Some weeks ago, while watching the Montreal Meets I remember that Fábio and James talked about watching Top Gun. Some of you may not know, but Top Gun is a 80's classic, I was even born when it came in to the cinemas, but I watched later and I must say it is really badass. So, after watching my buddies speech, I just found myself watching the movie again and that gave me a nice idea for a tutorial.Today we're going to learn how to create this vector badge and add some extra feature to it look more awesome, this is a pretty simple tutorial, you probably won't have bigger problems to execute it, hope you like it (and watch Top Gun, of course). Step 1First of all open Adobe Illustrator and create a A4 canvas (29,7 x 21 cm / 11,69 x 8,27 inches). It was pretty hard to find a font similar to the original one used on the logo, but I found one called NovaMono that is quite similar, you can it download here. After installing the font, use the Type tool (T) and write TOP GUN in Uppercase.
Now add some heavy black stroke to it and adjust the kerning between the letters.
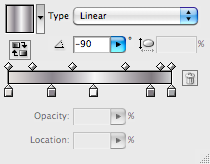
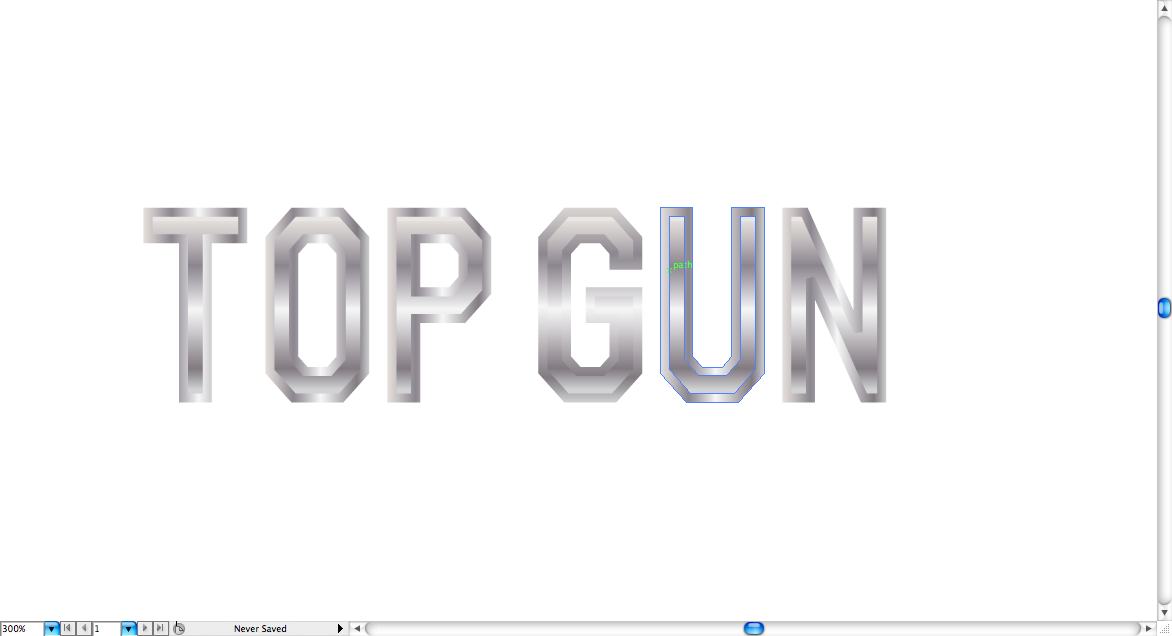
Create outlines (right click on the font and then select it) and make a grey metallic gradient using the Gradient tool (G) , make sure the gradient of all letters is on the same direction.
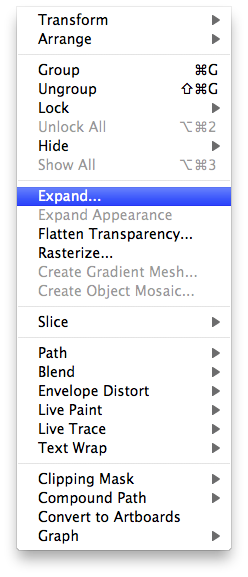
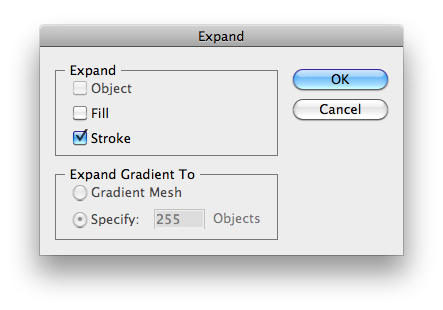
Now access Object > Expand set to only expand the Stroke, this will turn it to a separated path, then add the same gradient to its fill using the eyedropper tool (I).
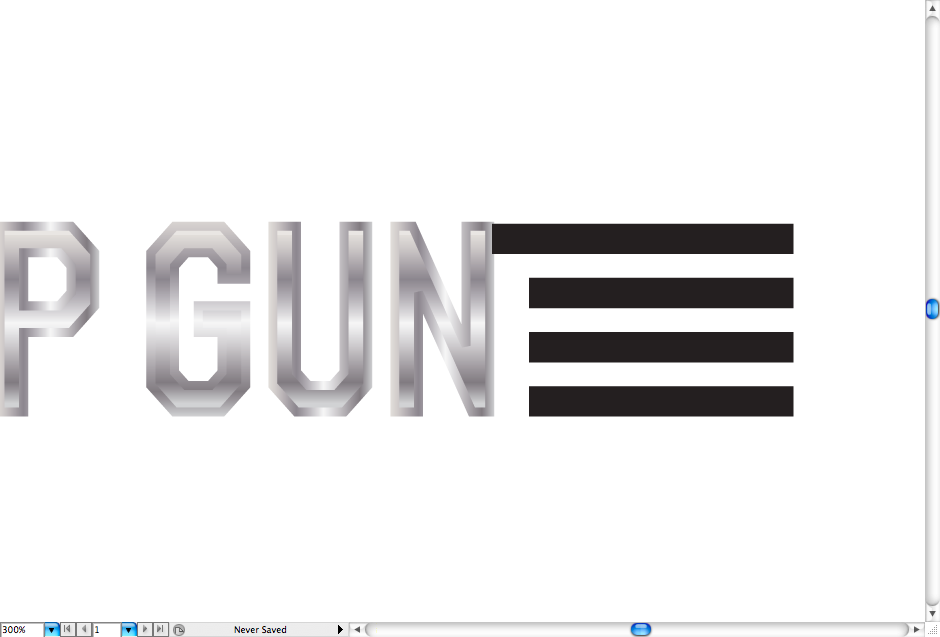
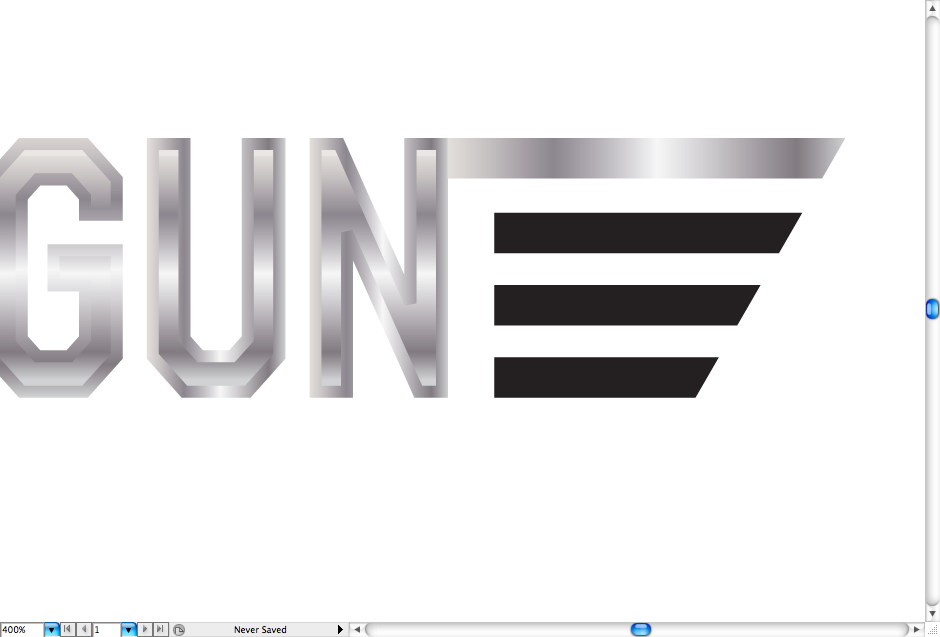
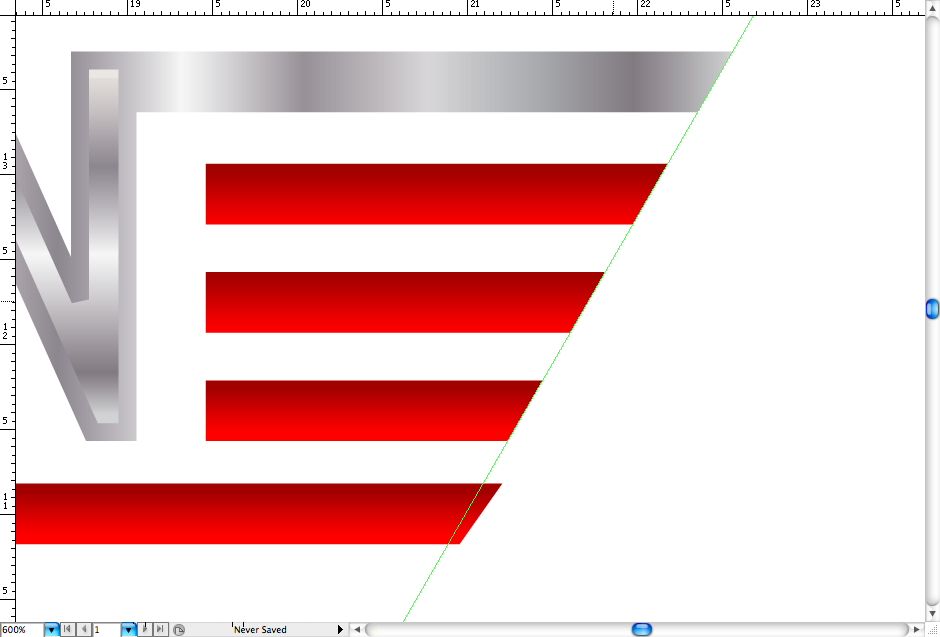
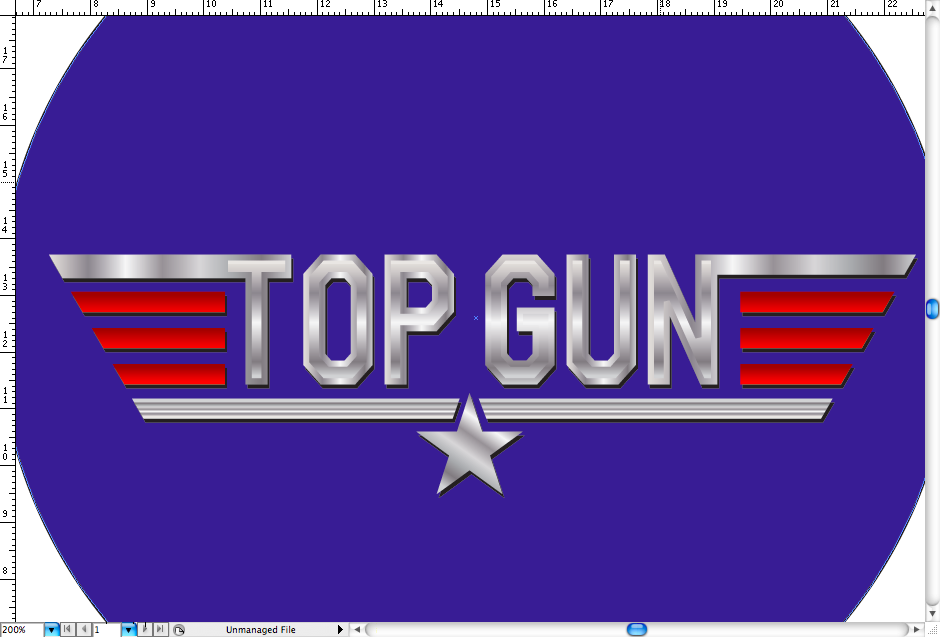
Step 2Then, using the Rectangle tool (M) create these four rectangles and align them like these. Get the last three rectangles using the selection tool (V) and decrease their width a bit.
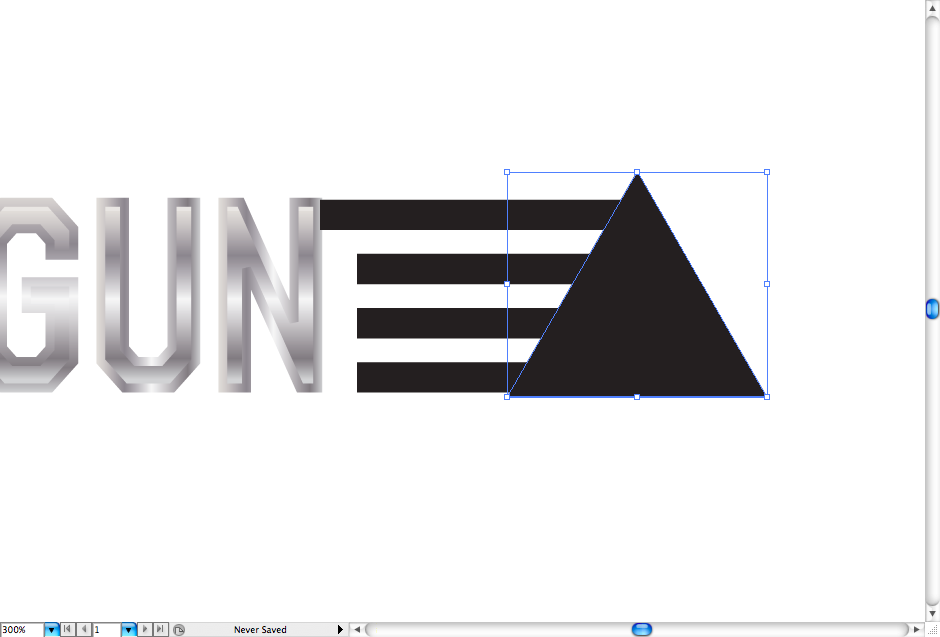
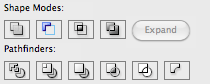
Here's a cheap trick: in order to get the same diagonal in all rectangles corners, create four triangle with the polygon tool or the star tool, make sure they are one exactly above another. Then access the pathfinder panel and chosse the option called Minus front.
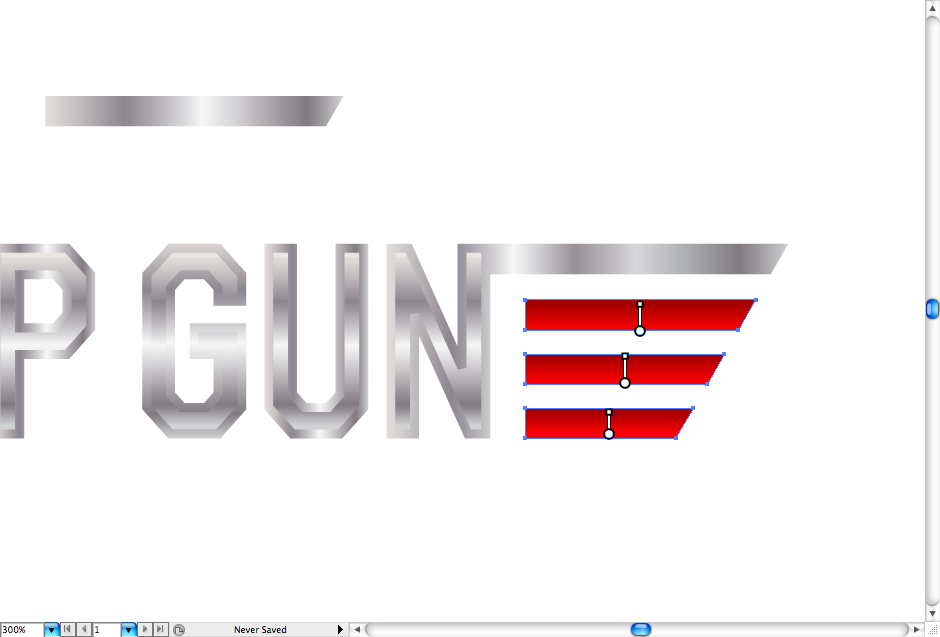
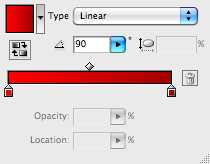
Change the upper rectangle to a metallic gradient, than access the "N" group till you find the original "stroke path", then access the pathfinder panel and choose the option called Unite, that should get things together. Using the gradient tool (G) make a dark red gradient in the other rectangles. Finally, repeat all the steps again in the other side, that should take some time.
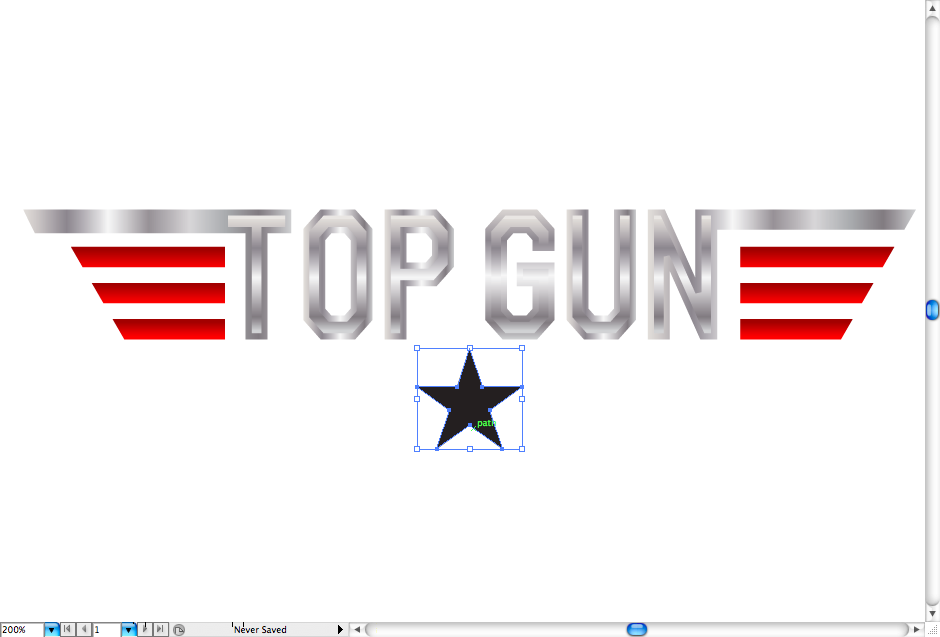
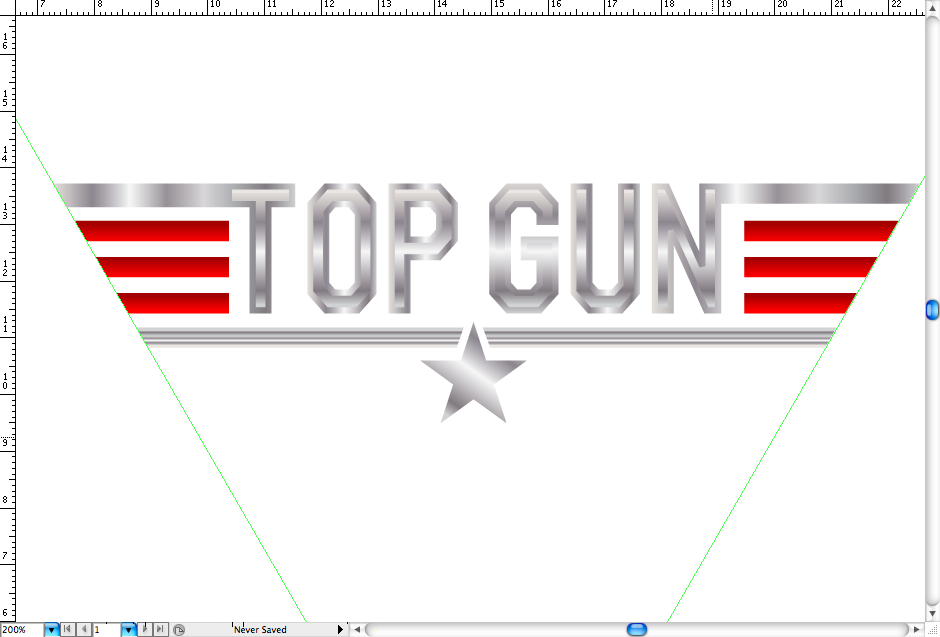
Step 3Create a five points star using the polygon tool or the star tool, posicionate it above the type.
Duplicate one of the red gradient rectangles using the selection tool (V) + alt then get a ruler (ctrl + R / command + R), access the transform panel and rotate it 30º degrees. That will help you to align the vector points in the same diagonal, use the direct selection tool (A) to adjust them correctly. Remember to copy the gradient from the letters using the eyedropper tool (I) on the lower rectangle.
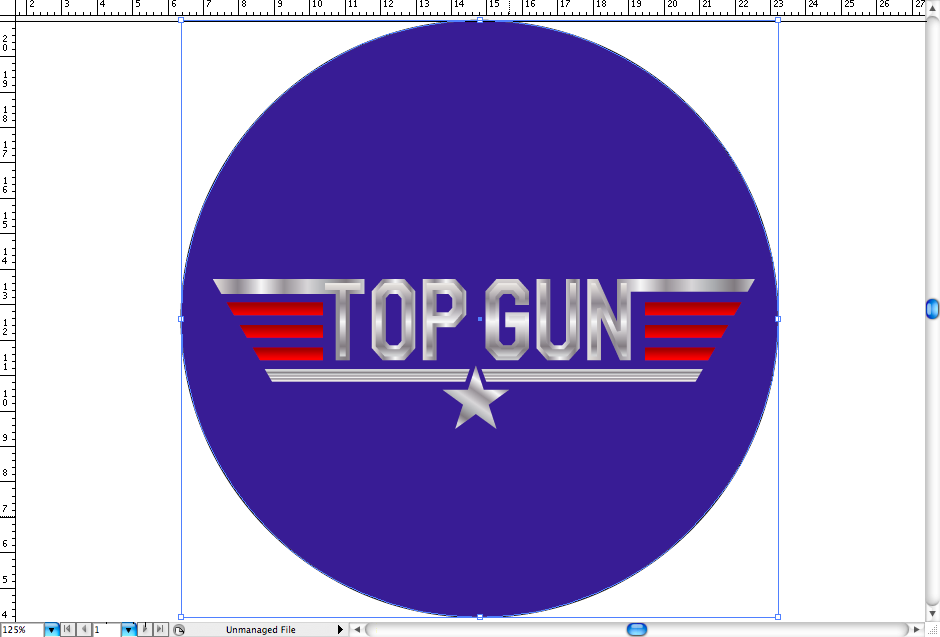
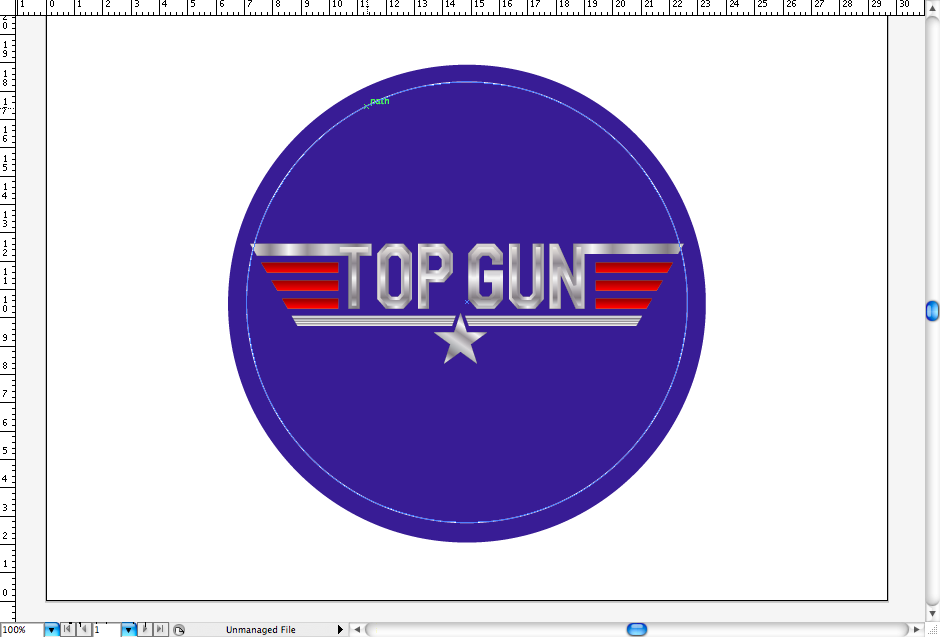
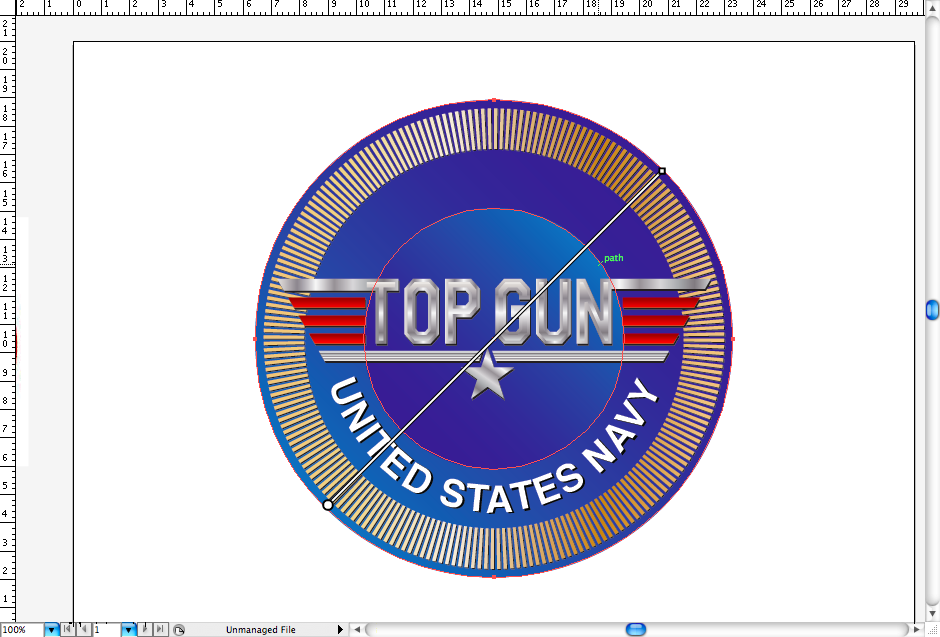
Step 4First create a new layer ( ctrl + L / command + L ) and call it background, put it above the title layer. Create a blue circle around the title using the ellipse tool (L)..
Group ( ctrl + G / command + G ) all the elements of the title, then just duplicate it using the selection tool (V) + alt, send this layer to back, now we have a hard shadow.
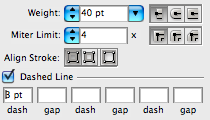
Create another circle using the ellipse tool (L) but disable its fill and use a white stroke. So, here I used a 40 pt stroke, but if you are using a scale different of mine you may probably have to adjust till you get this fat stroke.
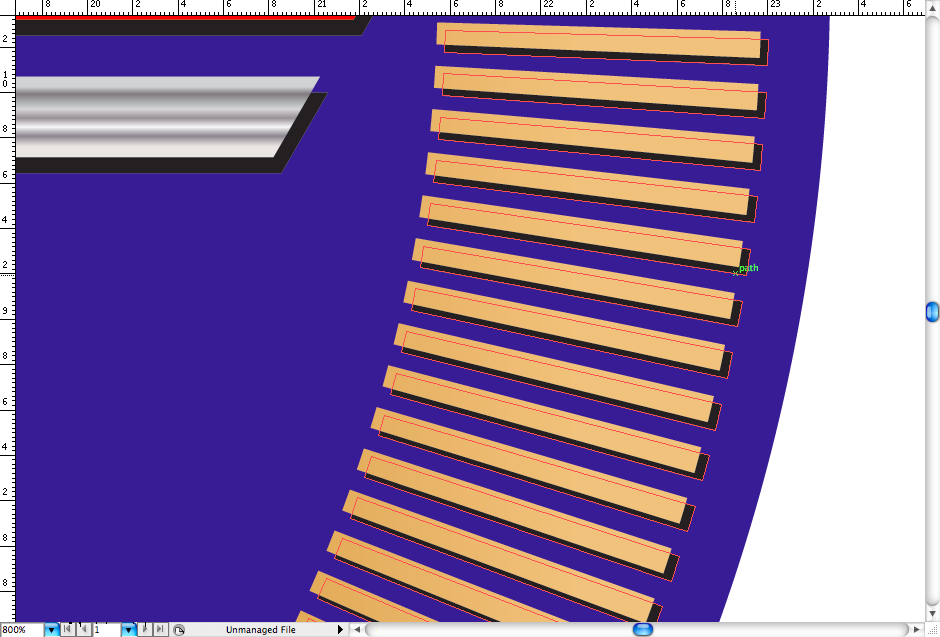
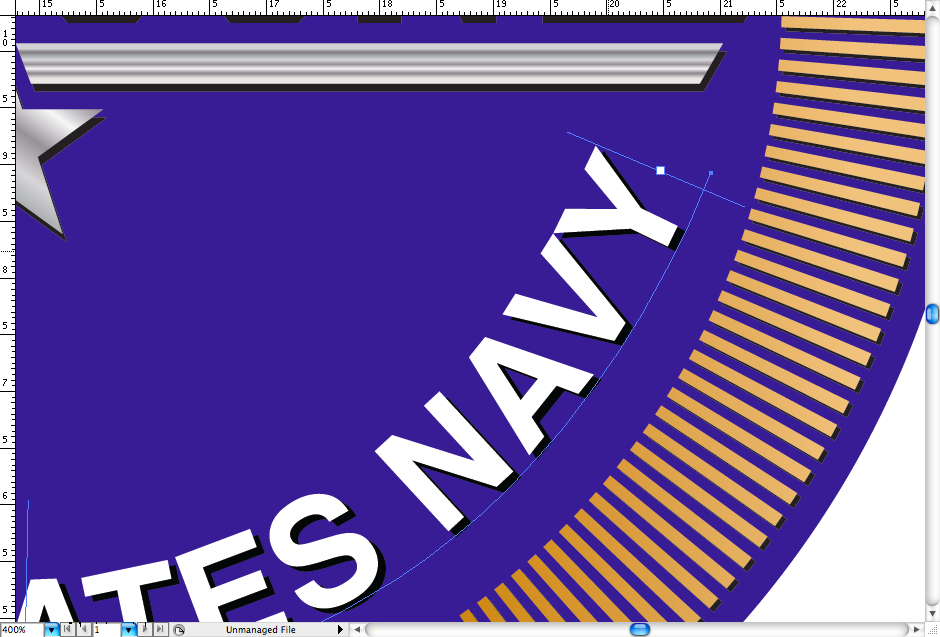
Access the stroke panel and activate the Dashed line option, set the first dash to 3 pt, you should get something like these.
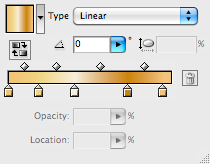
Again, repeat the procedure of expanding the stroke showed on Step 1, after it choose a gold gradient and using the gradient tool (G) spread the gradient all along the circle.
Using the selection tool (V) + alt duplicate the circle and turn its fill to black, send it to back to look like a hard shadow.
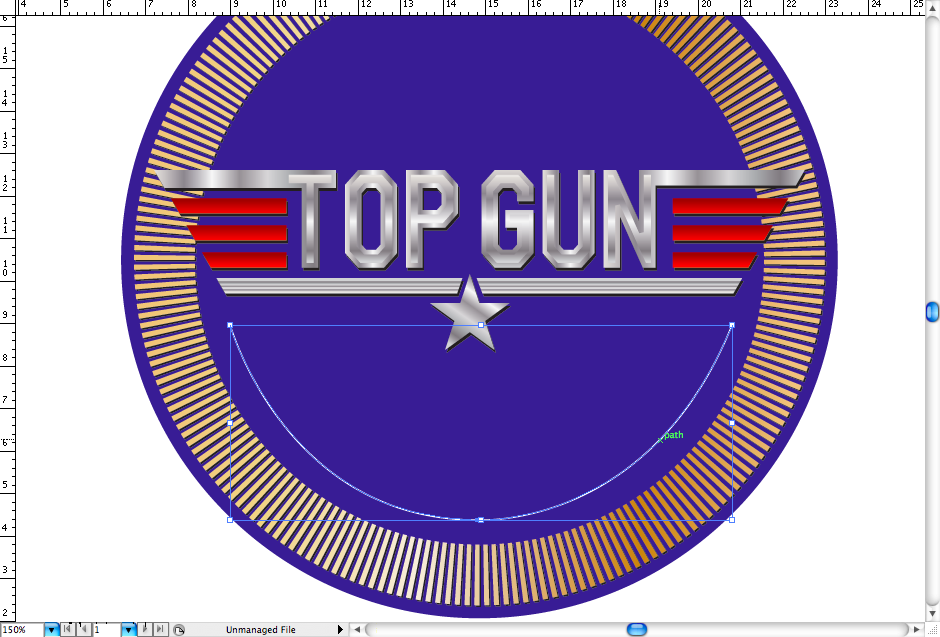
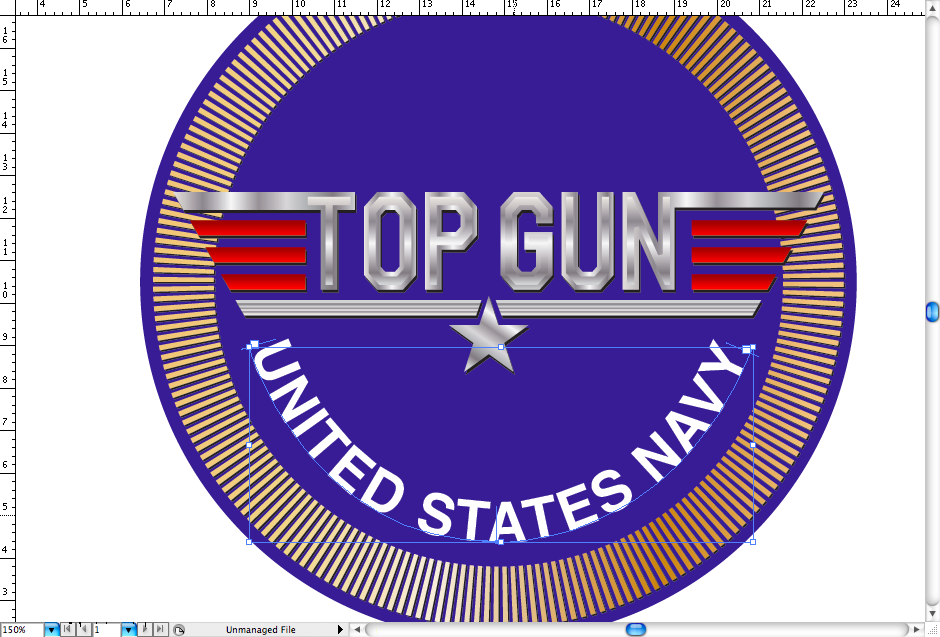
Step 5Using the pen tool (P) create this semicircle with stroke only, now select the text tool called type on path tool then write "United States Navy" in uppercase, I used Helvetica but you can use wherever font you think it's better. Using the the selection tool (V) + alt duplicate the text, chage the fill to black and send it to back to create the hard shadow, don't forget to turn it all in curves after.
Step 6Using the ellipse tool (L) create a circle, then with the gradient tool (G) make this blue gradient on it, use the eyedropper tool (I) to copy the same gradient to the bigger circle on the back, but just change the gradient of it to the opposite direction to give depth.
Choose the "United States Navy" text and use a grey mettalic gradient on it.
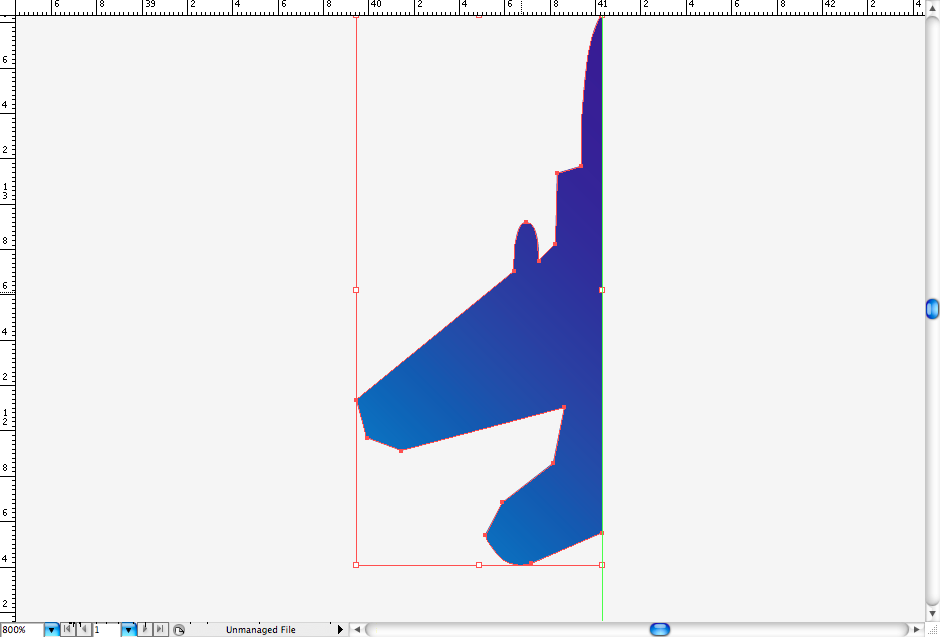
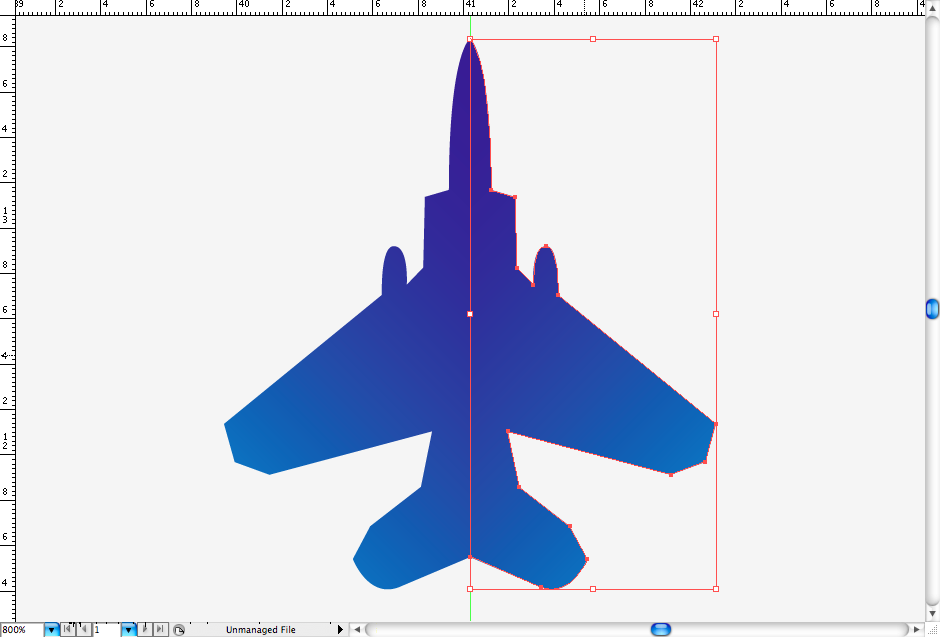
Step 7The airplane part will be pretty easy if you are good with the pen tool (P), you will have to basically draw it, duplicate it, reflect it and use the Unite option from the pathfinder panel to make it one path.
Just repeat the same procedure you did in another steps to make the hard shadow and it's done.
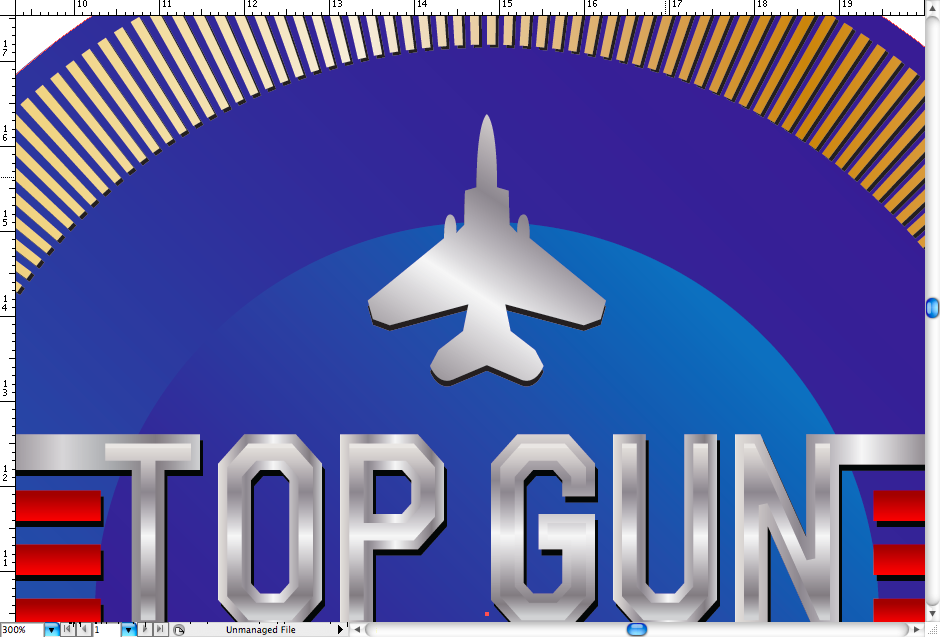
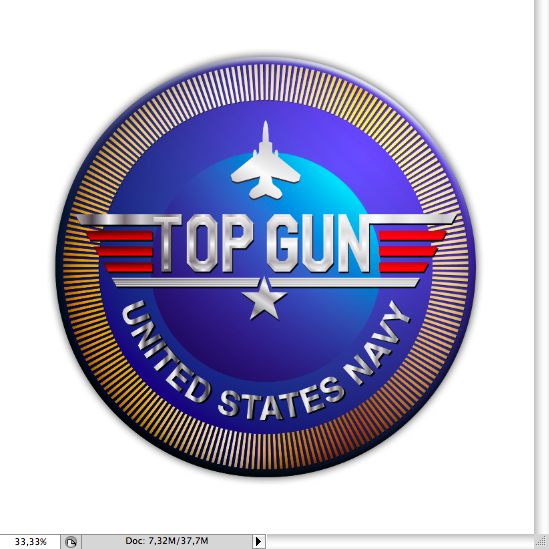
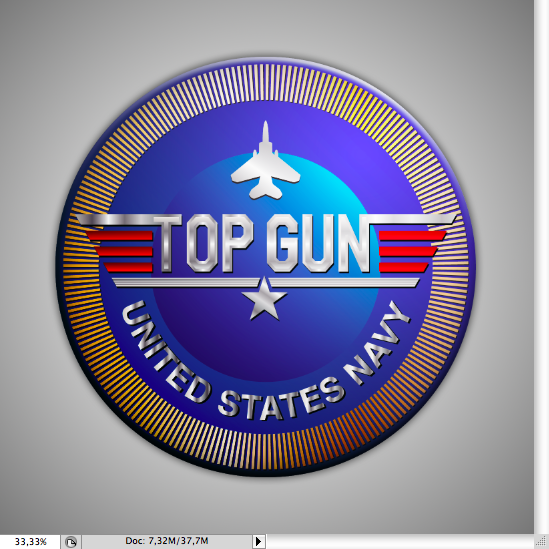
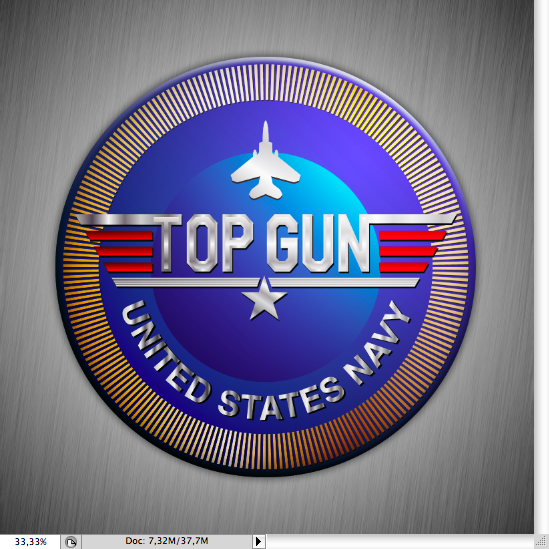
Step 8If you want, you can open photoshop and add a few more details to it. First I used some drop shadow, inner shadow and bevel and emboss (right click on the selected layer) to make it pop a little bit. Then added some Gradient (G) to make a main light (use the overlay blending mode after creating it a layer above the original badge). And finally, added some Gradients (G) on the background and a metal texture.
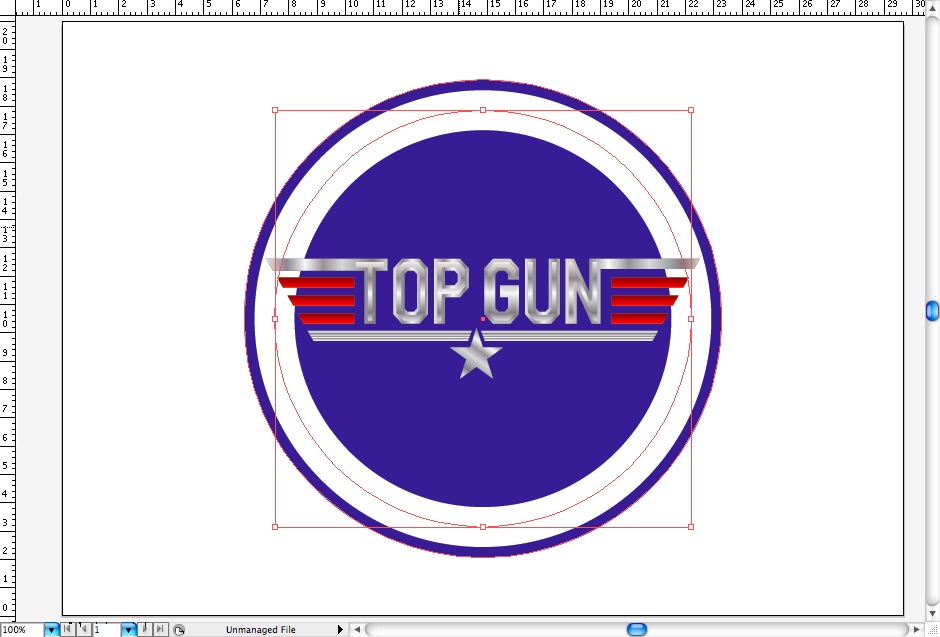
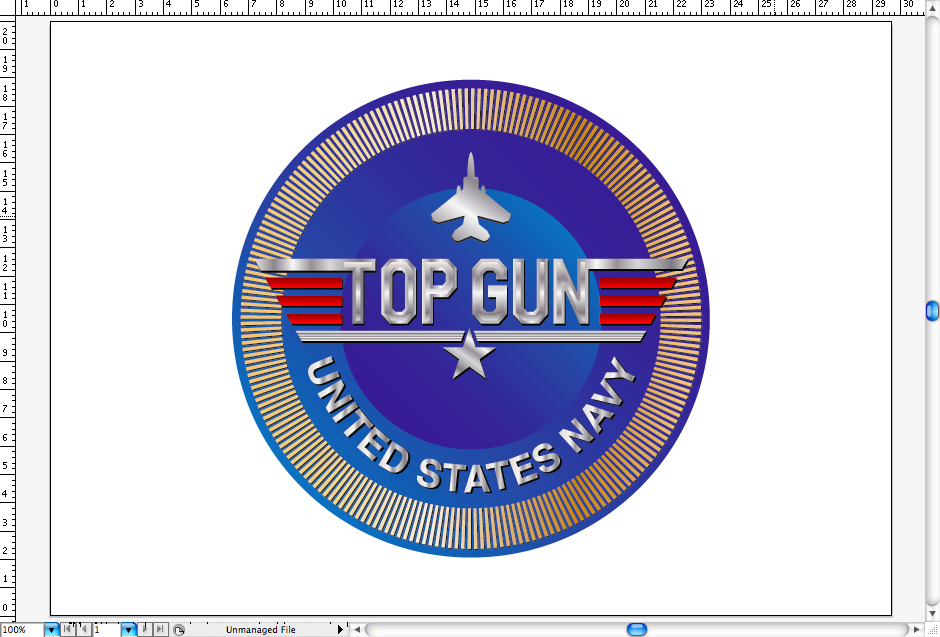
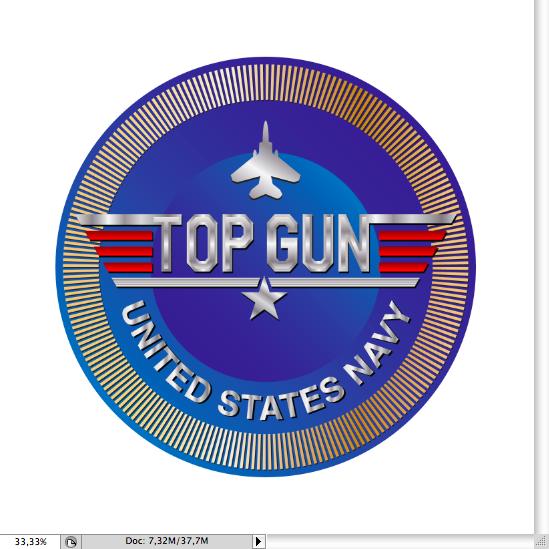
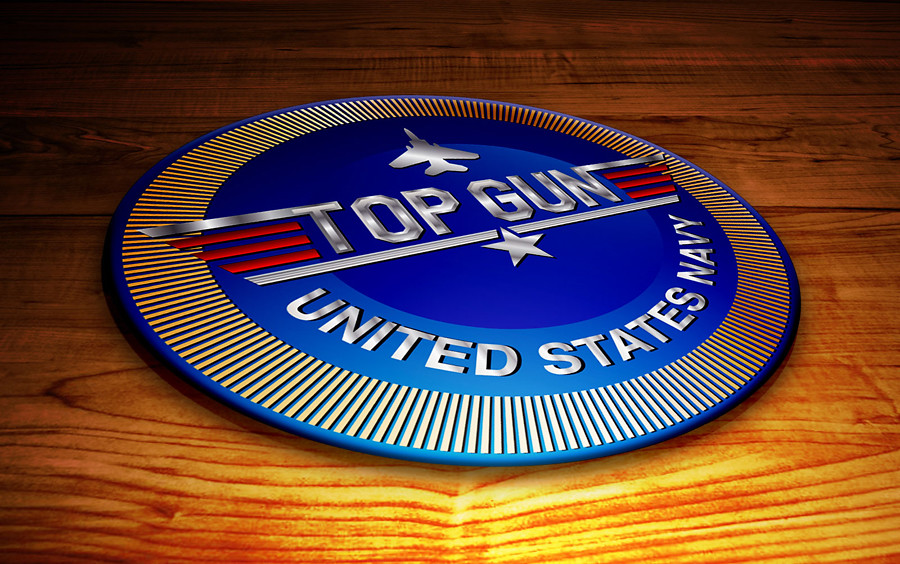
Final ResultI hope after reading and completing this tutorial you got a better notion of how to use the pathfinder tool and strokes. There are other ways to execute this image, but this seems to be the easier. The photoshop part was more like a bonus that's why I didn't went more deep in this part, but you can add some metal textures or wherever you want, get it rad. Download the filesCLICK HERE TO DOWNLOAD ALL FILES USED FOR THIS TUTORIAL |


| You are subscribed to email updates from Abduzeedo | Graphic Design Inspiration and Photoshop Tutorials To stop receiving these emails, you may unsubscribe now. | Email delivery powered by Google |
| Google Inc., 20 West Kinzie, Chicago IL USA 60610 | |
Tidak ada komentar:
Posting Komentar